Around Thanksgiving last year, I received a request from a biology lab professor who commissioned me to modify OpenSprinkler to become a custom fluidics controller. The goal is to achieve web-based, programmable control of fluid selector valves, linear actuators, relays, and air valve, to automate a custom biology experiment. I don’t typically accept contract work, but felt this was a very interesting project, as I’m always keen to see wider applications of OpenSprinkler. Also, this particular project fits well with the existing software design of OpenSprinkler, since the control schedules are somewhat similar to typical sprinkler programs.
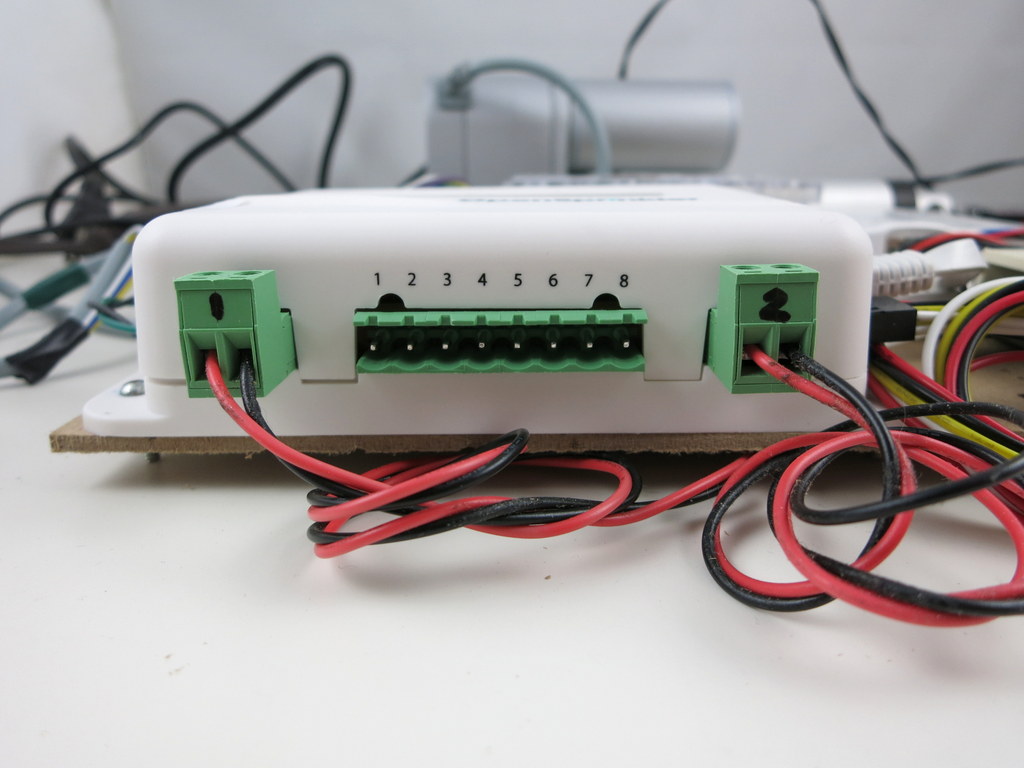
It took me a while to understand the design requirement and how various components worked. The main component is the fluid selector valve, which selects a specific type of fluid from several input fluid streams. The valve has a number of control wires which are normally pulled high. To set a specific position, you basically use open-collectors (one for each wire) to pull a subset of the wires to ground. This is pretty easy to achieve using OpenSprinkler — there are 8 stations on the main controller, each station is a open-collector that controls on wire. By activating a subset of stations, it sets the selector valve to a specific position.
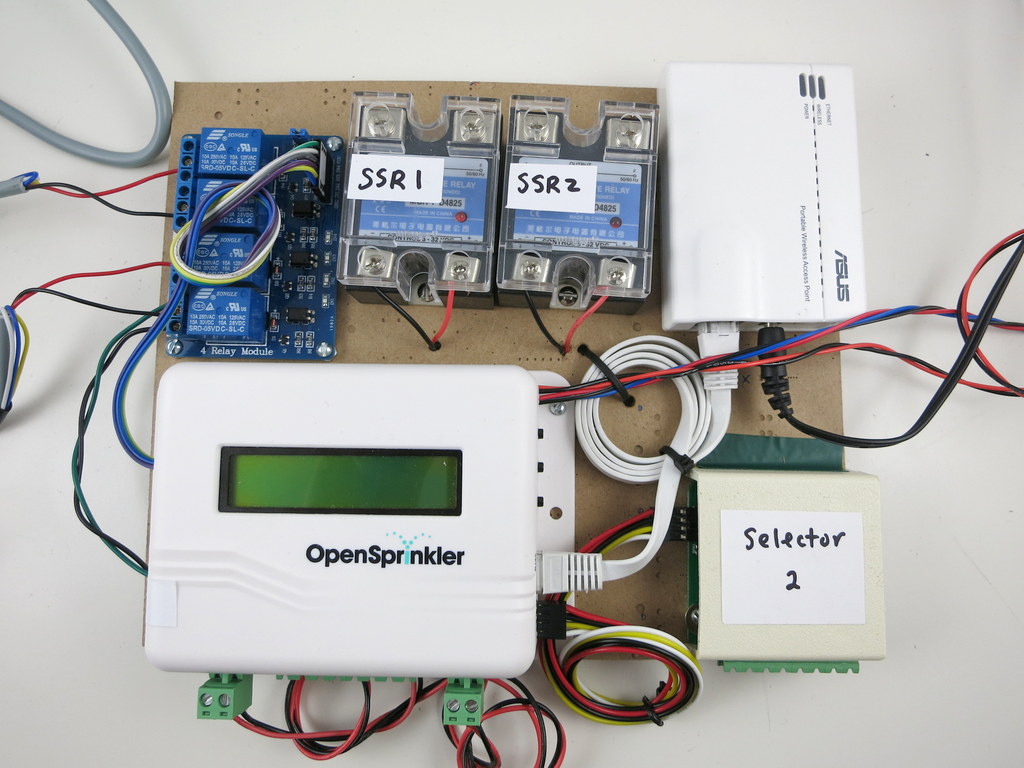
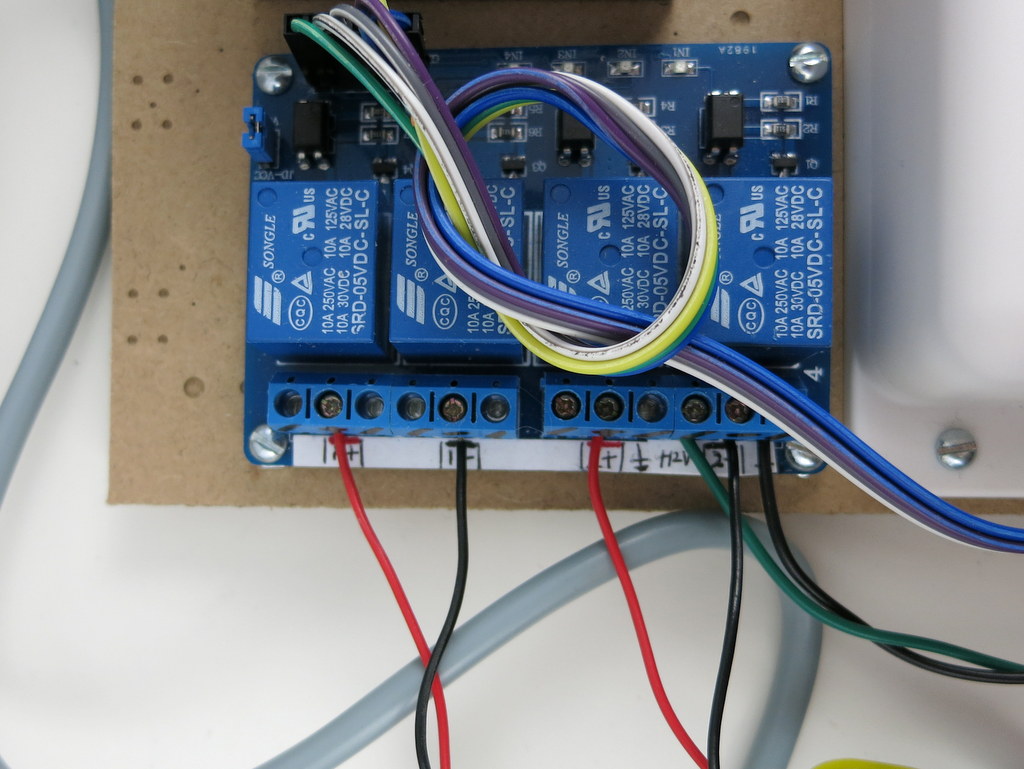
The project also calls for two solid state relays (SSRs) to control 110V pumps. The SSR works with logic level signals, so I used two digital pins to interface with them. Next, there are two 12V linear actuators, and a 12V air valve. Because we don’t want to involve too many different power supplies, we decided to go with a single 12V power supply, which powers the OpenSprinkler, linear actuators and the air valve. OpenSprinkler already has a switching regulator inside that can work with 12V, so that’s not a problem. I then used the built-in relay on OpenSprinkler to switch the air valve. To control the linear actuators, I needed two high-power H-bridges. The way linear actuators work is that they each have two wires — apply positive 12V on the two wires, the actuator will start to extend; reverse the polarity, the actuator will retract. This is similar to how a motor works, and it’s typically done through an H-bridge. Because the linear actuator can draw up to several amps of current, I decided to use a 4-channel relay board (instead of MOSFETs) to implement two H-bridges. So four additional digital pins are used to toggle the 4 relays.
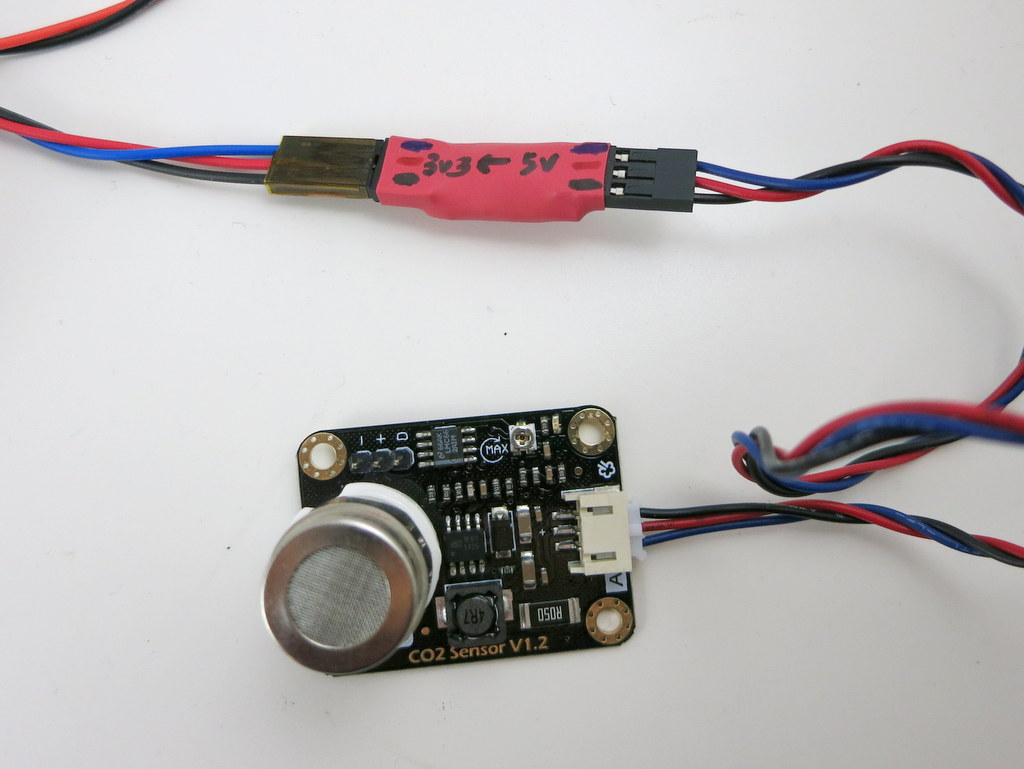
The right image above shows a CO2 sensor. It is used to conditionally open the air valve at the end of the experiment. The idea is that the air valve will only need to be open if the CO2 level is above a certain threshold. I didn’t have chemicals to generate CO2, but had plenty of soda at home, so it was quite easy to create varkous CO2 levels to help test the sensor 🙂
Then as soon as I started working on the software, I realized that the control schedules are actually not entirely the same as sprinkler programs. Specifically, each schedule contains multiple entries, where each entry indicates the status of every component and the time the status will last. It’s kind of like: upon starting the program, the components should be in status A, B, C; after 15 minutes, they will change to status D, E, F; and so on. So I decided to overhaul the existing OpenSprinkler firmware, and rewrite it with a new program data structure. The end result is that each program contains multiple entries. For each entry, you specify the status (such as on/off) of every component, and the duration (i.e. how long the status lasts). In a sense this can also be used to schedule sprinkler programs, and it’s actually very powerful, because it allows you to set almost arbitrary schedules, including scheduling multiple stations to open at the same time, and scheduling the same station to water multiple times within a program. So maybe once day I will make it an alternative OpenSprinkler firmware.
Anyways, it was a really fun project. I didn’t have very good documentations about the work, but I did shoot a couple of video clips. Check them out below.
The initial demo video:
The final demo video with web interface: