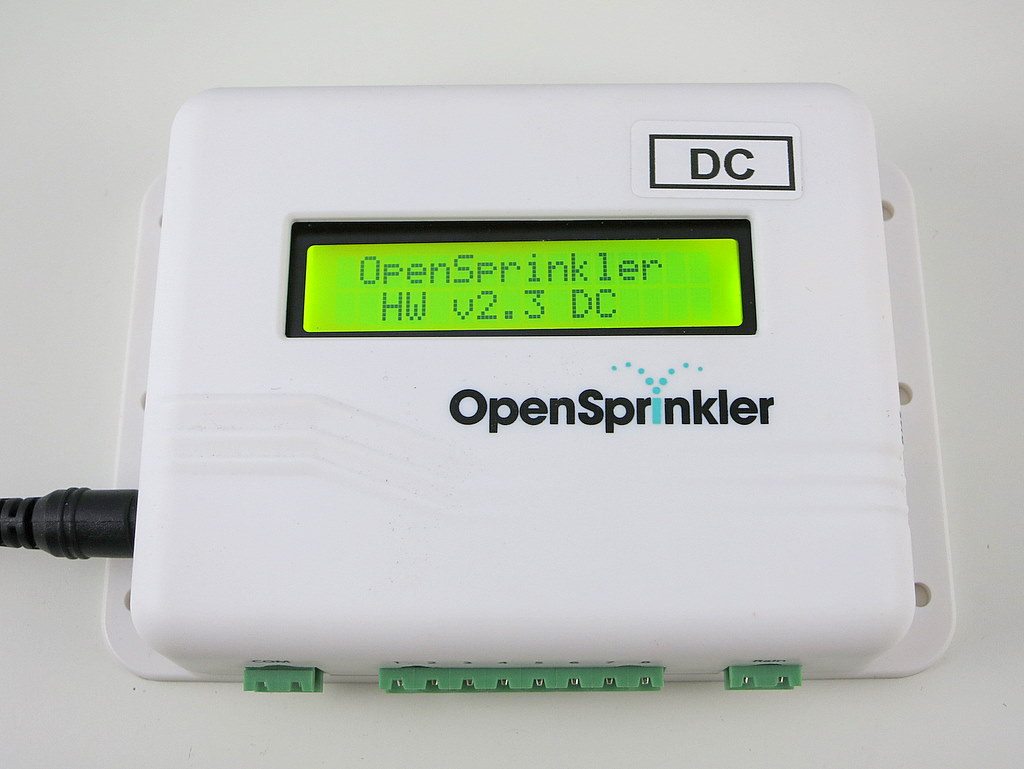
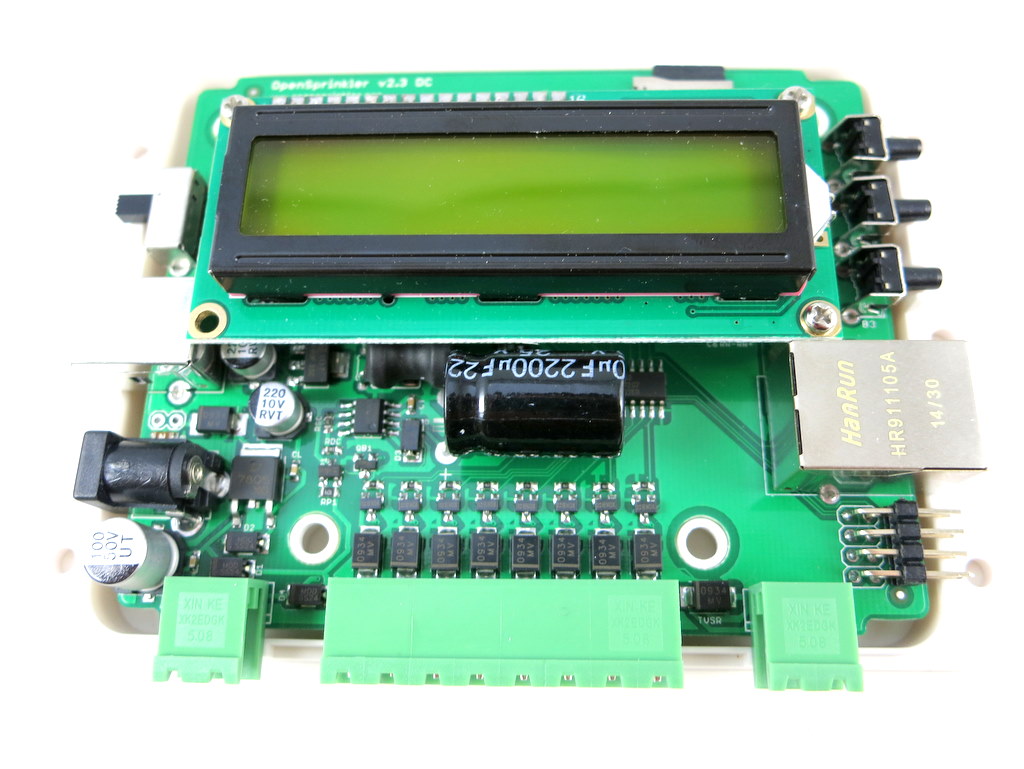
After several months of continued development, I am excited to announce the release of the first DC powered OpenSprinkler — v2.3 DC. This version uses a 9V DC universal power adapter, and is designed to work with both standard 24V AC sprinkler solenoids as well as DC (e.g. 12V DC) non-latching solenoids. Below are two pictures.
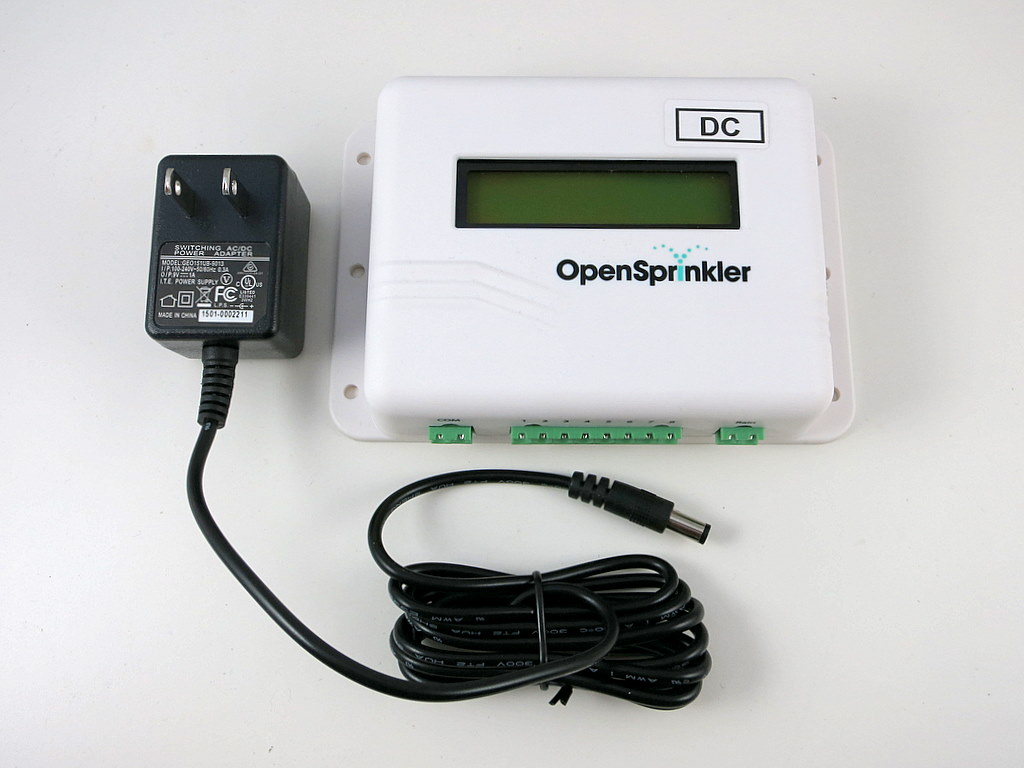
Buy OpenSprinkler v2.3 DC from Rayshobby Shop.
As explained in a previous blog post, the main motivation behind this is to make it easy to source the power supply for OpenSprinkler, particularly for International customers outside of US/Canada. As you know, different countries use different mains voltage standard. In US/Canada, the mains voltage is 110V AC; but in most other countries, the mains voltage is 220V to 240V AC. Because AC adapters are not regulated, you can’t directly use a 24V AC transformer designed for the US market in, say, Germany. You will either need a 220V to 110V step-down converter, or source your own 24V AC transformer. Either case, it’s a pain. On the contrary, DC transformers are much easier to source, and work universally in any country of the world. They are usually cheaper too, because their demand is higher than AC transformers. Therefore it would be ideal to use DC power supply. This is just like how your laptop adapters can work with any mains voltage in the world, so you don’t have to worry about it wherever you travel to.
Given the above benefits of DC, why in the world are sprinkler solenoids designed to work on 24V AC? To explain this, you should read my earlier blog post entitled Understanding 24V AC Sprinkler Valves. In that blog post I analyzed the electrical properties of 24V AC solenoids. They generally require a high impulse (in-rush) current to get energized (often as high as 300 to 500mA), then they will stay on with a relatively low stable (holding) current (e.g. 150 to 250mA). With AC power, the solenoids can automatically achieve this dynamic current adaptation, thanks to the solenoid coils’ electric properties (technically, the inductor’s reactance to AC). This ensures the solenoid will both turn on solidly, and remain on at relatively low power consumption and heat dissipation. The circuit design is also quite simple and straightforward.
But there is no reason why we can’t achieve the same effect with DC. Specifically, there is nothing particular about AC solenoids that they must be driven by AC — they work just fine under DC current. However, you need a more complex circuit to alternate the voltage: it needs to produce a high in-rush voltage to ensure the solenoids are solidly energized, and then reduce the voltage down to produce a relatively low (150 to 250mA) holding current. According to my calculation, 9V DC is ideal for providing the required holding current. On top of that, we just need a boost converter to generate a high in-rush voltage (18~22V) required to energize the solenoids. That’s it — this is how a DC powered OpenSprinkler works on a high level.
If you search online, you can find plenty of people using just 12V DC to power sprinkler solenoids. In my mind, it’s not the most reliable design, as 12V is barely sufficient for producing the in-rush current, and is too much for holding current. As a result, it may not successfully energize the solenoids, and it certainly will shorten the solenoids’ lifetime due to the excessive holding current. That’s why my design uses 9V DC power instead, in conjunction with a on-board boost converter. This provides the optimal holding current as well as in-rush current.
If you still have questions or confusions, hopefully the F.A.Q. below will help you answer your questions.
How is OpenSprinkler v2.3 AC different from v2.3 DC?
OpenSprinkler v2.3 AC uses 24V AC transformer (sold separately), and triacs to drive sprinkler solenoids. OpenSprinkler v2.3 DC uses 9V DC transformer (included in the package), and MOSFETs to drive solenoids. Other than these, the two use the same microcontroller (ATmega1284p) and run the same OpenSprinkler Unified Firmware.
In addition, OpenSprinkler v2.3 DC includes a universal 9V DC power adapter that can be used worldwide. In contrast, v2.3 AC version does NOT include the transformer — US/Canada customers can purchase 24V AC transformer as an optional add-on, but customers in other countries will have to source 24V AC transformers on their own.
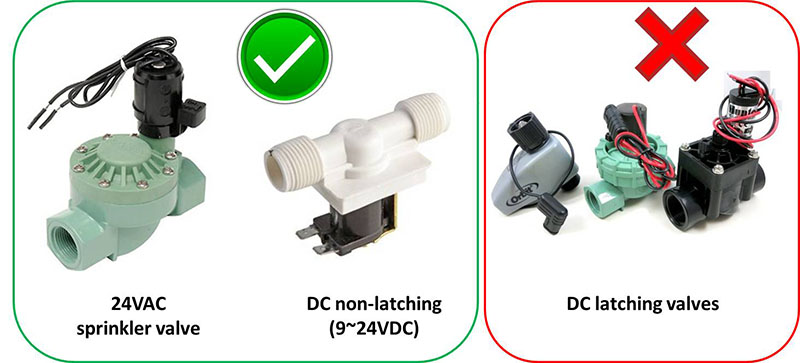
What types of solenoid valves can work with v2.3 DC?
Both standard 24V AC sprinkler solenoids as well as DC solenoids (e.g. 12V DC or 24V DC, non-latching type). Keep in mind that v2.3 DC is NOT compatible with latching solenoids.
What about pump start relay and multiple valves?
We’ve tested a few common pump start relays and they all work well with OpenSprinkler DC. We’ve also tested opening multiple valves simultaneously without any issue.
How can I decide which version to get: AC or DC?
We strongly recommend the DC version for anyone who doesn’t already have a 24V AC transformer, because the DC version includes the transformer. It’s particularly suitable for customers outside of US/Canada as there is no need to source your own power adapter any more.
Also, if you need to control DC solenoid valves, such as 12V DC solenoids, the DC version is your only choice.
On the other hand, if you need to use certain sensors that require 24V AC, such as wireless rain sensors, soil sensors, or solar sensors which require 24V AC, you are better off with the AC version as they can share the same 24V AC power supply.
Does OpenSprinkler v2.3 DC output AC voltage?
No, it does not. It uses completely DC voltage to drive AC sprinkler solenoids. To understand how it works, refer to the explanations above. Because the output voltage is DC, it can also work with DC solenoid valves (non-latching type).
What about expansion boards?
Keep in mind that the DC controller must use DC expansion boards; similarly, AC controller must use AC expansion boards. You should NOT mix and match the two, or your sprinkler solenoids won’t function properly. All DC controllers and DC expansion boards have the label [DC] attached at the front and back of the enclosure.
What’s the operating voltage range for v2.3 DC?
Although v2.3 DC comes with a 9V DC power adapter, you can power it with any voltage ranging from 5~24V DC.
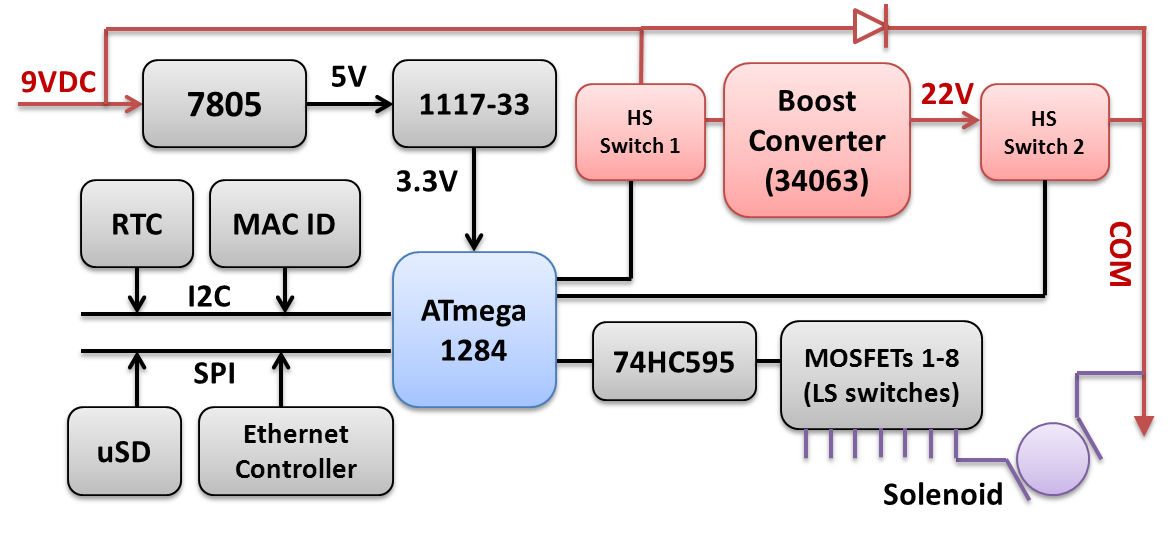
Can you give me more details on how v2.3 DC works internally?
Below is a block diagram of the v2.3 DC circuit. All relevant parts are marked in red. The mcu controls two high-side switches (HS switches): it turns on switch 1 to engage the boost converter (based on MC34063), which generates 22V DC and stores that into a capacitor; it then turns off switch 1 but turns on switch 2 to dump the boosted voltage to the common (COM) wire, which provides the in-rush current. Finally it turns off switch 2 and the input 9V DC continues to provide the holding current through the diode.
The snapshot below shows the inside of the controller.
Buy OpenSprinkler v2.3 DC from Rayshobby Shop.