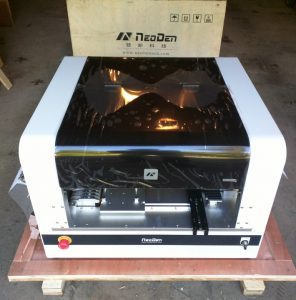
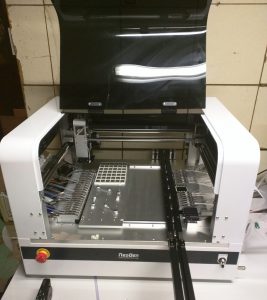
A few years ago I purchased a NeoDen TM-240A desktop pick and place machine, and wrote two blog posts about it. It was one of the most popular desktop pick and place machines on the market back then, and has served me well for the past three years. It does small boards pretty well, but without a computer vision system, it requires a fair amount of manual placement of fine-pitched components; and it only has a fixed set of 27 feeders, which are not entirely sufficient for me.
Recently NeoDen released a new model called NeoDen 4 — it’s their first desktop model that has built-in computer vision system. The vision-based alignment makes it possible to place fine-pitched components with minimal manual work. It has four pick and place heads, which means if can simultaneously pick up to four components at a time. It can fit a lot more feeders, and can handle a variety of component types, including matrix tray components, and any special components that you can lay out in a 3D printed tray. It has a vibration feeder for components in tube packaging. Although I rarely use tube packaging, one notable exception is the CH340G USB-serial chip, which is used in almost all my products, and so far it only comes in tubes. On top of these exciting new features, the machine I ordered comes with a PCB conveyor belt that can automatically feed PCBs into the system. This is really convenient for starting a pick and place job.
Well, a picture is worth a thousand words, and a video is worth a thousand pictures! Without further ado, here is my video review of this machine:
So far I am pretty happy with the machine. Pricing-wise, it’s surely more expensive than TM-240A, but not significantly. I paid around 9K in total, including DHL shipping and all the feeders (for TM-240A I paid 5.5K). It’s not all perfect so you’ve got to learn the quirks. For example, I learned that the component height is often quite important — without providing the proper component height, the placing may give you a lot of troubles. Also, for components that need better placement accuracy, reducing the placing speed (say, to 50%) helps a lot to improve the accuracy and reliability.
Overall the machine operation is fairly intuitive, and it works in a predictable manner, much better than some of the comparable products I’ve seen on the market. No matter how powerful the machine is, you can’t afford to spend forever learning how to use it. It took me just two days of looking through the user manual, video tutorials, and doing my own trial and error to learn to successfully produce the first board using this machine. I would say it’s pretty good.
Disclaimer
I am not associated with NeoDen in any way. I am just a standard user. Please do NOT contact me for purchasing or sales questions. Go to their company website (www.neodentech.com) for details.
EagleCAD ULP Script
One difficulty I had initially was how to export a PCB design to a format acceptable by the machine. Without this I would have to manually locate the x-y coordinates of each component using the down-facing camera, which would be a huge pain. The user manual and video tutorial had no descriptions about the format of the spreadsheet. After banging my head on the wall for a while, I found one example spreadsheet somewhere in the flash drive that came with the machine, and that seems to work. Then I went ahead and modified an existing EagleCAD script (designed for TM-240A) to match the example spreadsheet. The script can be downloaded from the link below. Please take a look at the README file as it explains how to use the script.

