Setting Up a Raspi to Work with OpenSprinnkler

Dan K. from California wrote an excellent blog post about how to set up a Raspberry Pi to work with OpenSprinkler. The link to the blog post can be found here:
http://xperimentia.com/2012/12/14/setting-up-a-raspberry-pi-to-work-with-opensprinkler/

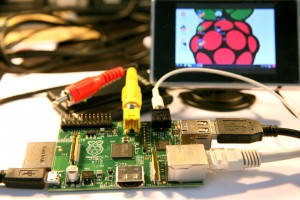
and you can download his scripts from the OpenSprinkler GitHub repository (link given in his post). The scripts basically consist of two parts: 1) storing and serving Javascripts required by OpenSprinkler on a Pi server (recall that currently these Javascripts are served on the rayshobby.net server); 2) using Pi to log OpenSprinkler status (this part is based on Dave Gustavson’s PHP scripts). As Raspi is compact, low-cost, and low-power, it is becoming an increasingly popular embedded Linux platform. The combination of Pi with OpenSprinkler also makes it possible to develop sophisticated features in the future like weather-based irrigation control, or leaning-based control like the Nest thermostat. Perhaps it’s time for me to think about an OpenSprinkler Pi Edition 🙂

IMG_2372

How to Check Out a Previous Version from GitHub Repository

Recently I’ve received questions about how to check out a previous version of the OpenSprinkler repository. One reason to do so is to recover features that have been eliminated in the most recent firmware, such as the parallel / concurrent running mode. As in any version control tool, GitHub allows you to do this pretty easily. Here is how.

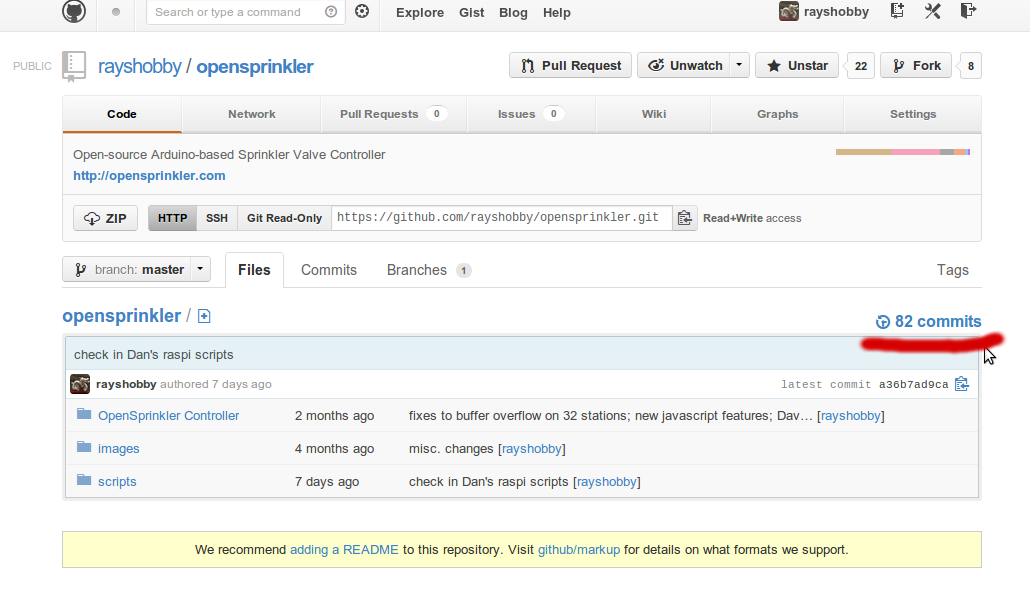
First, go to the OpenSprinkler Github page, at https://github.com/rayshobby/opensprinkler, and click on the ‘XX commits’ link on the right side, shown below:

github_version_demo1

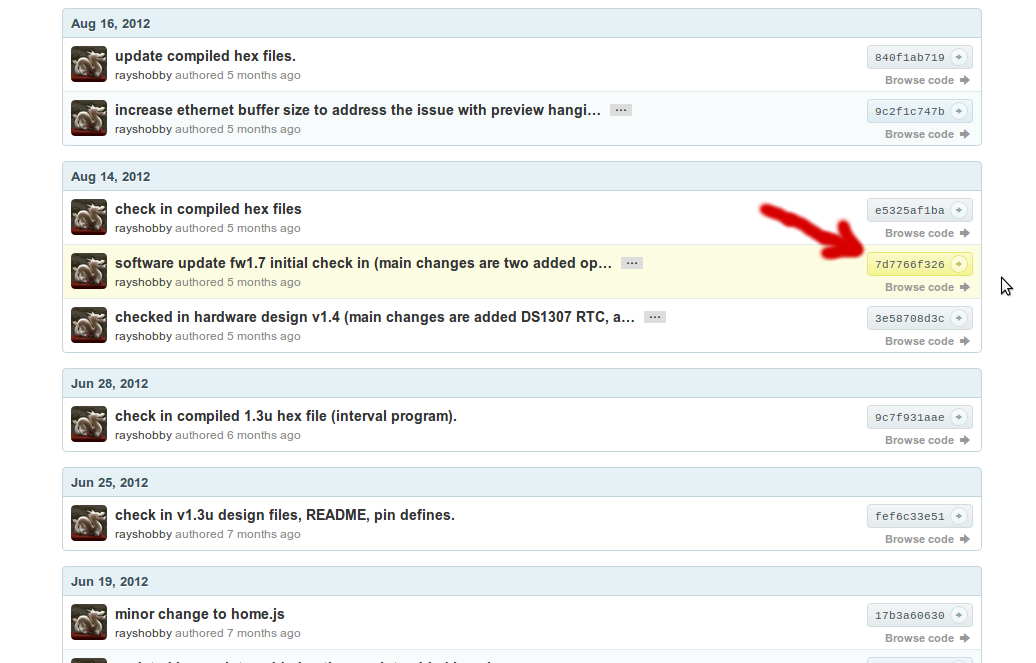
This brings you to the commit history, which lists all previous versions of the repository. Next, from the commit message or date, figure out the entry that you need to check out. Say, I want to check out firmware 1.7, and I found the entry here:

github_version_demo2

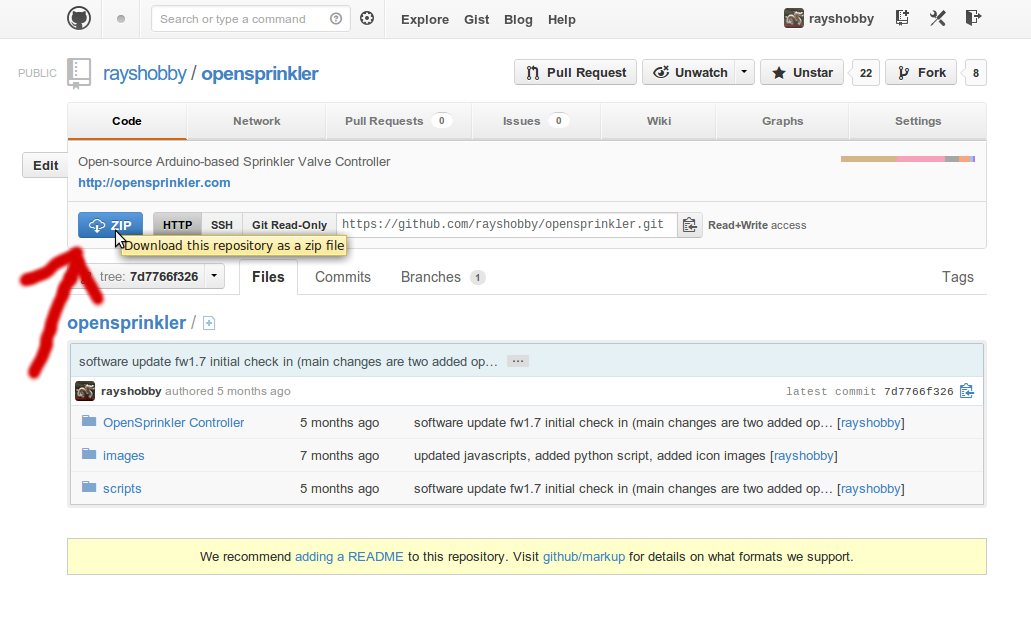
After clicking on ‘Browse Code’, you will be directed to a new page, which looks just like the homepage but with a different version number. Now, simply click on the ‘.Zip’ icon on the upper left to download the whole repository as a zip file. That’s it. Simple, isn’t it?

github_version_demo3

SprinklerAce — An OpenSprinkler iOS App

As I’ve given you a heads up in the previous post, there is now an iOS app for OpenSprinkler called SprinklerAce, developed by Michael at FeedFriendly.com. I know many people have requested an OpenSprinkler mobile app. I haven’t been able to split time to work on it myself. I am happy that Michael went ahead and wrote the first version. Here I will give a brief overview of the app. For details please refer to the SprinklerAce website.

SprinklerAce is extended from its previous version called IC Sprinkler, which was dedicated to the IrrigationCaddy. IrrigationCaddy is another Internet-based sprinkler controller on the market. It has nice polished UI design, but on the other hand it’s closed-source, has no LCD display, no support for extension board, and a limited set of three programs. Well, what I am trying to say here is that OpenSprinkler is better, more flexible, and actually comes at a lower price tag :). Michael made a clever choice to extend the app to support both OpenSprinkler and IrrigationCaddy, so the same app can be used for both.

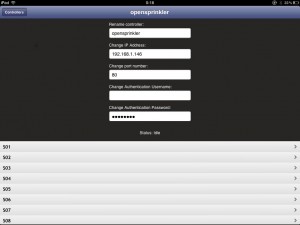
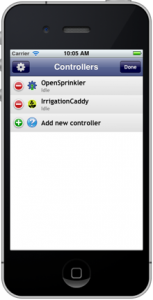
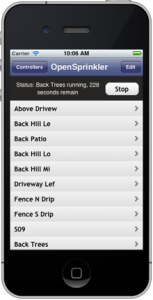
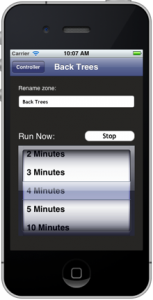
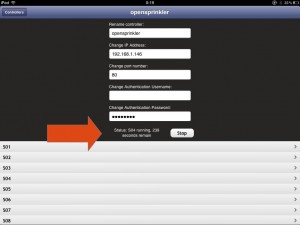
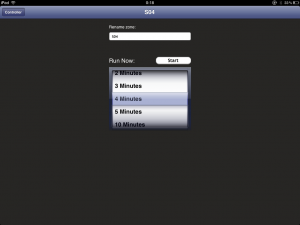
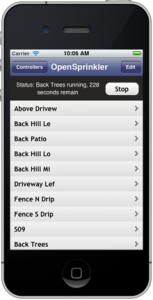
Once installed, you will see the SprinklerAce app on your iOS desktop. The app is pretty self-explanatory and simple to use. Below I am going to mix screenshots captured on my iPad and those from the app website. The homepage shows a list of the current controllers. You can add a new controller by providing a name, ip address, port number, and password. You don’t need to input UserName because OpenSprinkler does not require that. You can add many controllers: for example, you may have more than one controller units, or you may create one with internal ip and one with external ip so that you can use it both at home and remotely. Once you click on a specific controller, it will show the list of stations. If you have defined custom station names, they are also supported here.

The app is currently designed to only manually open and close stations with a specified amount of time. Basically it makes use of the OpenSprinkler’s manual operation mode to control sprinkler stations. Program mode is not supported yet, so you won’t be able to add/modify/delete programs in the app (you need to use a web browser to perform program changes). It is mainly used for manual control and troubleshooting purposes. Once a station is turned on, the homepage will show running status and display the remaining water time. Internally the app reads back the OpenSprinkler homepage once every 5 seconds and makes use of the returned data to update its status accordingly. This is somewhat similar to how Dave’s logging script works. For example, if the controller is running a normal program schedule, you will be able to see the station status and remaining time in the app.

That’s it. It’s pretty easy to figure out how to use it. The app doesn’t do a whole lot yet, but hopefully Michael will continue improving it, including adding support for program mode, changing options and stations names. Basically you can view an app as another way to format the webpages: a web browser makes use of Javascripts to format the pages, and currently OpenSprinkler requires these Javascripts to be stored externally due to its limited program memory space; an app can store formatting code natively so it doesn’t need to rely on a whole lot of Javascripts.

Anyways, if you are interested or cannot live without an app :), feel free to give it a try. The app is now available in Apple store and supports both iPhone and iPad.

DISCLAIMER: FeedFriendly.com is an independent company and is not associated with Rayshobby LLC by any means. If you encounter any problem using the app, or has comments/suggestions, please contact them directly.


OpenSprinkler End-of-the-year Update

Hi everyone, Christmas is coming in a few days, and soon we will be entering the year 2013. I figured this is time that I post about recent progress on OpenSprinkler. Sorry that I haven’t blogged for a while. Various projects have been keeping me busy. I am excited to post and talk about the details of these new projects in the near future. Anyways, what’s new at Rayshobby shop in the past month or so?

Sale Update. A few weeks ago we’ve just shipped the 600th OpenSprinkler. The sale really starting going up quickly ever since the Bay Area Maker Faire this year. I am hopeful that by the end of spring next year we will reach the 1000 mark. That would be awesome :). With a growing community of users, I’ve also started seeing people contributing to this project, including feature testing, debugging, writing scripts and mobile apps (see below). I am really thankful to everyone who supported and contributed to this project.

Software Revision. The latest firmware shipped with OpenSprinkler is 1.8.2. It has been relatively stable and I haven’t seen or received report of any major issue with it. Some of the commonly requested features are 1) adding back the parallel running mode (which was available in firmware 1.7 but disabled in 1.8.x to make space to other features); 2) adding a weather feature; 3) adding a microSD card for logging and storing Javascripts. I am hoping to get the first request done soon: since the feature already exists in previous versions, I just need some patience to sit down, optimize and reduce the current code and put it back in. As for the second request, a friend of mine has been helping me to implement the weather feature in Python script. The plan is to host the Python code on Rayshobby server. This way, the controller can periodically send requests to the server with the user’s zip code, and the Python script will return a simple number that reflects how the water time should be adjusted that day. This will free the microcontroller from having to carry out the necessary computation. It would be a simple scheme to fit a basic weather feature into the current generation of hardware. The third request cannot be implemented with the current hardware, due to the program memory limit. If you need logging, please use David’s Sprinkler Logger script that I blogged about in a previous post. It is available in the OpenSprinkler GitHub repository.

iOS/Android App. I’ve been holding back on developing an iOS or Android app for OpenSprinkler, partly because I am not familiar with programming mobile apps, and partly because the OpenSprinkler’s web interface is already functioning on mobile devices through their web browsers. But I do agree that a dedicated app would look much more appealing and make the product stand out. Fortunately the folks at FeedFriendly.com have developed an iOS app for OpenSprinkler called SprinklerAce. I’m quite excited and I’ve already seen the pre-release version of it. The app is extended from the previous version, which was dedicated to the IrrigationCaddy. It makes use of the manual operation mode on OpenSprinkler to directly control station valves. It’s currently undergoing the Apple Store approval process. I will make a separate post about it once it becomes available. Stay tuned!

Hardware Revision. The latest hardware version is 1.4, and we still carry both the full-assembled products (1.4s) as well as the DIY kits (1.4u). A while back when the last batch of DIY kits sold out, I was considering discontinuing it and start carrying semi-assembled kits, similar to the OpenSprinkler extension boards. But due to the popular requests from users, I decided to still offer the DIY kits, not only because its price is significantly lower than the fully-assembled versions, but also because many people enjoy the process of building a kit regardless of the price. In October 2012, I made some minor revisions to both 1.4u and 1.4s, mainly to improve the reliability of the power conversion circuit. Again, the hardware design is pretty much stable and I do not anticipate any major changes to it.

Also, I’ve been working with SeeedStudios to make a injection-molded case for OpenSprinkler. I’m quite excited because this is the first time I’m working on an injection-molded case. The folks at Seeed are awesome and very helpful. I will certainly learn a lot through the process.

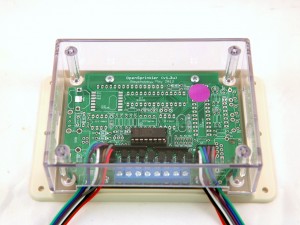
Another bit of news is that I’ve started prototyping OpenSprinkler 2.0. The current plan is to simply upgrade the microncontroller to ATmega644 in order to fit in features like microSD card and more sophisticated weather-based control. Because I am planning to design it to fit the new project case, it will not be available until the case design has been finalized. So most likely it won’t be released until some time in late spring and early summer next year. I do have two prototype images to show off here. I was curious to experiment with different PCB colors, so I ordered a white version as well as a black version:
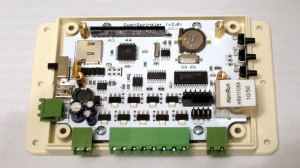
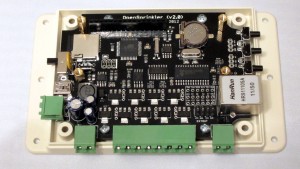
They both look gorgeous, but I personally prefer the black version because the dark background looks really cool. Feel free to let me know your preference/opinion. In addition to upgrading the microcontroller and adding the microSD card slot, I’ve also changed more components to surface mount packaging to facilitate manufacturing, and adding support pillars for the 16×2 LCD. Again, this is just a hardware prototype, I haven’t started working on the software code yet. The final version will also have to be designed together with the new case. So a lot of things need to be orchestrated before its release.

Upcoming New Products. As I mentioned above, I’ve been working on several new projects. Among which there is the OpenSprinkler Bee, which is an open-source controller for battery-operated sprinnkler valves. I already have a prototype and have demonstrated it at Maker Faire. I am working on making the kits ready soon.

Another product is a controller for watering indoor plants. It has built-in humidity, temperature, and light sensors, and will interface with a compact water pump to automatically water plants for you. I’ve temporarily named it OpenSprinkler Sip. This is a very exciting project that I hope to blog about soon.

All right, so much for the end-of-the-year OpenSprinkler Update. I hope everyone have a Merry Christmas, and see you again in 2013!
OpenSprinkler Logger

Logging is a useful feature which allows you to find out how OpenSprinkler has worked say, in the past week. While you can check the scheduled water programs using the ‘Program Preview’ feature, it does not account for dynamic changes like rain delay, power loss etc. This is where logging comes in handy: you can find out what OpenSprinkler has actually done in the past. Unfortunately I have not been able to include logging in the firmware because of the memory space that it would require to store the log data.

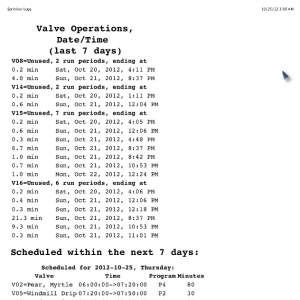
Recently, David Gustavson, an OpenSprinkler user, successfully implemented logging by using a PHP script that he wrote. The way it works is to have a computer that periodically polls the OpenSprinkler status say, every 20 seconds, and the script checks the differences between every two consecutive polls to record status changes. This is quite clever, as it does not require any modification on the OpenSprinkler side. All that it needs is for OpenSprinkler to return the status of each station, which it already does. Of course this does require a computer running on the side (or even remotely), but it’s pretty easy to set up, and you can use a plug computer or a Raspberry Pi which has very low power consumption.

David is kind enough to share his scripts and I’ve checked them in to the OpenSprinkler GitHub repository under the script/PHP/ directory. He also wrote a blog post about OpenSprinkler, which you can read about here. Thanks David!

OpenSprinkler Interfacing with Relay Board

Recently I received a request to customize OpenSprinkler for a 12V DC external relay board. It turns out to be relatively easy to do. Since it may be useful for other folks, I am writing a post here to briefly describe the modifications. First of all, the relay board has built-in opto-couplers and flyback diodes. It is designed to work directly with microcontroller pins. This particular relay board I received is an active low type. This means normally the relay control pin is pulled high; when the control pin is set low by the microcontroller, the relay will be activated. So before you go ahead and make changes, make sure to find out the type of your relay board.

OpenSprinkler can run on 12V DC power supply without any modification. As long as you keep in mind the polarity, it should work right away. Even if you connect the power supply in the wrong direction, it shouldn’t cause any damage because there is a protecting diode D1 that prevents reverse polarity. The only modification I needed to do is to replace the triacs (used to drive AC solenoids) by NPN transistors. Any common NPN transistor is fine. For example, 2N3904. The remaining step is to connect the station wires to the corresponding relay control pins.

The way it works is that normally the shift register outputs low. So all NPN transistors are turned off, and the collectors are pulled high by the relay board. When a station is open, the shift register pin outputs high, turning on the corresponding NPN transistor, and driving its collector low (to ground). This in turn activates the relay. That’s it.

Here is a video showing the relay board in action. The OpenSprinkler running a self test that turns on each station for 3 seconds.

It is also possible to use the NPN transistors to directly drive the relays. However, in this case, you need to add an additional flyback diode (between the collector of the transistor and the +12V line). The flyback diode is important to protect the transistor under inductive load. To accommodate this, I am planning to add PCB holes for these diodes in the future, which will make it easy to solder these extra components.

OpenSprinnkler Firmware 1.8.1 Released

I had the urge to send this out a week ago, but I was holding on to it because I had to hear some feedback, suggestions, and issue reports from the initial users. Now I am ready to spread the words:

OpenSprinkler Firmware 1.8.1 is available for download in GitHub, go for it!

If you haven’t updated firmware before, here are the Firmware Update Instructions.

As always, the first question I need to answer is: what’s new in this version? Here is a list of highlights:
• New features:

  • Custom station names: each station can have a custom name up to 12 letters long.
  • Per-station master operation control: each station can individually activate the master station.
  • Run-once program: similar to the manual override feature on some sprinkler timers.
  • Station delay time, and master on/off adjusted time: fine tune station turn-on and turn-off time.
  • Water level/percentage: globally scales water time up and down based on local weather conditions.
  • Automatically reconnect: improves reliability on unreliable networks.
  • Support for RTC and automatic RTC detection: keeps time running even when power or network is lost.
  • Full range of time zones: living in Nepal? No problem.

• Improved features:

  • Program now has an ‘enable’ flag which allows you to enable or disable each program individually.
  • Improved Graphical Preview feature, which shows each station’s name and scheduled on/off time.

So this is another major upgrade since Firmware 1.6. So what happened to Firmware 1.7? Well, that was a quick update for the preparation of OpenSprinkler 1.4 orders: except for added support of RTC, it didn’t have any major changes. So I had to number this one 1.8 to distinguish it from the previous version.

Also taking a suggestion from the Forum, I’ve starting using minor revision numbers (1.8.0, 1.8.1 etc.) to keep track of changes in between major releases. This way you can easily find out whether your version is up to date.

I’ve also made a video tutorial (above) for those who want a video guide on how to use this firmware. I ended up having to switch between different ways of recording, so the audio quality is not consistent. Sorry about that, and enjoy the video!

OpenSprinkler Hardware v1.4 Released

About two weeks ago we started shipping out OpenSprinkler v1.4, and I figured it is now time to write a short post to announce it. What are the new updates in v1.4?

• DS1307 RTC
The main update is that the external EEPROM (24LC128) is replaced by a DS1307 Real-Time Clock (RTC). I am aware that RTC has been requested since the beginning of OpenSprinkler, and I apologize for taking so long to add it. There are multiple reasons: the limited PCB space, the cost of DS1307, and the fact that NTP sync is often good enough. The limited PCB space is probably the biggest reason. Fortunately since the latest interval program does not use external EEPROM any more (i.e. everything is stored in internal EEPROM), there is now space to add RTC. The software has also been updated to support DS1307. Specifically, if RTC is enabled in options, the controller will not rely on NTP to get time any more. In addition, there is an on-board button cell battery which will keep the time running even when power is lost.

If you own a previous version of OpenSprinkler which does not have built-in DS1307, you can easily add an external RTC module, available in Rayshobby shop. Our module comes with a built-in rechargeable battery, pin headers, and jumper wires for easy connection to your OpenSprinkler board. Follow this link for instructions on how to connect. These modules are also available on eBay, or Adafruit, or SparkFun, but they are usually pricier and without jumper wires.

• Screw Terminals
As you may have noticed from the pictures, the screw terminals have been upgraded to the two-piece (plug and socket) type, which makes it easier for installing and uninstalling wires. Now when you need to make changes to wires, you can simply take out the plug piece, insert and tighten wires, and plug it back in. There is no need to open the enclosure.

• Pin Changes
The second update is that a few pin assignments been changed to free up analog pins A2 and A3. These pins are precious for connecting to external sensors. Also, digital pin D3 is now wired internally to the rain sensor, so you no longer need to solder a separate wire. As in previous version, if you are not use the RFM12B transceiver, digital pins D2 and D10 are also free to use.


• Surface Mount Version
The last major change is that there is now a surface mount (SMT) variant 1.4s, which uses the same circuit as the through-hole version 1.4u but most components have been changed to surface mount package. This variant is created to improve our productivity of full assembled and tested kits. So from now on, all orders of fully assembled kits will receive the SMT version, while the DIY kits will continue to use the through-hole version.

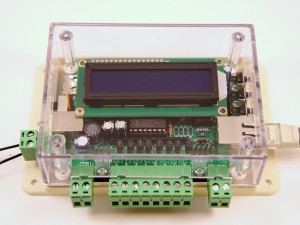
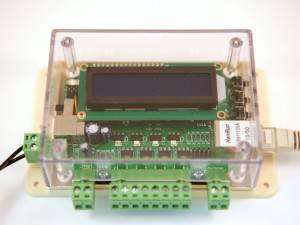
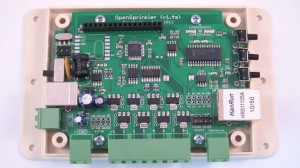
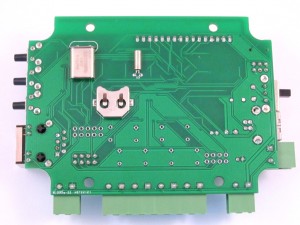
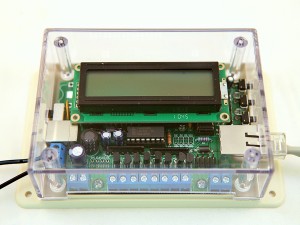
The images below are close-up views of the SMT version (front and back):

As you can see from the front image, most components are surface mount, except the peripheral components like screw terminals, connectors, buttons, and big capacitors. Two crystals and the button cell battery for RTC are on the back side. The SMT version uses the same software as the through-hole version, but it does have a few differences:

  • It has two extra analog pnis A6 and A7, which are accessible in Arduino programs.
  • The Ethernet connector is changed from SparkFun RJ45 jack to Hanrun 911105A, which is less expensive and more widely available.
  • There is a slide switch on the top-left corner of the PCB. This is used internally by us to switch between programming ATtiny45 and ATmega328. You should keep it in the ‘INT’ position.

Future Plans

To give you a heads-up, version 1.4 is likely to be the last one in this hardware generation, and will also be the last through-hole version. The next version OpenSprinkler 2.0 will be SMT only, and will switch to a completely different microcontroller in order to accommodate new features like better user interface, on-board wifi, logging, and more sensor options. However, the development of 2.0 will likely take more than a year, so it won’t be available until after summer next year (2013). Meanwhile, feel free to send me comments and suggestions on how to improve the OpenSprinkler functionality, and I will consider them for version 2.0!


OpenSprinkler Hardware v1.3u Released

Ok, this post is a bit late, as 1.3u has already started selling since Tuesday this week. Anyways, 1.3u is a minor revision since 1.2u. There are only a few changes (see Release Notes for details), so I didn’t make a release video. This post explains why these changes were made and some of the technical details.

  1. Added shift register OE (output enable) line
  2. This is mainly to address an issue with 74HC595 shift register that on powering up the output values are undefined. This can potentially lead to valves being randomly turned on for a short period of time before the mcu takes over and clears output values. It is not a huge issue, but quite annoying. It turns out that one simple solution is to add a control line to the 74HC595 OE (output enable) pin. This pin is active low, which means when set to low it enables output, and when set to high, it forces the output to be in high-impedance state, therefore the triacs will not turn on and the valves will remain closed.

    In 1.3u, Arduino digital pin 3 is assigned to control OE, and a pullup resistor is used to pull the pin high by default. On start-up, before the mcu takes over, OE is high, disabling output; then when the mcu completes initialization, it sets OE to low, enabling output. That’s it. Simple solution.

    Because of the added line, the extension board connector has been changed to 2×4 format (previously it was 2×3). If you own a previous version of OpenSprinkler and would like to use 1.3u extension board, you just need to solder a wire between the OE pin and Gnd , in order to enable output by default.

  3. TXD/RXD are now used as general I/O pins.

    This change was made to free up the A2 and A3 analog pins, since there have been many requests to make more analog pins available in order to connect external sensors like temperature and humidity sensors. Because TXD and RXD are now used as general I/O pins, they can no longer be used for Serial communication. In fact, since they are not used to control the LCD, calling Serial.begin() or Serial.print will cause the LCD to display garbage. If you need Serial communication, you can use the SoftSerial library which can simulate Serial communication on any pins.

  4. Added coin battery holder.

    Warning: this is a feature under development. It requires software support which is not available yet. The goal is to have a backup battery which allows the mcu to continue time keeping even when power is lost. Actually the easiest solution would be to just add a DS1307 Real-Time Clock (RTC). But my main hesitation is that DS1307 is quite pricy. Well, it’s not hugely expensive, but at $2 a piece (volume pricing), it is actually more expensive than the ATmega328 mcu. Isn’t that a bit silly? Anyways, the time keeping business can be well handled by the mcu itself. First, the mcu can run at a voltage as low as 1.8V, so when power is lost, it can continue running on a low-voltage battery; second, during power loss, the mcu will mostly be in sleep mode, using an external 32.768 kHz clock source, and occasionally waking up to update the time counter. This way, it can basically do whatever the RTC chip can do.

    The only tricky part is detecting power loss (which is already possible with the Power Sense pinout), and turning off peripheral components such as the Ethernet controller to minimize power consumption during sleep mode. These require some further experiments, which have been put on my todo list.

Another minor change is adding two resistors for the LEDs on the RJ45 Ethernet connector. In OpenSprinkler v1.1 and v1.0, the Ethernet connector did not have built-in LEDs. Then when I changed to use SparkFun’s RJ45 in v1.2, I forgot that it actually has built-in LEDs… So in this version the LEDs are wired in, which makes the circuit more complete 🙂

That’s all for OpenSprinkler v1.3u update. In case you are wondering about the frequent hardware changes, keep in mind that we are continually improving the design based on feedback and comments received from users. We run small batches (a couple hundred) for each version, that’s why we can have quick turn-around time in integrating new hardware features. At some point when the hardware becomes mature, we will make a surface mount version to improve the production throughput. Hopefully that point won’t be too far away!

OpenSprinkler New Interval Program (fw1.6) Released

I am glad to announce that the new interval program has been released and available for download at the OpenSprinkler GitHub page. This is a major software update since the initial release in October last year. Here is a list of new features in this version:

  • Program-based scheduling. Each program consists of a set of days (including weekdays, odd/even day restriction, and interval days), stations, start, ending, interval, and water time. The firmware supports up to 64 programs.
  • Choice of running stations either sequentially or concurrently.
  • Graphical Preview of each day’s program.
  • Integrated Manual Mode. When activated, the manual mode allows turning on or off stations using buttons on the homepage. An optional timer can be set to automatically shut stations off.
  • Support for rain sensor and location-based weather checking.

Details can be found in the video below, and the OpenSprinkler Instructions of Use page. This software version is compatible with all existing hardware versions, including v1.0, v1.1, and v1.2u. Feel free to give it a try. To find out how to re-program the MCU with new firmwares, please refer to the Re-programming Instructions. From now onw, the new interval program will replace the previous svc_full_schedule program, and become the default program shipped with all pre-flashed MCUs.


Technical Details

You will find that the new program has significantly improved the web user interface. This is made possible by using external Javascripts. As I described in a previous post, a major challenge in designing full-featured web interface is the limited program memory (flash) size of the ATmega328 MCU. The trick to get around with this limitation is by using external Javascripts stored on remote servers to ‘beautify’ the webpages. When you access the OpenSprinkler webpage in a browser, two pieces of information are combined in the browser: one is the essential data provided by the controller, the other is the set of Javascripts used to format webpages. The process to combine the two actually happens in your browser, which can interpret and execute complex Javascripts. This is called Client-Side processing. In addition to releasing the MCU from carrying the heavy ‘formattting’ code, another advantage of this separation is that you can easily replace the Javascripts to present data in a different format. This is in a sense similar to web Templates. Finally, debugging Javascripts is also a lot faster and easier than debugging microcontroller code, because it requires no re-flashing of the MCU, and most modern browsers support checking and error reporting of Javascript code.

One downside with this approach is that the Javascripts must be placed on a server that’s constantly available. Currently the scripts are stored on the Rayshobby web server, which is quite reliable. The path to the scripts is:
http://rayshobby.net/scripts/java/svc1.6/
There are 7 scripts involved: home.js, progmode.js viewoptions.js, viewprog.js, plotprog.js, modprog.js, manualmode.js. These are used to format various pages, including the homepage, program modification page, program preview page etc. However, if you ever want to customize the Javascripts yourself, you need to make a copy of these scripts and put them on your home server, a cloud server, or any file hosting server that can provide direct file access links. Note that the Javascript files are simply text files that store (human-readable) Javascript code. So any server that can host a text file is ok. If you decide to direct the scripts to your own server, simply modify JAVASCRIPT_PATH macro defined at the beginning of interval_program.pde, and point it to your new path.

You don’t have to worry about the security of using scripts stored on the Rayshobby server. Remember, in client-side processing, your controller data is never sent to the server; rather, it is sent to the browser that you are using to view the webpages. The browser will then retrieve the Javascripts and combine them with the data to present the webpages. Clearly there is no way we can ‘log’ your data or keep a record of your data, so it’s safe.

The Weather feature you saw in the demo video above is implemented using a Python script and Google Weather API installed on the Rayshobby server. This is an example of Server-Side processing, because the Python script runs on the server and not in your browser. The reason this requires server-side processing is because first, the Google Weather API returns fairly long XML data that cannot be directly parsed by the MCU, second, the MCU needs to periodically retrieve weather data, so it needs to initiate requests on its own and cannot rely on the existance of a web browser. Thus the Python script serves as a mechanism to convert complex XML data to microcontroller-readable format, and since it runs on the server, the microcontroller can send requests to it at any time.

OK, so much for the technical details. There is no way to cover all details in a single post. If you want to find out more about how the software works, please refer to the source code, or post a message on the forum.