OpenSprinkler Firmware 1.8.3 Released

Amid all the fun and exercise of snow shoveling following the heavy snowstorm Nemo, I was able to finish and check in a new firmware update for OpenSprinkler. This new firmware, numbered 1.8.3, is a relatively minor update. You don’t have to update if you don’t need the new features explained below. There are two main changes:

The first is adding back the Sequential option that was available in firmware 1.7 but disabled in 1.8 due to a bug that was tricky to fix. This option allows you to set the controller to run in either sequential mode (where station runs are serialized) or concurrent mode (where stations are allowed to run simultaneously). The support for this option is now added back (with the bug fixed), and the Program Preview Javascripts have also been updated so you can easily check and verify the controller schedules in concurrent running mode. For most people this is probably not that useful, because sprinklers are typically set to run sequentially to maintain water pressure (similar to how people in the same house usually take showers in turn!) But there are times when you may need to run stations in parallel, say, if you want to speed up the overall watering time, or if you want to run master stations in a non-conventional manner, or if you want to use OpenSprinkler to control not only sprinkler valves but also home lighting and other devices. These are all cases where station runs have to overlap with each other. If this feature is useful to you, go ahead and upgrade to 1.8.3.

The second change is a new Device ID option which assigns the last byte of the controller’s MAC address. This new option allows you to run multiple controllers on the same network by giving each controller a different MAC address. Note that OpenSprinkler uses a software MAC, and is programmed with exactly the same MAC on every unit. I know, this sounds lame, but it’s just because I haven’t spent any time to figure out how to flash a random MAC address. Since most users won’t have more than one controller on the same network, it is not a serious issue. With the Device ID, you can easily customize the MAC address, albeit only the last byte. So again, if you find this feature useful, go ahead and upgrade to 1.8.3.

There are a couple of other minor changes. For example, the network status icon has been removed, instead, the LCD now displays no status icon if the network is on, and a question mark if the network is lost. Also, the Run-Once Program data is not stored in EEPROM any more; instead, you have to type in the water duration each time you start the Run-Once program. I know, this sounds a bit inconvenient, but I had to do it to make space for the new features. If you want to upgrade to 1.8.3, please follow the Firmware Update Instructions.

A slight annoyance I found recently is that I couldn’t compile the OpenSprinkler source code any more on my upgraded OS — Linux Mint 14. It turns out that Mint 14, based on Ubuntu 12.10, installs avr-gcc 4.7.2 by default, which apparently broke some of the Ethernet library code. This is quite annoying. My temporary workaround is to install Linux Mint 13 (based on Ubuntu 12.04 and installs avr-gcc 4.5.3 by default) on a VirtualBox in the host system, and then I can compile the code again in the virtual OS. I haven’t found an easy way to downgrade avr-gcc 4.7.2 to 4.5.3, so I will just stick to this option for now. Apparently next time I should really transition to use Arduino 1.x, which comes with its own avr-gcc compiler so I don’t have to worry about the OS installed avr-gcc breaking old code.

OK, that’s all. Back to snow shoveling tomorrow!
Setting Up a Raspi to Work with OpenSprinnkler

Dan K. from California wrote an excellent blog post about how to set up a Raspberry Pi to work with OpenSprinkler. The link to the blog post can be found here:
http://xperimentia.com/2012/12/14/setting-up-a-raspberry-pi-to-work-with-opensprinkler/

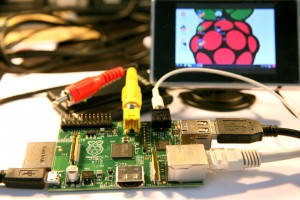
and you can download his scripts from the OpenSprinkler GitHub repository (link given in his post). The scripts basically consist of two parts: 1) storing and serving Javascripts required by OpenSprinkler on a Pi server (recall that currently these Javascripts are served on the rayshobby.net server); 2) using Pi to log OpenSprinkler status (this part is based on Dave Gustavson’s PHP scripts). As Raspi is compact, low-cost, and low-power, it is becoming an increasingly popular embedded Linux platform. The combination of Pi with OpenSprinkler also makes it possible to develop sophisticated features in the future like weather-based irrigation control, or leaning-based control like the Nest thermostat. Perhaps it’s time for me to think about an OpenSprinkler Pi Edition 🙂

IMG_2372

How to Check Out a Previous Version from GitHub Repository

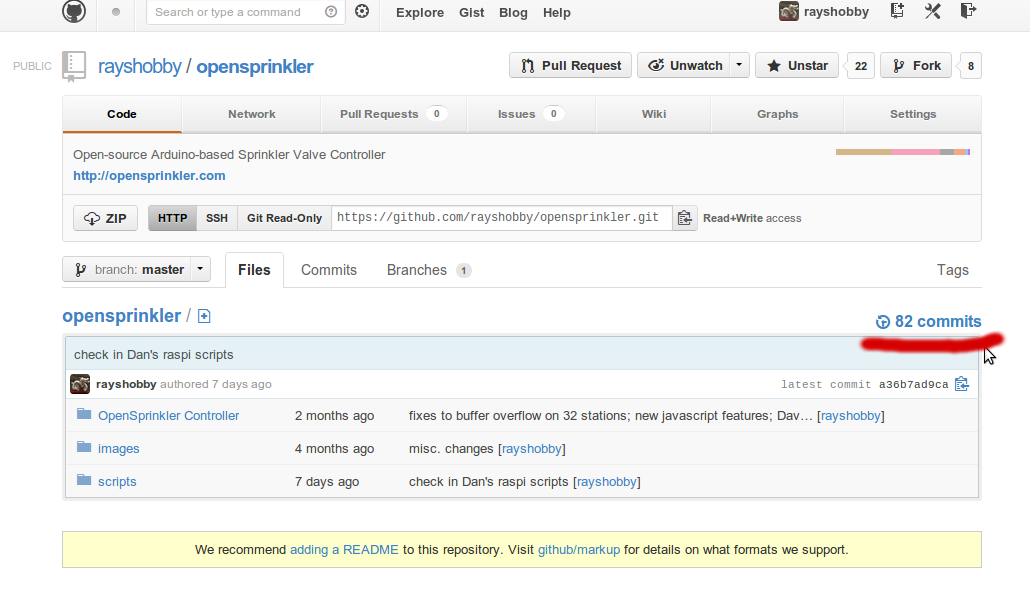
Recently I’ve received questions about how to check out a previous version of the OpenSprinkler repository. One reason to do so is to recover features that have been eliminated in the most recent firmware, such as the parallel / concurrent running mode. As in any version control tool, GitHub allows you to do this pretty easily. Here is how.

First, go to the OpenSprinkler Github page, at https://github.com/rayshobby/opensprinkler, and click on the ‘XX commits’ link on the right side, shown below:

github_version_demo1

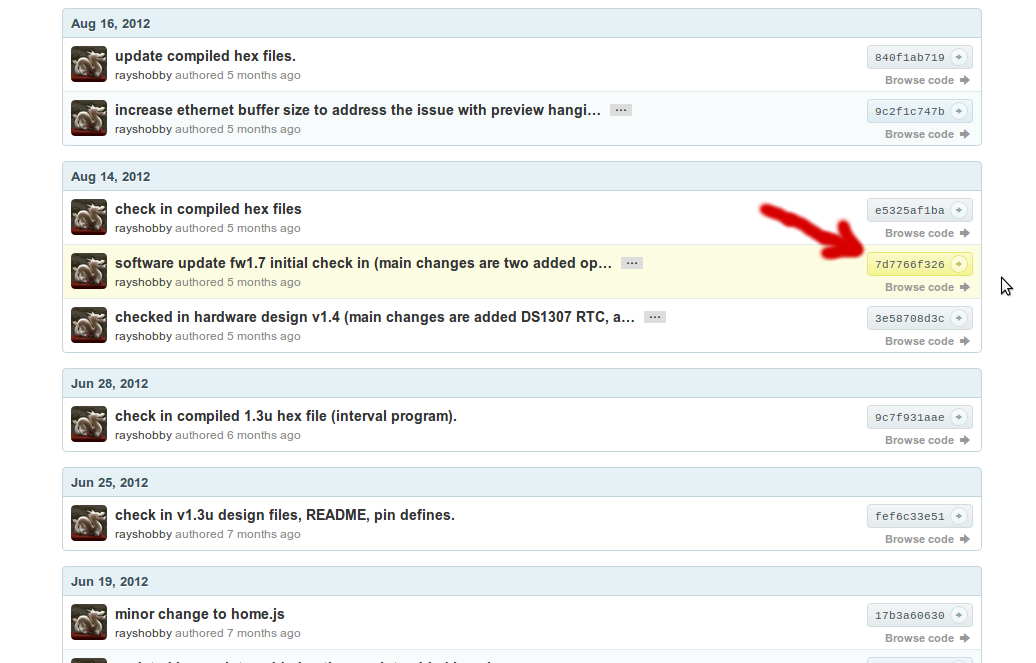
This brings you to the commit history, which lists all previous versions of the repository. Next, from the commit message or date, figure out the entry that you need to check out. Say, I want to check out firmware 1.7, and I found the entry here:

github_version_demo2

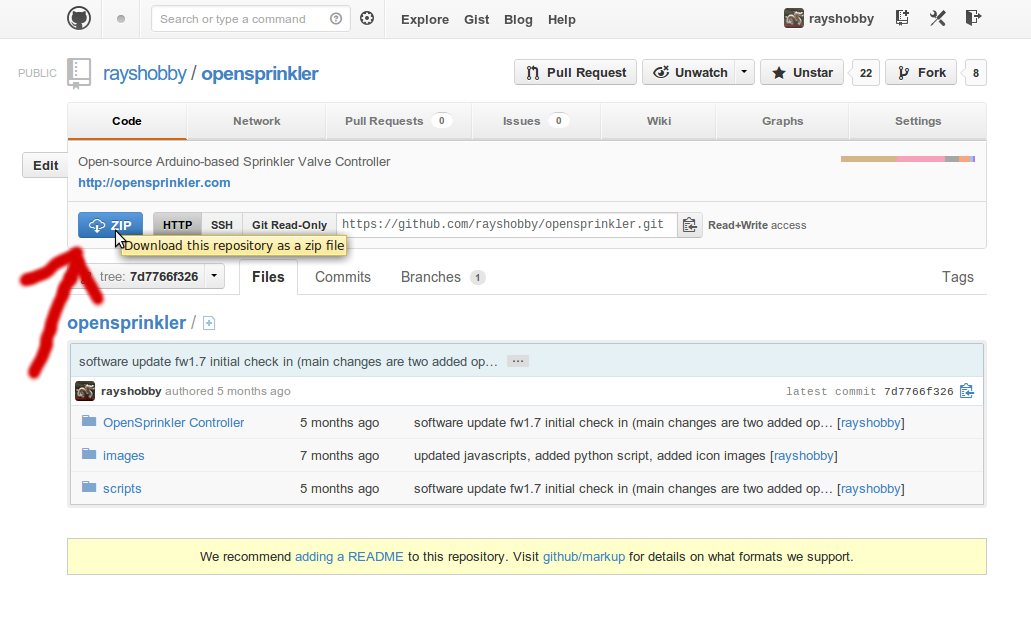
After clicking on ‘Browse Code’, you will be directed to a new page, which looks just like the homepage but with a different version number. Now, simply click on the ‘.Zip’ icon on the upper left to download the whole repository as a zip file. That’s it. Simple, isn’t it?

github_version_demo3

SprinklerAce — An OpenSprinkler iOS App

As I’ve given you a heads up in the previous post, there is now an iOS app for OpenSprinkler called SprinklerAce, developed by Michael at FeedFriendly.com. I know many people have requested an OpenSprinkler mobile app. I haven’t been able to split time to work on it myself. I am happy that Michael went ahead and wrote the first version. Here I will give a brief overview of the app. For details please refer to the SprinklerAce website.

SprinklerAce is extended from its previous version called IC Sprinkler, which was dedicated to the IrrigationCaddy. IrrigationCaddy is another Internet-based sprinkler controller on the market. It has nice polished UI design, but on the other hand it’s closed-source, has no LCD display, no support for extension board, and a limited set of three programs. Well, what I am trying to say here is that OpenSprinkler is better, more flexible, and actually comes at a lower price tag :). Michael made a clever choice to extend the app to support both OpenSprinkler and IrrigationCaddy, so the same app can be used for both.

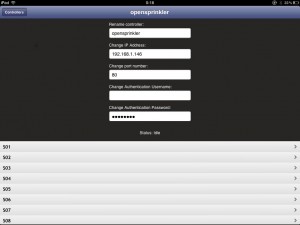
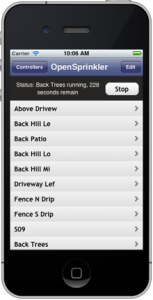
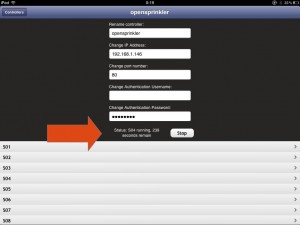
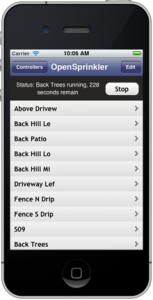
Once installed, you will see the SprinklerAce app on your iOS desktop. The app is pretty self-explanatory and simple to use. Below I am going to mix screenshots captured on my iPad and those from the app website. The homepage shows a list of the current controllers. You can add a new controller by providing a name, ip address, port number, and password. You don’t need to input UserName because OpenSprinkler does not require that. You can add many controllers: for example, you may have more than one controller units, or you may create one with internal ip and one with external ip so that you can use it both at home and remotely. Once you click on a specific controller, it will show the list of stations. If you have defined custom station names, they are also supported here.

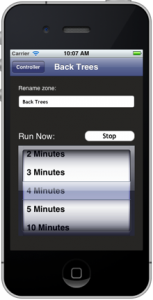
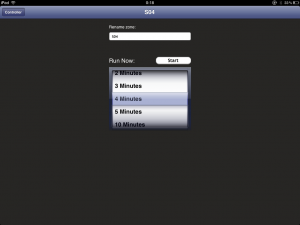
The app is currently designed to only manually open and close stations with a specified amount of time. Basically it makes use of the OpenSprinkler’s manual operation mode to control sprinkler stations. Program mode is not supported yet, so you won’t be able to add/modify/delete programs in the app (you need to use a web browser to perform program changes). It is mainly used for manual control and troubleshooting purposes. Once a station is turned on, the homepage will show running status and display the remaining water time. Internally the app reads back the OpenSprinkler homepage once every 5 seconds and makes use of the returned data to update its status accordingly. This is somewhat similar to how Dave’s logging script works. For example, if the controller is running a normal program schedule, you will be able to see the station status and remaining time in the app.

That’s it. It’s pretty easy to figure out how to use it. The app doesn’t do a whole lot yet, but hopefully Michael will continue improving it, including adding support for program mode, changing options and stations names. Basically you can view an app as another way to format the webpages: a web browser makes use of Javascripts to format the pages, and currently OpenSprinkler requires these Javascripts to be stored externally due to its limited program memory space; an app can store formatting code natively so it doesn’t need to rely on a whole lot of Javascripts.

Anyways, if you are interested or cannot live without an app :), feel free to give it a try. The app is now available in Apple store and supports both iPhone and iPad.

DISCLAIMER: FeedFriendly.com is an independent company and is not associated with Rayshobby LLC by any means. If you encounter any problem using the app, or has comments/suggestions, please contact them directly.


OpenSprinkler End-of-the-year Update

Hi everyone, Christmas is coming in a few days, and soon we will be entering the year 2013. I figured this is time that I post about recent progress on OpenSprinkler. Sorry that I haven’t blogged for a while. Various projects have been keeping me busy. I am excited to post and talk about the details of these new projects in the near future. Anyways, what’s new at Rayshobby shop in the past month or so?

Sale Update. A few weeks ago we’ve just shipped the 600th OpenSprinkler. The sale really starting going up quickly ever since the Bay Area Maker Faire this year. I am hopeful that by the end of spring next year we will reach the 1000 mark. That would be awesome :). With a growing community of users, I’ve also started seeing people contributing to this project, including feature testing, debugging, writing scripts and mobile apps (see below). I am really thankful to everyone who supported and contributed to this project.

Software Revision. The latest firmware shipped with OpenSprinkler is 1.8.2. It has been relatively stable and I haven’t seen or received report of any major issue with it. Some of the commonly requested features are 1) adding back the parallel running mode (which was available in firmware 1.7 but disabled in 1.8.x to make space to other features); 2) adding a weather feature; 3) adding a microSD card for logging and storing Javascripts. I am hoping to get the first request done soon: since the feature already exists in previous versions, I just need some patience to sit down, optimize and reduce the current code and put it back in. As for the second request, a friend of mine has been helping me to implement the weather feature in Python script. The plan is to host the Python code on Rayshobby server. This way, the controller can periodically send requests to the server with the user’s zip code, and the Python script will return a simple number that reflects how the water time should be adjusted that day. This will free the microcontroller from having to carry out the necessary computation. It would be a simple scheme to fit a basic weather feature into the current generation of hardware. The third request cannot be implemented with the current hardware, due to the program memory limit. If you need logging, please use David’s Sprinkler Logger script that I blogged about in a previous post. It is available in the OpenSprinkler GitHub repository.


iOS/Android App. I’ve been holding back on developing an iOS or Android app for OpenSprinkler, partly because I am not familiar with programming mobile apps, and partly because the OpenSprinkler’s web interface is already functioning on mobile devices through their web browsers. But I do agree that a dedicated app would look much more appealing and make the product stand out. Fortunately the folks at FeedFriendly.com have developed an iOS app for OpenSprinkler called SprinklerAce. I’m quite excited and I’ve already seen the pre-release version of it. The app is extended from the previous version, which was dedicated to the IrrigationCaddy. It makes use of the manual operation mode on OpenSprinkler to directly control station valves. It’s currently undergoing the Apple Store approval process. I will make a separate post about it once it becomes available. Stay tuned!

Hardware Revision. The latest hardware version is 1.4, and we still carry both the full-assembled products (1.4s) as well as the DIY kits (1.4u). A while back when the last batch of DIY kits sold out, I was considering discontinuing it and start carrying semi-assembled kits, similar to the OpenSprinkler extension boards. But due to the popular requests from users, I decided to still offer the DIY kits, not only because its price is significantly lower than the fully-assembled versions, but also because many people enjoy the process of building a kit regardless of the price. In October 2012, I made some minor revisions to both 1.4u and 1.4s, mainly to improve the reliability of the power conversion circuit. Again, the hardware design is pretty much stable and I do not anticipate any major changes to it.

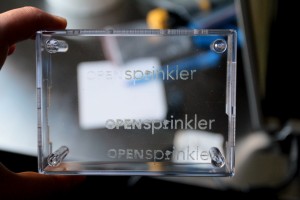
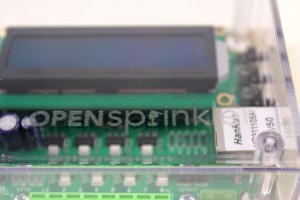
Also, I’ve been working with SeeedStudios to make a injection-molded case for OpenSprinkler. I’m quite excited because this is the first time I’m working on an injection-molded case. The folks at Seeed are awesome and very helpful. I will certainly learn a lot through the process.

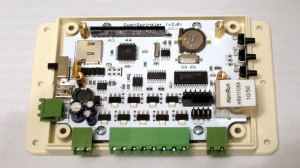
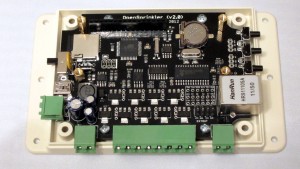
Another bit of news is that I’ve started prototyping OpenSprinkler 2.0. The current plan is to simply upgrade the microncontroller to ATmega644 in order to fit in features like microSD card and more sophisticated weather-based control. Because I am planning to design it to fit the new project case, it will not be available until the case design has been finalized. So most likely it won’t be released until some time in late spring and early summer next year. I do have two prototype images to show off here. I was curious to experiment with different PCB colors, so I ordered a white version as well as a black version:

They both look gorgeous, but I personally prefer the black version because the dark background looks really cool. Feel free to let me know your preference/opinion. In addition to upgrading the microcontroller and adding the microSD card slot, I’ve also changed more components to surface mount packaging to facilitate manufacturing, and adding support pillars for the 16×2 LCD. Again, this is just a hardware prototype, I haven’t started working on the software code yet. The final version will also have to be designed together with the new case. So a lot of things need to be orchestrated before its release.

Upcoming New Products. As I mentioned above, I’ve been working on several new projects. Among which there is the OpenSprinkler Bee, which is an open-source controller for battery-operated sprinnkler valves. I already have a prototype and have demonstrated it at Maker Faire. I am working on making the kits ready soon.

Another product is a controller for watering indoor plants. It has built-in humidity, temperature, and light sensors, and will interface with a compact water pump to automatically water plants for you. I’ve temporarily named it OpenSprinkler Sip. This is a very exciting project that I hope to blog about soon.

All right, so much for the end-of-the-year OpenSprinkler Update. I hope everyone have a Merry Christmas, and see you again in 2013!

OpenSprinkler Logger

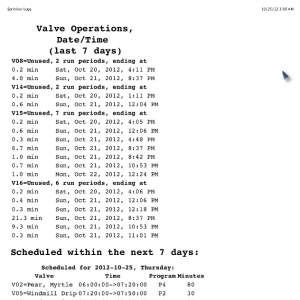
Logging is a useful feature which allows you to find out how OpenSprinkler has worked say, in the past week. While you can check the scheduled water programs using the ‘Program Preview’ feature, it does not account for dynamic changes like rain delay, power loss etc. This is where logging comes in handy: you can find out what OpenSprinkler has actually done in the past. Unfortunately I have not been able to include logging in the firmware because of the memory space that it would require to store the log data.

Recently, David Gustavson, an OpenSprinkler user, successfully implemented logging by using a PHP script that he wrote. The way it works is to have a computer that periodically polls the OpenSprinkler status say, every 20 seconds, and the script checks the differences between every two consecutive polls to record status changes. This is quite clever, as it does not require any modification on the OpenSprinkler side. All that it needs is for OpenSprinkler to return the status of each station, which it already does. Of course this does require a computer running on the side (or even remotely), but it’s pretty easy to set up, and you can use a plug computer or a Raspberry Pi which has very low power consumption.

David is kind enough to share his scripts and I’ve checked them in to the OpenSprinkler GitHub repository under the script/PHP/ directory. He also wrote a blog post about OpenSprinkler, which you can read about here. Thanks David!

New Toy: Full Spectrum Hobby Laser Cutter

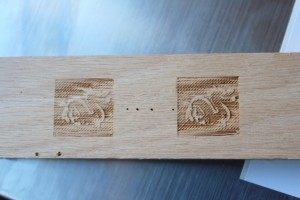
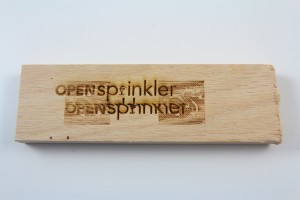
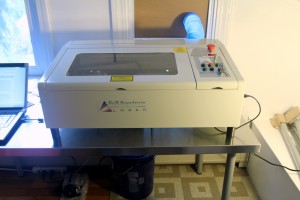
I have a new toy that came in two weeks ago: it’s a Full Spectrum 40W hobby laser cutter! It has been sitting in the shipping box for all this time. This weekend I finally gather everything I needed to set it up, and here are some fresh-made engravings:


Not too bad for the first try, isn’t it?

Impression. My order was handled very quickly. I placed the order on a Tuesday after 5pm and it was shipped the same day! A big thumb-up to the Full Spectrum team. A week later, the box showed up at my door. It’s quite big and heavy. I mean, this is already the least expensive, hobby level model on the market. I can easily imagine how daunting the professional level ones must be.

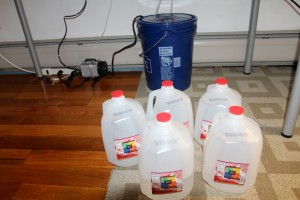
Setup. The build quality is pretty good. The exterior could probably use some more sexy design, but at its price level, I have no complaint. To set it up, I bought a stainless steel table from Ikea, a 5-gallon bucket with cover from Lowes, and five gallons of distilled water. The user manual stressed everywhere that you must use distilled water and not tap water. It is used to cool down the laser tube. I guess distilled water is crucial to avoid sediments.

The user manual is a bit confusing and not entirely consistent. Some pictures do not match my model I ended up having to check some youtube videos and forum posts to figure things out. Also, the instructions for installing the beam combiner are almost unreadable due to low toner. This is a bit disappointing. The good news is that these instructions are all available online, so it’s not a big deal.

There are three peripheral devices I set up first: air compressor, water pump, and exhaust fan. Air compressor is the easiest: just connect the air tube and that’s all. For setting up water pump, I cut three holes on the cover of the bucket, so that the in/out tubes and the power cable can go through the cover easily. Then I placed the water pump in the bucket, and poured 5 gallons of distilled water. The exhaust fan is also fairly easy to set up. The only tricky part is to find a way to vent exhaust air to the outside. My solution is to use a piece of cardboard paper and cut it to the right size so that it can fit tightly on my window. Pictures are included:

Running. The first thing to do is to manually move the Z-table in order to get the laser focused onto the engraving surface. I followed the instructions to do a fire test and it worked right away. Keep in mind that the water pump, air compressor, and exhaust fan MUST be running before the laser fires. Also make sure that the emergency stop is deactivated, and the laser switch is activated. The control is done through USB port, which is very convenient. (I remember my hobby CNC machine requires a hardware parallel port, which was a pain to find). The software is only available on Windows. Since I am mainly using Linux these days, I had to salvage an old Windows PC for this. I suspect I can probably run it through a Virtual Windows on my Linux machine too. The software is reasonably good. It did give me annoyance like hanging and crashing, but nothing that can’t be fixed by restarting the laser cutter and software. Here is a video demo of the machine in action:

As you can see, my first test case is to engrave the OpenSprinkler logo (courtesy of Nathan Johnson) onto the project enclosure. It took me a few tries to find the right laser power level and speed. No rocket science. The enclosure material is probably not best designed for laser engraving, because it can easily burn and produce a greenish color. But at the appropriate laser intensity, it looks reasonably good.

The next order I ship will include this engraved project enclosure 🙂 I can probably start making a small batch of engraved enclosures if it turns out to be reasonably productive.

My next steps are to try laser cutting, and installing the beam combiner. Overall I am pretty happy with this new toy. Given that this is the first time I’ve ever used a laser cutter, I would say the installation and initial tests went very smooth. Again, a thumb-up to the Full Spectrum team.

OpenSprinkler Interfacing with Relay Board

Recently I received a request to customize OpenSprinkler for a 12V DC external relay board. It turns out to be relatively easy to do. Since it may be useful for other folks, I am writing a post here to briefly describe the modifications. First of all, the relay board has built-in opto-couplers and flyback diodes. It is designed to work directly with microcontroller pins. This particular relay board I received is an active low type. This means normally the relay control pin is pulled high; when the control pin is set low by the microcontroller, the relay will be activated. So before you go ahead and make changes, make sure to find out the type of your relay board.

OpenSprinkler can run on 12V DC power supply without any modification. As long as you keep in mind the polarity, it should work right away. Even if you connect the power supply in the wrong direction, it shouldn’t cause any damage because there is a protecting diode D1 that prevents reverse polarity. The only modification I needed to do is to replace the triacs (used to drive AC solenoids) by NPN transistors. Any common NPN transistor is fine. For example, 2N3904. The remaining step is to connect the station wires to the corresponding relay control pins.

The way it works is that normally the shift register outputs low. So all NPN transistors are turned off, and the collectors are pulled high by the relay board. When a station is open, the shift register pin outputs high, turning on the corresponding NPN transistor, and driving its collector low (to ground). This in turn activates the relay. That’s it.

Here is a video showing the relay board in action. The OpenSprinkler running a self test that turns on each station for 3 seconds.

It is also possible to use the NPN transistors to directly drive the relays. However, in this case, you need to add an additional flyback diode (between the collector of the transistor and the +12V line). The flyback diode is important to protect the transistor under inductive load. To accommodate this, I am planning to add PCB holes for these diodes in the future, which will make it easy to solder these extra components.

Today is…

OpenSprinkler’s 1-year anniversary! Yes, on Oct 9 last year, the OpenSprinkler project got posted on Hackaday and became known to the world for the first time. A lot of updates have happened during this past year. The hardware has gone through four cycles of changes, and the latest version is 1.4. From August 2011 we have started producing the surface mount version of 1.4, making it easier to manufacture and assemble the kit. The software has also been substantially improved. Many user-requested features have been included. I am proud to say that at this moment OpenSprinkler is probably the best Internet-based sprinkler timer with its price and the functionality it provides. I am hoping that in the upcoming years it will start making a positive impact on the technology innovation in consumer-level sprinkler products.

To honor the 1-year anniversary, all orders placed on Oct 9 (today) and 10 will receive a 10% discount. If you have ever considered buying OpenSprinkler but hasn’t made up your mind, there is no better deal than this!

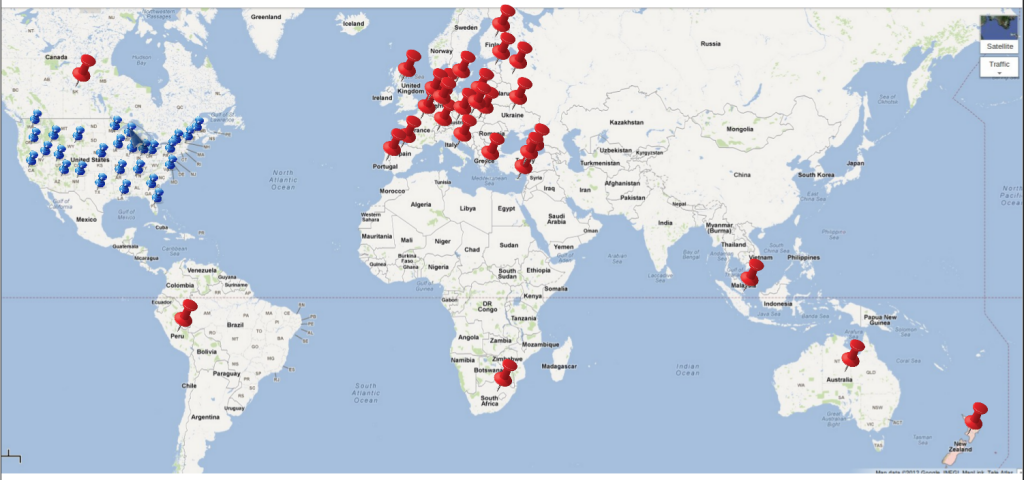
Statistics wise, most OpenSprinkler orders came from the United States, which is not a surprise since we are based in the US. But OpenSprinkler has also reached places outside of the US. So far it has reached close to 30 countries. Here is an un-ordered list: Germany, Netherlands, Australia, South Africa, France, Bulgaria, Spain, Slovakia, Canada, UK, Finland, Portugal, Hungary, Singapore, Belgium, New Zealand, Italy, Turkey, Greece, Peru, Switzerland, Cyprus, Ukraine, Denmark, Estonia, Poland, Austria. I have also marked them on a world map, to give you a better visual:

I want to take a moment to thank the open-source movement. I am a strong supporter for open-source hardware and software. I believe open-source is important for pushing technology innovation and for promoting and implementing new ideas as quickly as possible. Unlike large-scale closed source products, open-source products are often started with a low budget and produced in small batches. We typically assemble kits on the level of a couple hundred per batch. This is how we can quickly update the design, fix bugs, introduce new features, and shorten the overall design cycle. If a particular design didn’t work out, we can simply abandon it and move on. There is little risk of losing big investment money. Also, having a project open-sourced makes it possible for the public to scrutinize the design, identify issues, contribute to the project, and build new projects. As a college educator, I am keen at understanding the underpinnings of how electronic products work, but more than that, I am keen at giving out the knowledge that I know.

Powering WiFi Adapter through OpenSprinkler’s USB Port

Update: OpenSprinkler 2.0 or above uses a different switching regulator and does not require additional resistor any more. The information below is only relevant to OpenSprinkler 1.x.

As you know, OpenSprinkler uses a single 24VAc sprinkler transformer to power both the circuit and the sprinkler solenoids. Frequently people are using a WiFi adapter together with OpenSprinkler to provide wireless Ethernet connection. So how about using the same transformer to also power the WiFi adapter? Ah ha, good question. This turns out to be possible and quite easy to do!

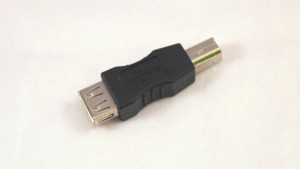
The basic idea is that many of these WiFi adapters (such as the popular NetGear WNCE2001) can be powered using an attached USB cable. One end of the cable is a USB Male A connector, and the other end is typically a 2.5mm power jack that goes into the adapter. Since OpenSprinkler has a built-in USB port (which is connected to the +5V output of the 34063 switching regulator), it can be used to directly power the WiFi adapter. However, OpenSprinkler’s USB connector is a Female B type, so the trick to make this work is to throw in a USB Female A to Male B converter, as shown in the picture below:

You can get this converter from Rayshobby Shop or at online retail stores.

Hold on one second, this is not the only thing you need to do. You also have to solder an additional 1 ohm resistor to the circuit board. The reason is that these WiFi adapters are quite power hungry: I measured that the NetGear WNCE2001 draws about 300-400mA current during operation. On the other hand, OpenSprinkler (by default design) outputs about 330mA current on its +5V output, of which 180mA will have to power the mcu and Ethernet controller. So we need to increase the current output. Fortunately this is not too difficult to do. The trick is to reduce the resistance of Rsc — current limiting resistor for the 34063 switching regulator. According to 34063’s datasheet, the maximum output current is 0.33/Rsc. So if we put two 1 ohm resistors in parallel, Rsc is effectively 0.5 ohm, and hence the maximum output current increases to 660mA, enough to power both the circuit board and the WiFi adapter. Also, OpenSprinkler v1.3u and v1.4 have already designed a spare slot for the parallel Rsc, so it’s pretty easy to make the modification.

You can reduce Rsc even further to provide better safety margin. 34063 supports maximum output current of 1.5A. To do so, you can keep putting more 1 ohm resistors in parallel until you reach the desired resistance. The reason to use multiple 1 ohm resistors is because it’s lowest value common resistor. Anything below 1 ohm will have a big price jump.

Again, if you are interested in trying this, you can get the USB converter from Rayshobby Shop. We will also throw in a couple of 1 ohm resistor free of charge!