OpenSprinkler Zone Expansion Board Upgraded to v1.1

One of the hallmarks of OpenSprinkler / OpenSprinkler Pi is the capability of expanding the number of zones. While the main controller can only interface with 8 zones, you can expand beyond 8 zones by daisy chaining Zone Expansion boards. Each expansion board adds another 8 zones. Because the zone expansion is implemented using shift registers, there is no hardware limitation on the total number of zones (although there is a software limitation due to the memory space required to store the information and data for each zone). This provides an economic way to implement a large number of zones. On commercial sprinkler controllers, zone expansion is relatively expensive, sometimes requiring you to upgrade to a new controller all together. On OpenSprinkler, if you need more zones, just buy more expansion boards. The software is designed to handle all zones in a consistent user interface.

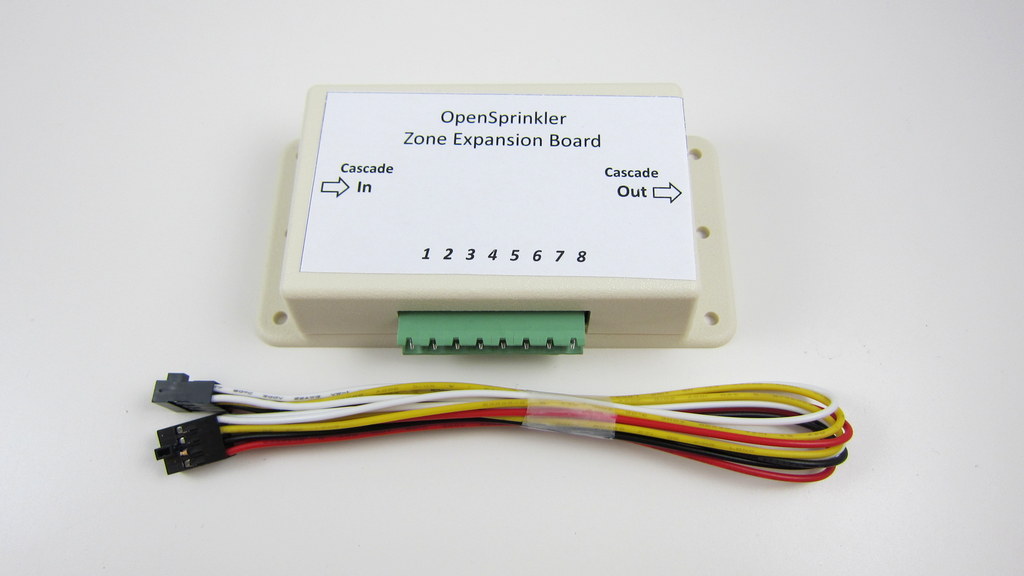
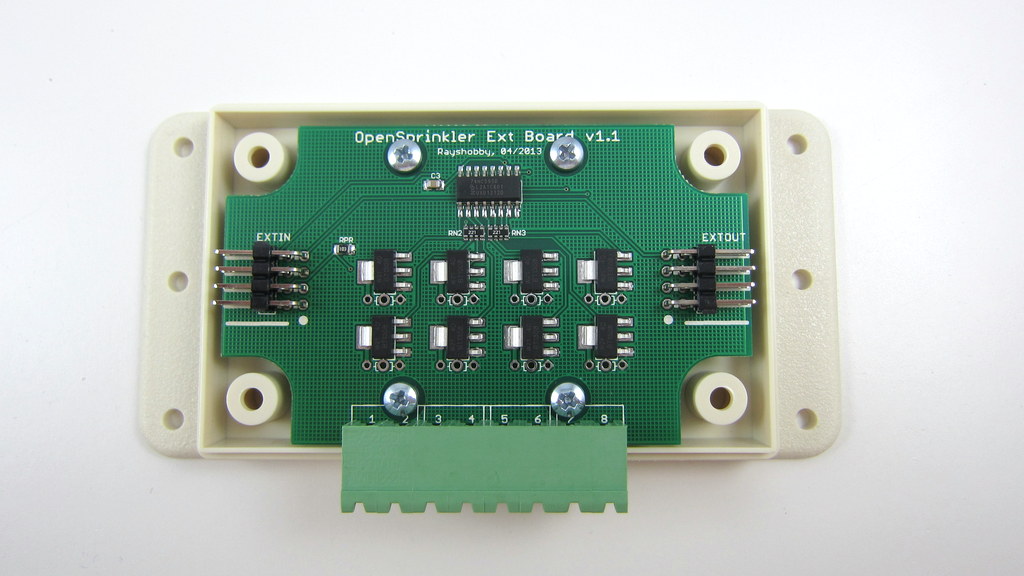
Previously, the zone expansion board is based on the same PCB as the main controller, and they share the same enclosure. This makes it easy to use a consistent enclosure design for both. However, the zone expansion circuit is actually very simple (just a shift register, a couple of resistors, and eight triacs), so it’s no need to commission a PCB as large as the main controller for something that can be much smaller. So I’ve decided to give the expansion board an upgrade, to version 1.1, which uses a much smaller PCB footprint, and its own dedicated enclosure (based on Serpac WM011).

IMG_3017IMG_3014

The new version is just a little over half the size of the original one. So in the same amount of space you can almost fit two expansion boards. This is particularly useful for people who has a limited space to fit a main controller and one or more expansion boards.

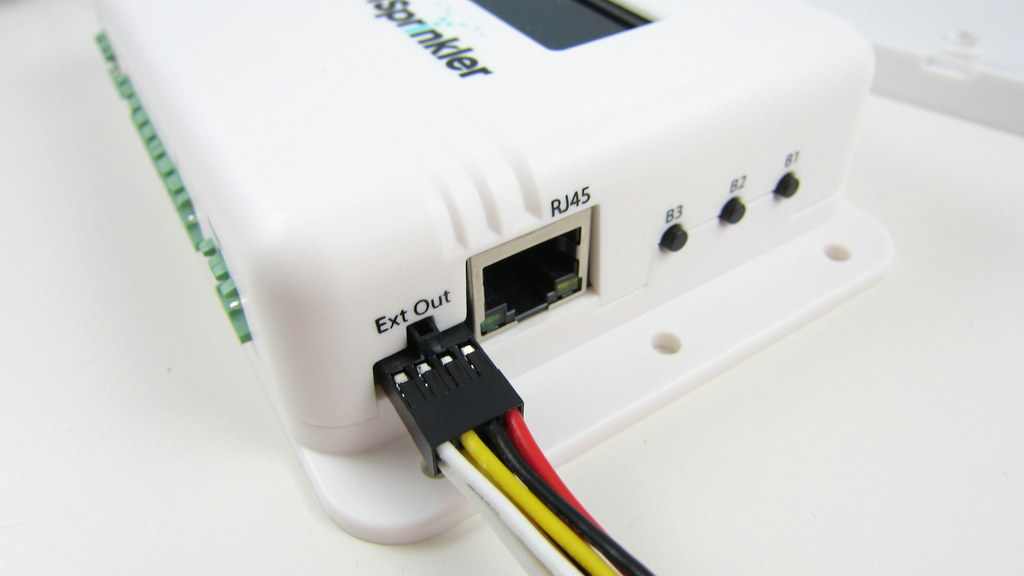
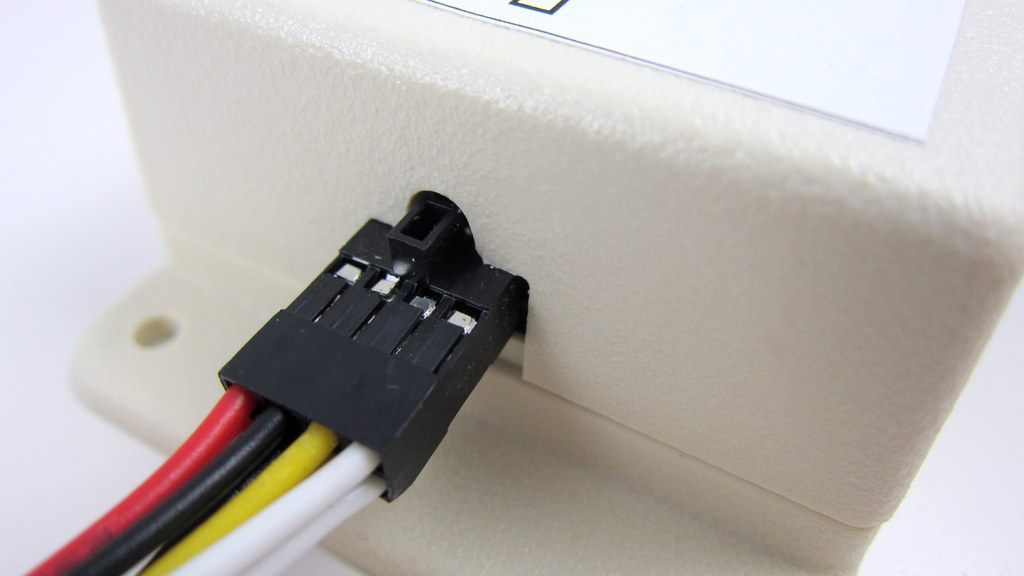
In addition, the zone expansion cable has been upgraded to use a polarized connector. Specifically, the connector has a small bump at the top, which matches the notch on the cutout of the enclosure. This way, there is only one possible orientation to insert the cable connector, thus preventing incorrect orientation:

IMG_3011IMG_3013

The picture on the left above shows the polarized cutout on the expansion board, and the picture on the right shows a similar cutout on the upcoming injection molded OpenSprinkler enclosure. This can help avoid mistakes when inserting the expansion cable. A special note that this cable has different pin connections with the previous version of expansion boards. So you should NEVER use the polarized cable with previous versions of zone expansion boards, or you may risk damaging your main controller!

Finally, expansion board v1.1 has added a 10K pull-down resistor, which when coupled with OpenSprinkler 2.0, allows the main controller to automatically detect the number of zone expansion boards. This feature is already included in hardware design, but hasn’t been implemented in software yet. The basic principle is that the main controller has a 1.5K pull-up resistor, and each expansion board has a 10K pull-down resistor. When multiple expansion boards are linked together, the pull-down resistors are connected in parallel, thus changing the divided voltage. By using an analog pin (which is internally wired to the voltage division point), the controller can easily calculate how many boards are linked together. A very simple solution!

To conclude, here is a short summary of the new features on OpenSprinkler Zone Expansion Board v1.1:

  • Reduced form factor, and dedicated enclosure.
  • Polarized expansion cable connector.
  • Added pull-down resistor for automatic detection of the number of expansion boards.
  • Besides, the new expansion board retains the on-board PCB holes to fit one MOV per zone, and it works with both OpenSprinkler and OpenSprinkler Pi.

That’s all for the update. This new version is in stock and available for purchase at Rayshobby Shop. Same old price!

Moment of decision: which color do you prefer for the OpenSprinkler enclosure?

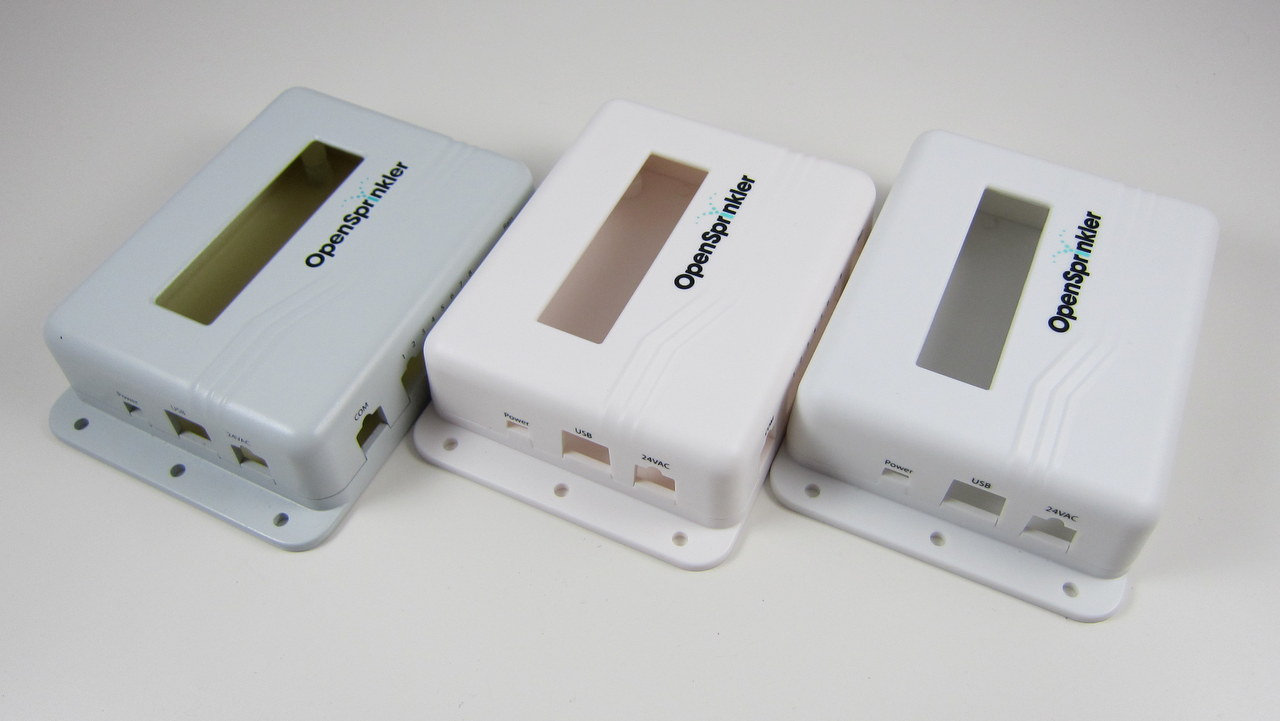
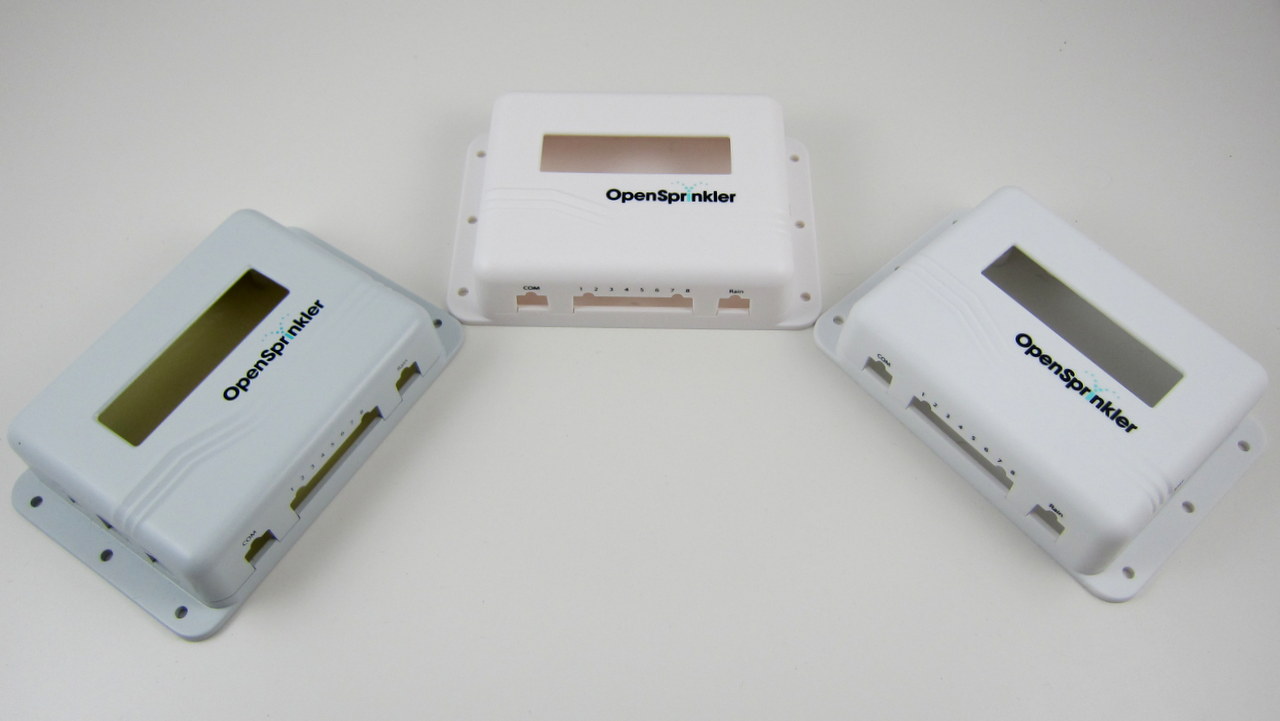
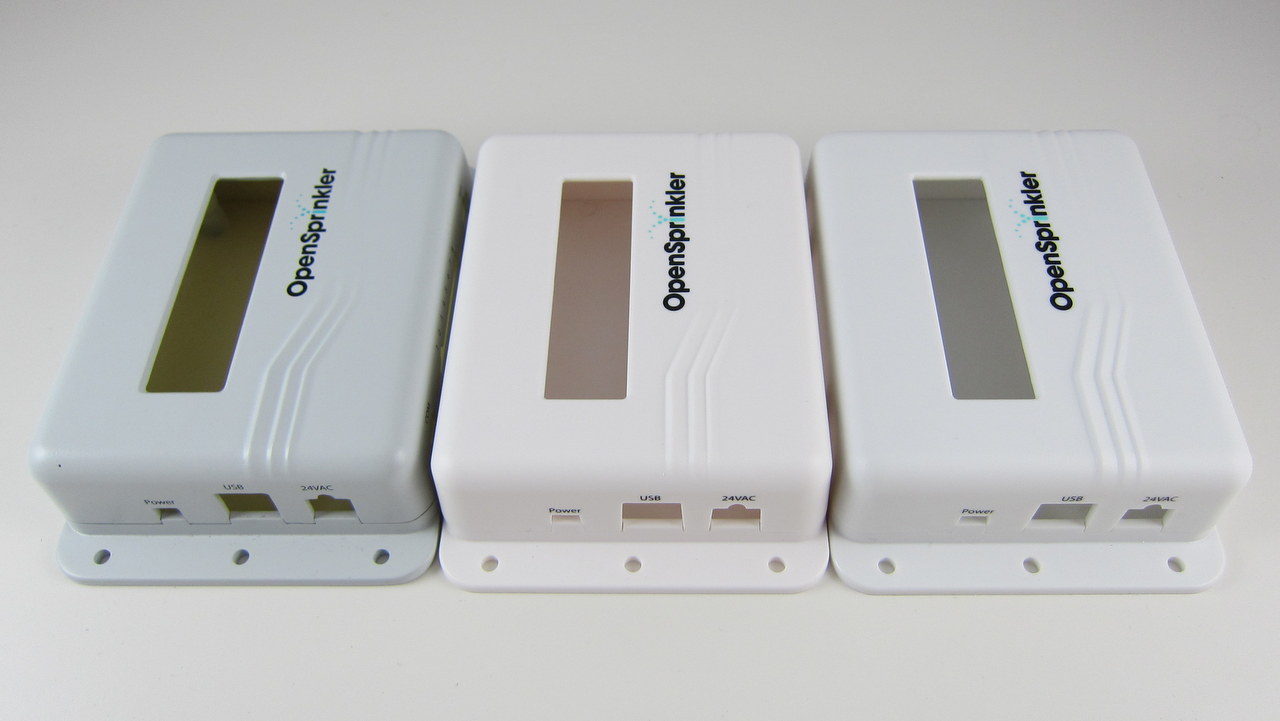
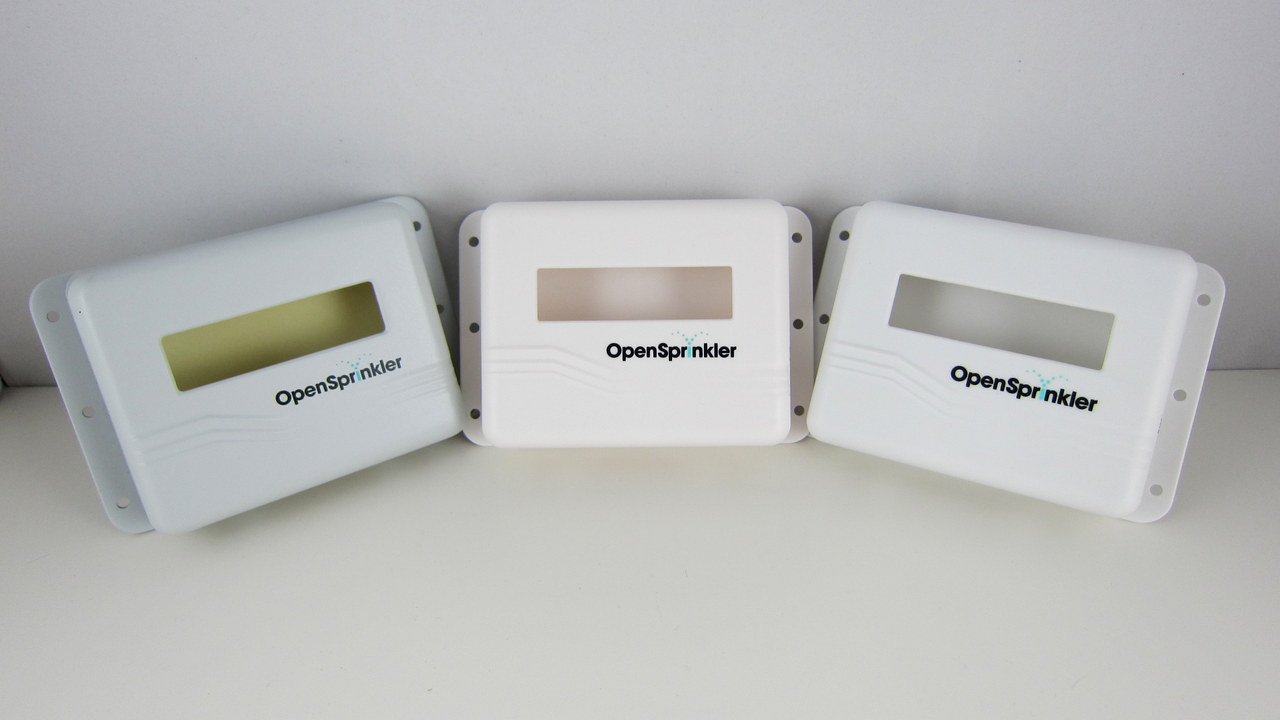
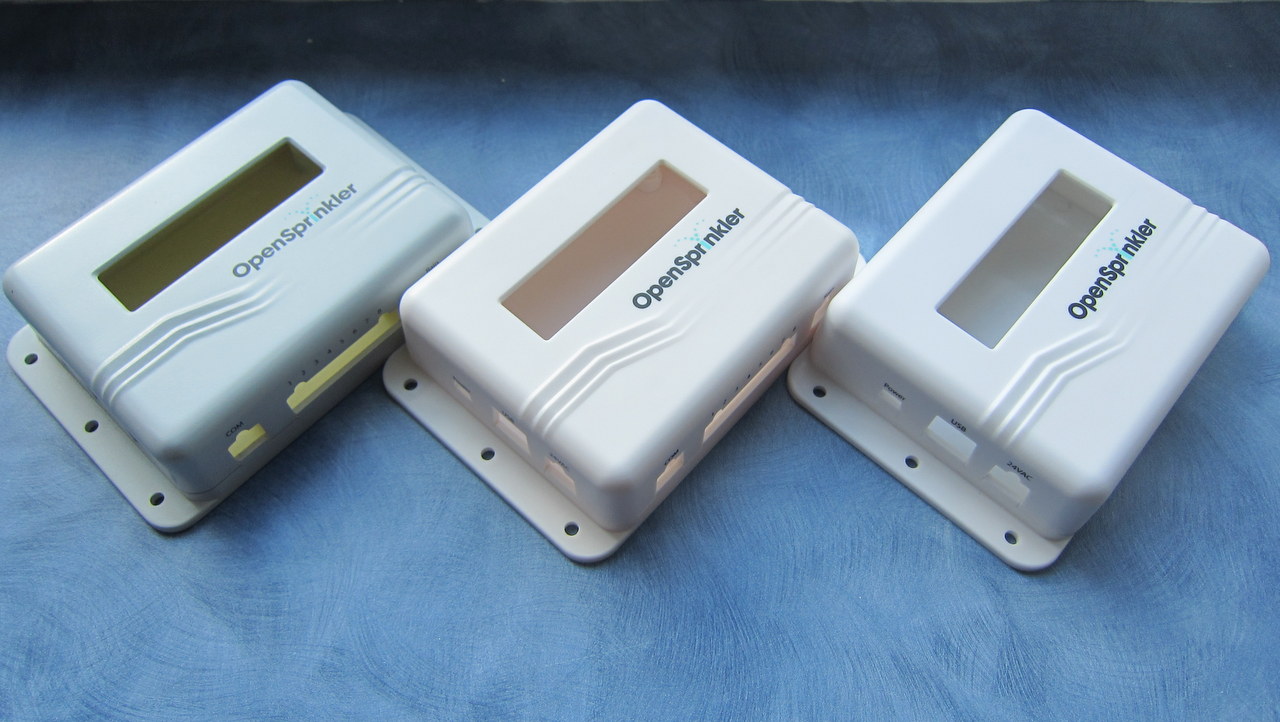
The final sample of the injection molded enclosure has arrived. Very exciting! The moment of decision: I’ve got three samples, each with a slightly different color. I’ve taken a few picture of all three side by side. The differences are subtle, but basically the first one (left) is more gray-ish, the second one (middle) is closer to milk white, the third one (right) is closer to pure white. Please vote for your favorite color in the comments section below (you can either use 1, 2, 3, or left, middle, right, or anything un-ambigious). I’ve only got a couple of days to give them my final decision, so please vote as quickly as you can. Thanks!

IMG_3003-001

IMG_3006-001

IMG_3005-001

IMG_3004-001

IMG_3000-001

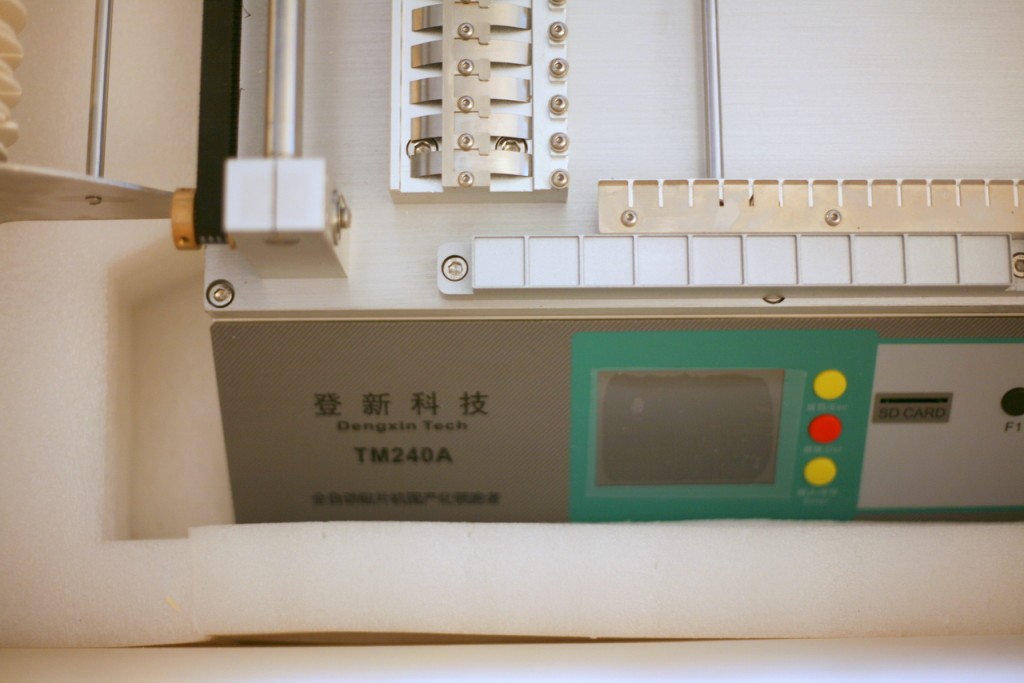
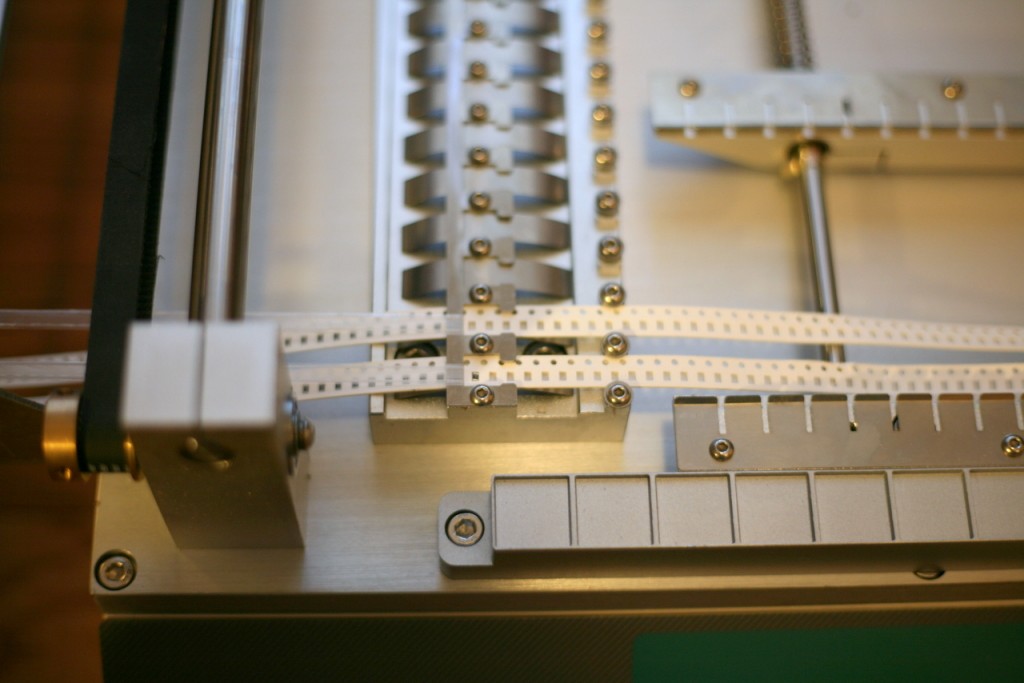
New Toy: NeoDen TM-240A Automatic Pick and Place Machine – Part 1

Updates

  • Click here to see NeoDen 4 Pick and Place Machine with Vision System.
  • Click here to see Part 2 of the TM-240A video.

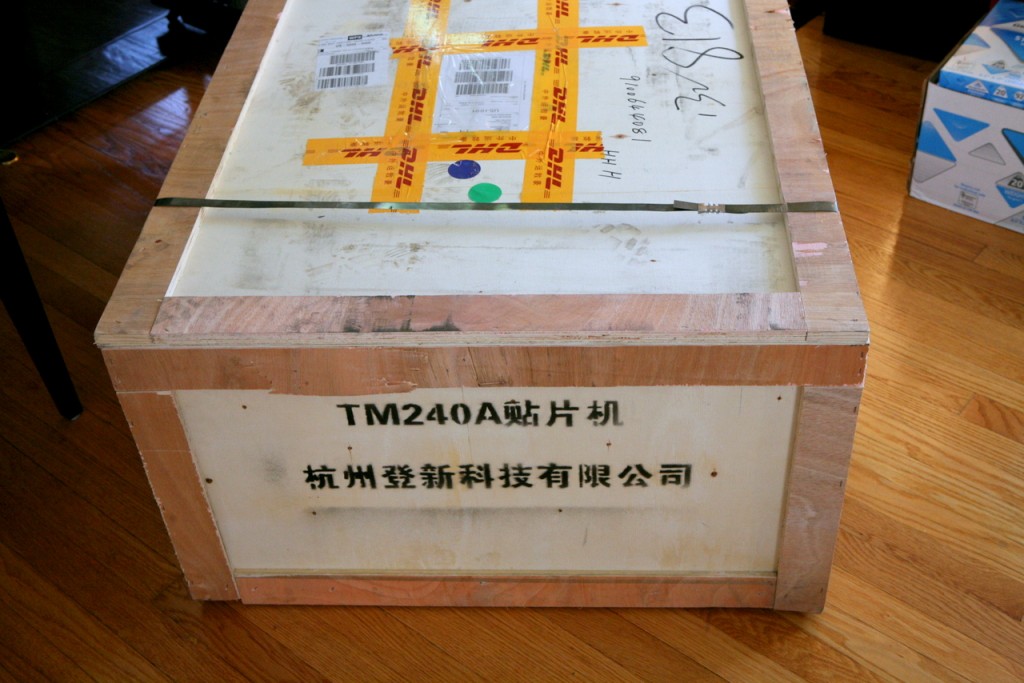
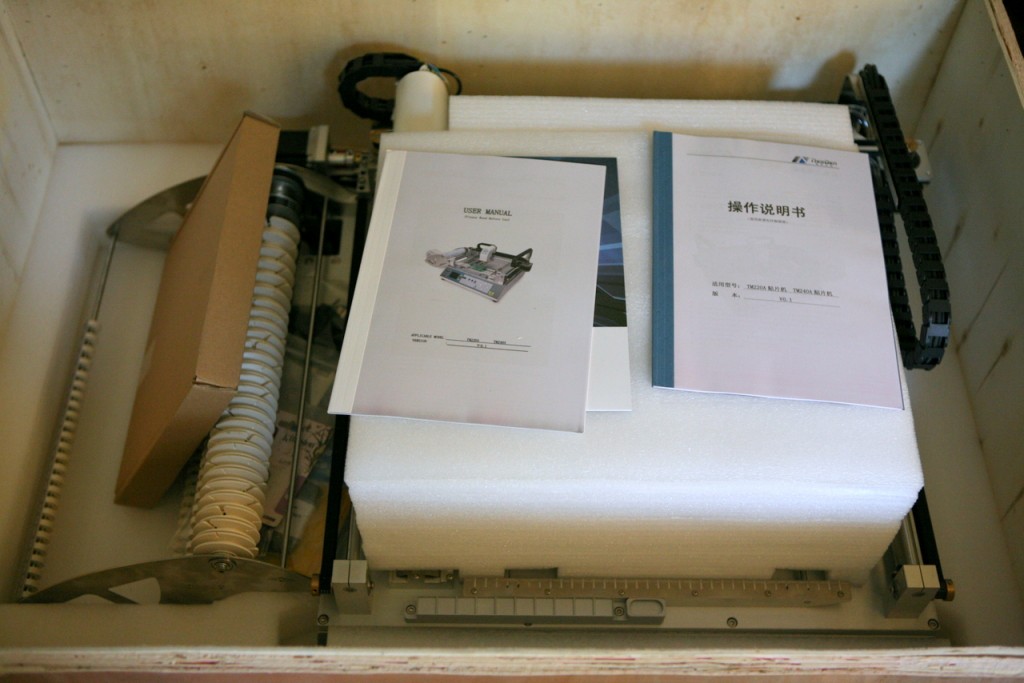
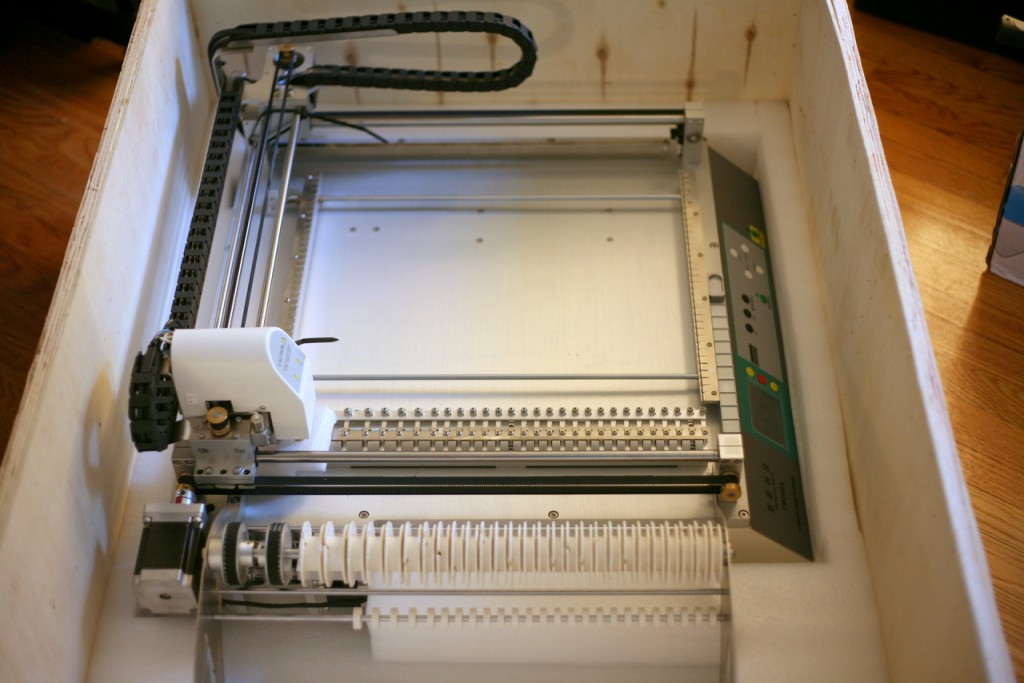
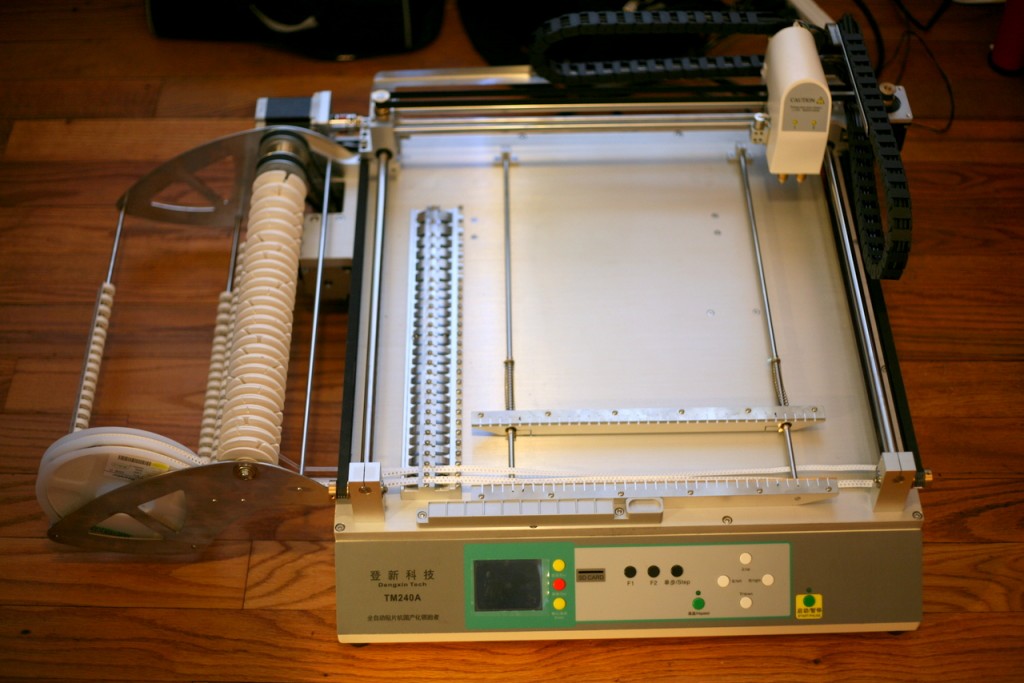
Yes, there have been lots of new updates recently. Among them is a new toy I received in the mail today: a NeoDen TM-240A automatic desktop pick and place machine! I’ve kept my eyes on this baby for a quite a while, and finally decided to make a purchase last week. The shipping was very fast: DHL from China, a total of 4 days from shipping to delivery. The package is quite heavy: 65kg with the box, and 45kg just the machine itself. The DHL courier and I moved it together to my workshop. Some unboxing pictures:

IMG_2664IMG_2668IMG_2671IMG_2672

So what’s a pick and place machine? Simply speaking, it’s a machine that can quickly and accurately place SMT components onto a PCB. As our orders keep increasing, we need better tools to significantly improve the manufacturing productivity. It’s true that the major manufacturing needs can be outsourced to companies like SeeedStudio, but you will always have to prepare for unexpected delays. Also, small production runs are not worth outsourcing to China. So it’s crucial to have in-house manufacturing capability to meet small production needs.

The basic tools for small-scale PCB assembly include a stencil printing machine, a pick and place machine, and a reflow oven. The pick and place machine is probably the most expensive among the three. The NeoDen TM-240A is a relatively low-cost model. It’s desktop-size, so it’s light-weight and doesn’t take a huge amount of space. It has built-in suction pump, 28 feeders, two placement heads, speed of 7000 components per hour, and a maximum PCB area of 400mm x 360mm. It costs about $5000, which is significantly cheaper than machines at similar specs. I’ve seen machines that cost at least 10K, and even at that price you have to buy feeders separately. There is a sister model to TM-240A, which is TM-220A. It’s cheaper (~$3600), but with less feeders and smaller PCB area. The downside of TM-240A is that it does not have a vision-based system, so it’s not as accurate as the more expensive machines. But considering its price and capability, I decided it’s a good investment.

IMG_2675IMG_2674

I bought the machine directly from the Chinese website Taobao, which is the equivalent eBay in China. Shipping is 3000RMB (~$490). Considering it took only 4 days from China to the US, it’s not a bad price. All together I paid about $5500, including the machine and shipping cost.

As soon as I got the machine, I couldn’t wait to open it and give it a try. The user manuals are pretty minimal, but there is an SD card that contains several tutorial videos which are very helpful. For example, the user manual does not explain how to install the component tapes, and it took some careful watching and rewinding of the tutorial video to figure it out. The package came with a sample PCB and a bunch of double-sided tape. Using these I could quickly set up a test run without applying solder paste at all. The video below shows a demonstration. It’s very exciting to see the machine in action! It’s also quite fast. I am looking forward to using this machine in real production. I am glad that this machine has sufficient number of feeders to handle OpenSprinkler in one pass (i.e. no need to change tapes in the middle). There will be quite a bit of learning involved, but I am hopeful 🙂

Update: Click here to see Part 2 of the video.

Announcing OpenSprinkler Pre-Release v2.0s (assembled version)

After a few weeks of shipping these ‘underground’, I am finally happy to spread the words around: the OpenSprinkler Pre-Release v2.0s is officially available for sale! Note that this is the SMT assembled version — we don’t have DIY 2.0 yet. As usual, the first question to ask is what’s new in this version?

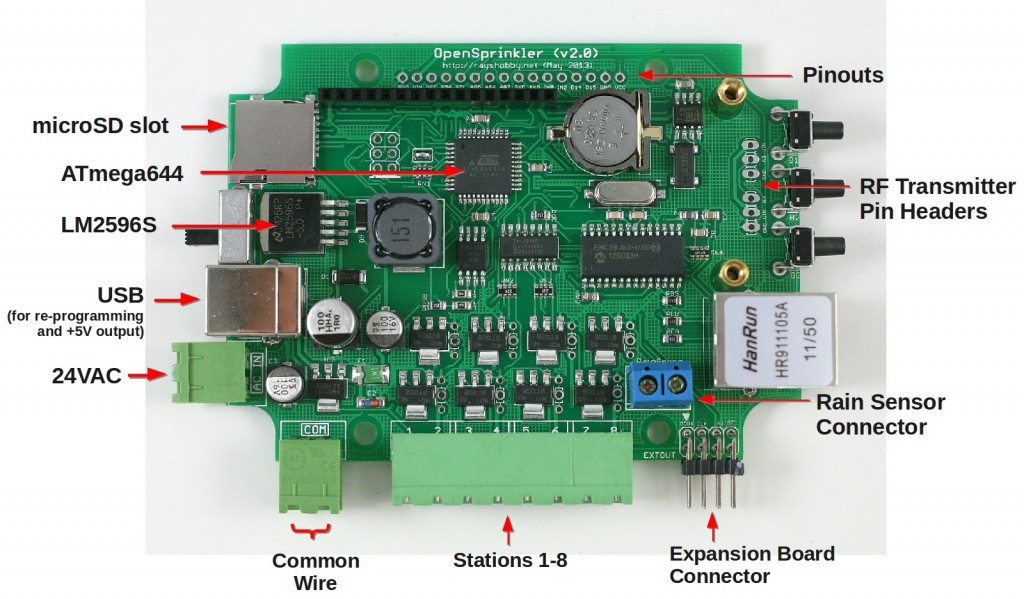
  • Upgraded MCU: OpenSprinkler 2.0 uses ATmega644, which is twice as much as ATmega328 in all aspects (i.e. flash memory size, GPIO pins, RAM, EEPROM, perhaps price as well 🙂 ). This makes it possible to add new features that I have planned ahead (e.g. weather-based control, logging, interfacing with wireless devices etc.) We will no longer be constrained by the flash memory size, well, at least for a while.
  • Upgraded Switching Regulator: the switching regulator (for 24VAC->5VDC conversion) has been upgraded from MC34063 to LM2596, which is less noisy and capable of outputting higher current. As more users are powering WiFi adapters through OpenSprinkler’s USB port, it’s important to make the power conversion section robust. The same circuitry is now also used in OpenSprinkler Pi. Details about this change can be found in this blog post.
  • Added microSD Card Slot: microSD card is useful for expanding the storage size of a microcontroller. This s great for a lot of purposes, such as logging, storing a lot of sprinkler programs, Javascript files etc. A standard microSD card shares the SPI interface and requires only one extra GPIO pin to operate. Hence adding microSD card support is a no brainer!
  • Expansion Board Detection: this allows the main controller to automatically detect the number of zone expansion boards linked to the controller. Not so crucial, but neat. The implementation is actually quite simple: it uses a pull-up resistor on the main controller and one pull-down resistor on each expansion board to form a voltage divider. By checking the voltage using an analog pin, the mcu can easily calculate how many boards are linked.
  • Other Features: given the plentiful GPIO pins available on ATmega644, I’ve added support to adjust LCD contrast and backlight (using two PWM pins), a set of pin headers for plugging in an off-the-shelf RF transmitter (for interfacing with wireless devices). The other un-used pins are made available in the pinout area (including three analog pins, two interrupt pins, two digital pins, as well as TXD, RXD, SDA and SCL).

OK, that’s quite a detailed list of new features. Here is an annotated diagram of the actual hardware:

os20_component_diagram

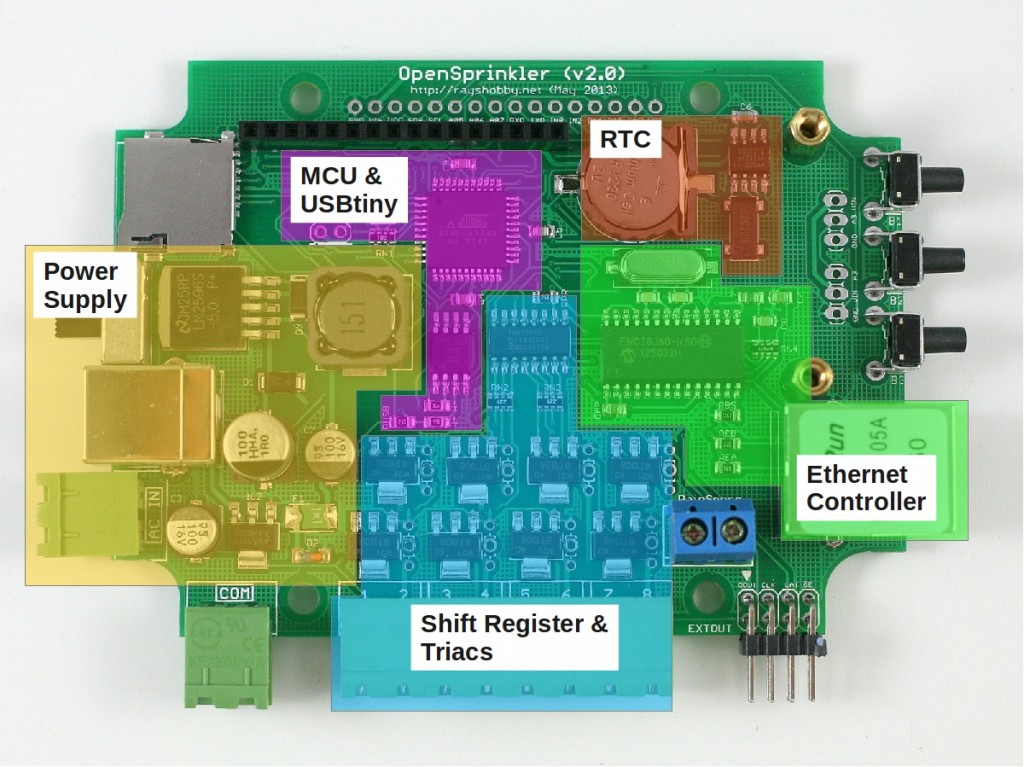
Also, just for fun, a diagram that shows each module of the circuit and where they are located on the PCB:

os20_module_diagram

The reason I call this the Pre-Release 2.0 is that the official 2.0 will use the injection molded enclosures I blogged about in this post. While that is already in production at SeeedStudio, I can’t give a reliable estimate of how long it will take for the final products to arrive. There have already been multiple delays, so I won’t be surprised if there are more… Other than the difference in the enclosure design, the pre-release 2.0 hardware is the same as the final 2.0.

If you are wondering what I mean by ‘shipping these underground’ at the beginning of the post — we’ve been automatically upgrading the recent orders of assembled OpenSprinkler v1.4s to v2.0s. Why not make it public? Well, there are several reasons. The first is that due to the Maker Faire and the vacation after that, I haven’t had time to finish the documentations, and I’m reluctant to officially release a product when the documentations are not ready yet. Second, I’ve been experimenting with minor changes of the 2.0 design, and we’ve been shipping several small batches, each with slight different hardware design. This is an important process to get user feedback, and to iron out all engineering issues before the official release. Finally, as many users have been waiting for 2.0, I don’t want to suddenly get into an overload situation, where the number of orders exceed our capacity to process them.

In terms of software, OpenSprinkler 2.0 is currently flashed with firmware 2.0.0, which is functionally the same as firmware 1.8.3, except for the additional options such as LCD contrast and backlight, and the support for a higher number of expansion boards and programs. More exciting firmware features will be gradually added over time. Also, starting from firmware 2.0.0, the source code can be compiled in Arduino 1.x (latest stable version is 1.0.5), and this is also the recommended Arduino version to compile OpenSprinkler code. I will continue to provide a VirtualBox image which has everything needed for compilation set up and ready to go.

The final bit of news: if you are interested in DIY 2.0, unfortunately that won’t be available for at least a couple of months. The delay is partly because the new injection molded enclosures are not ready yet (there is no space in the current enclosure to fit all through-hole components), and partly because there are a few design decisions I haven’t ironed out yet. So at least for a couple of months we will keep offering DIY 1.42u for anyone who wants to build OpenSprinkler from scratch.

So much for the announcement of OpenSprinkler Pre-Release 2.0. Feel free to leave your comments and suggestions below, or at the Rayshobby Forum. Thanks!

A Mobile Web App for OpenSprinkler and OpenSprinkler Pi


Update: OpenSprinkler new mobile app (native version) is now available on all platforms. Search ‘opensprinkler’ in iOS App Store, Android Play Store, or Windows Phone Store, then download and install the app. Additional details can be found in this blog post.


I am very excited to announce that a mobile web app for OpenSprinkler and OpenSprinkler Pi is now available, thanks to the generous contributions by Samer Albahra. After playing with the app for a while, I am quite pleased with the polished user interface. The only thing I want to say is it’s absolutely amazing! I would highly recommend those who are interested in a mobile app to give it a try. This blog post is a brief introduction to the app. For details, please refer to Samer’s write-up:

Before I begin, let me summarize some of the highlights of this development:

  • Cross-platform: the same web app runs on iOS, Android, as well as Desktop browsers. Also, the app is self-contained and does not rely on external Javascripts (so you can use it to access OpenSprinkler without Internet connection).
  • Supports the complete set of features in OpenSprinkler firmware 1.8.3 (and equivalently 2.0.0 for v2.0 hardware). Supports both OpenSprinkler and OpenSprinkler Pi (running the interval_program ported by Dan).
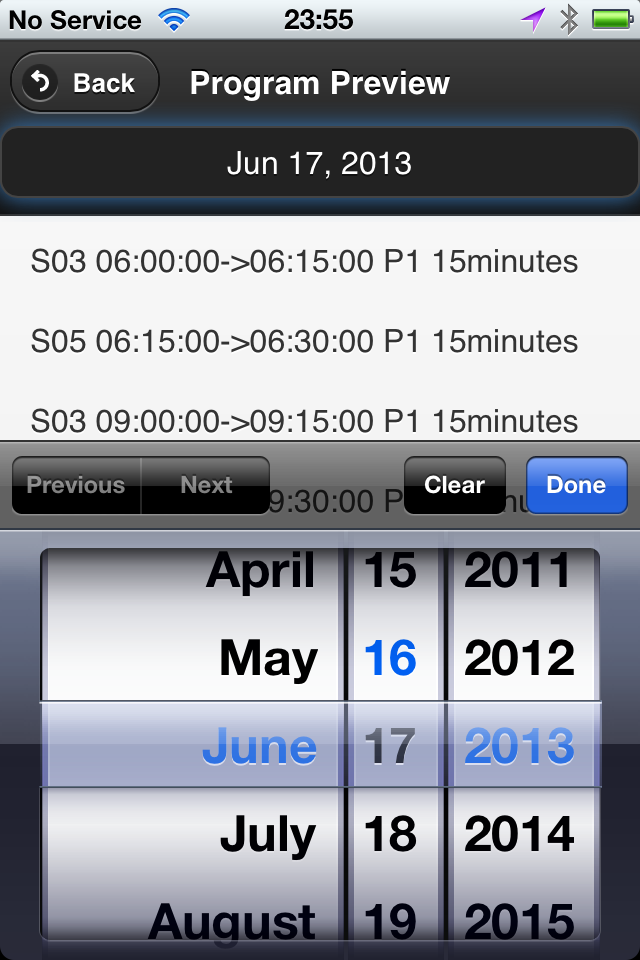
  • Supports additional features including logging and days selection in program preview.

The main requirement to enable this web app is an HTTP server with PHP support. You can either use a desktop server, or a Raspberry Pi (instructions given below), or an external server. For OpenSprinkler Pi users: the same RPi that drives your OSPi can be used as the HTTP server, so no additional RPi needed!

What’s a Mobile Web App?

Since the beginning of OpenSprinkler, requests for an iPhone or Android app have never stopped. To be frank, I have never written a mobile app myself. When writing the firmware for OpenSprinkler, I did consider a few tricks to make the webpage look a little nicer on a mobile browser, but the interface is still evidently written by an engineer, namely me 🙂 So far there have been a couple of efforts, mostly by OpenSprinkler users, to write iPhone apps (which I will blog about later). I am not aware of any effort to write Android apps.

So what’s a mobile web app? Simply speaking, it’s a webpage which appears like an app. Mobile webpages are not a new thing: when you use your phone or any mobile device to browse webpages, such as a bank’s homepage, the server will automatically detect what kind of device you are using, and return a page that’s optimized for mobile browsing experience. For example, the pages may have fewer elements than the desktop version, and buttons may appear larger, etc.

With the emergence of HTML5, mobile webpages are becoming fancier and more dynamic. Almost any feature you can find in a standard iPhone or Android app can be implemented in a web app. Speaking of that, the main difference of a standard app with a mobile web app is that the former is a native application that runs on an iOS or Android device, while the latter is a webpage that runs in a browser. This brings the biggest benefit of a web app, namely it’s cross-platform — you write one app and it instantly runs on almost any device, thanks to the universal support of HTML5 on modern browsers. No more learning how to write an iPhone app, no more messing with the Apple store. Everything is unified 🙂

Of course there are certain things you can’t do with a web app vs. a native app, such as accessing hardware (e.g. cameras, bluetooth etc.) Actually even these I am not entirely sure if they are absolutely impossible. For example, I’ve heard about accessing phone cameras in HTML5. I need to do some more research on these. The other downside is that a web app is slower than a native app, but there are lots of applications where the speed is not critical. In any case, one can argue that in the future web apps can replace most native apps, and this will be a big win for developers as they don’t have to maintain multiple implementations of the same app.

The OpenSprinkler Mobile Web App

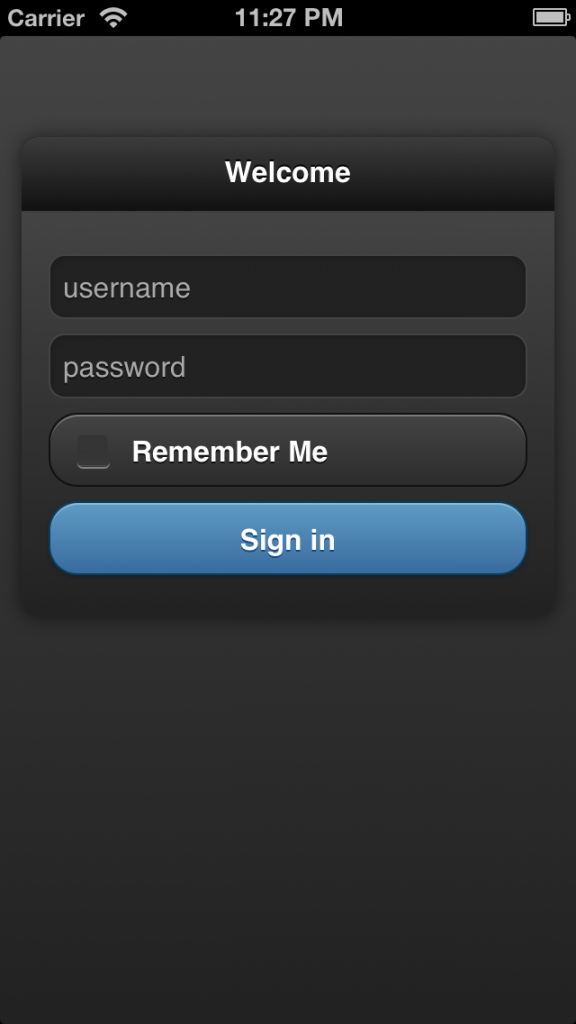
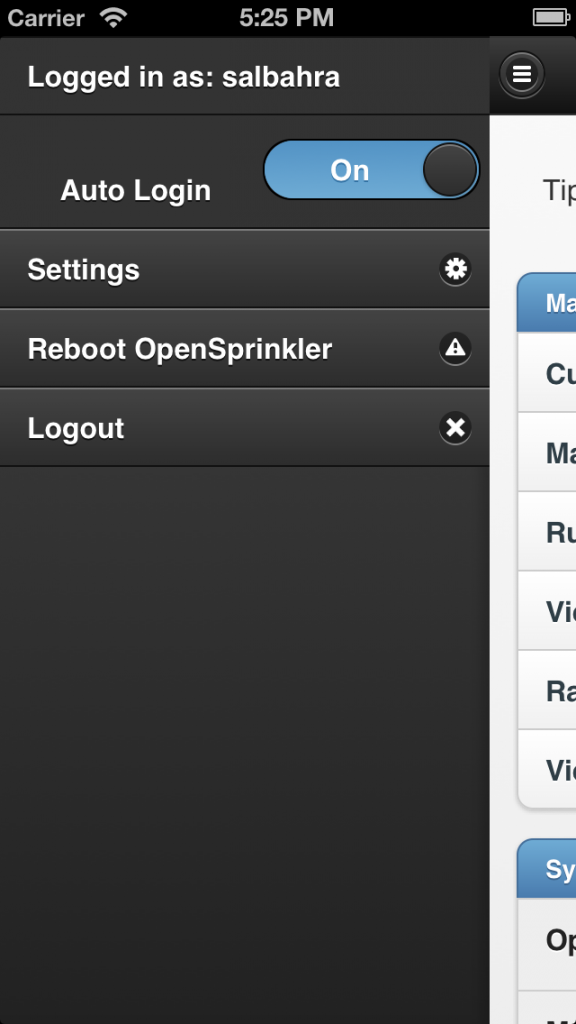
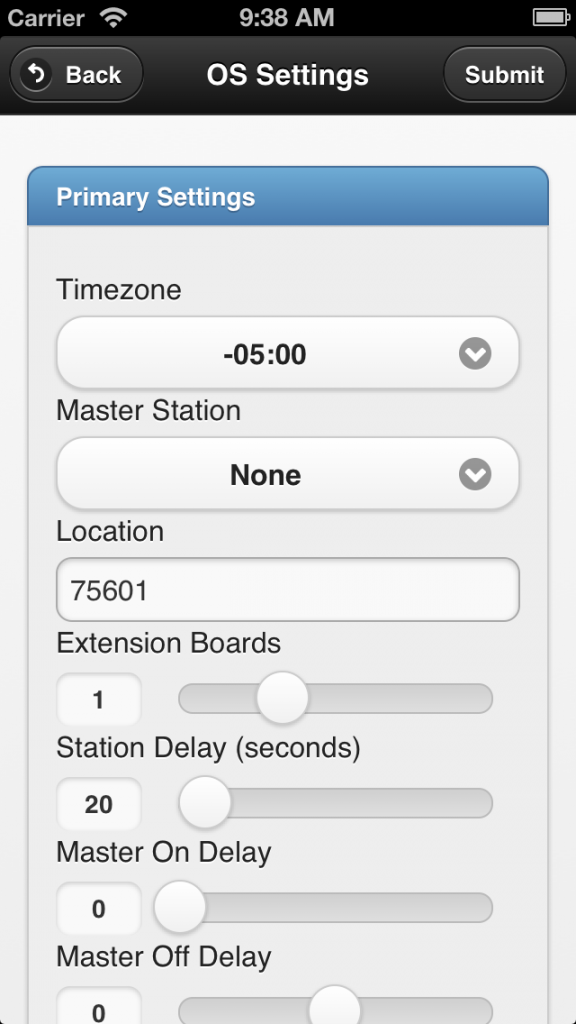
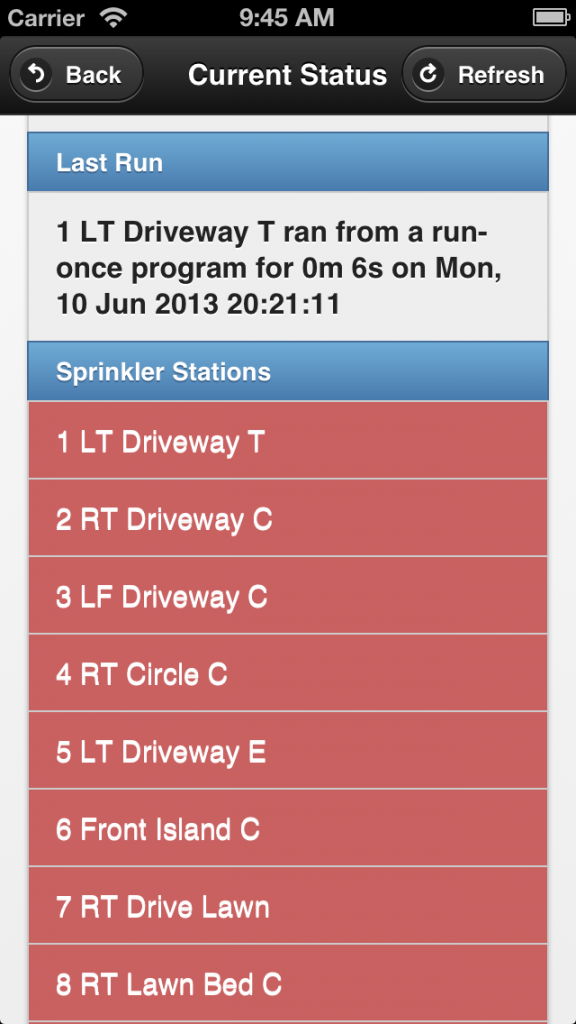
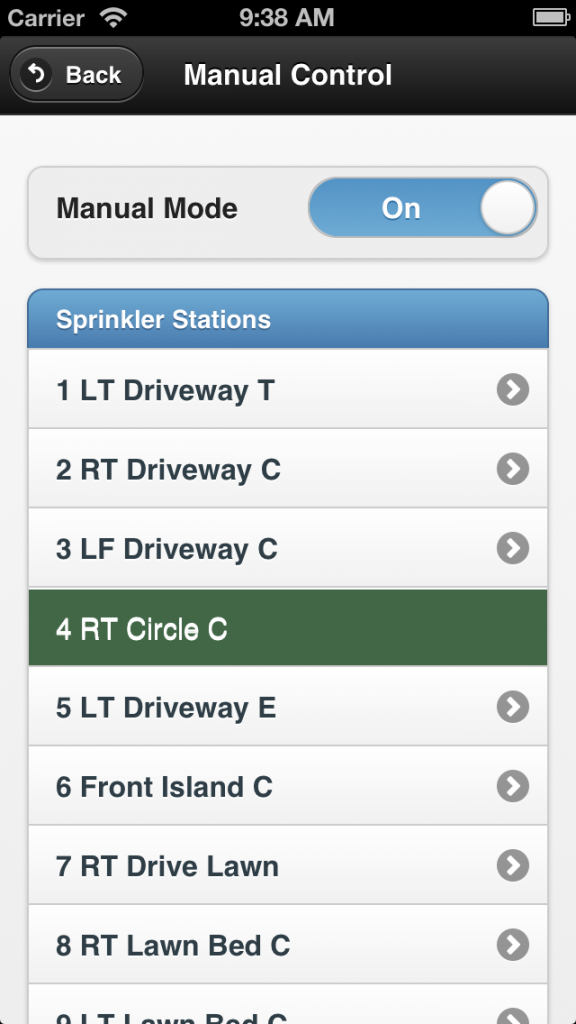
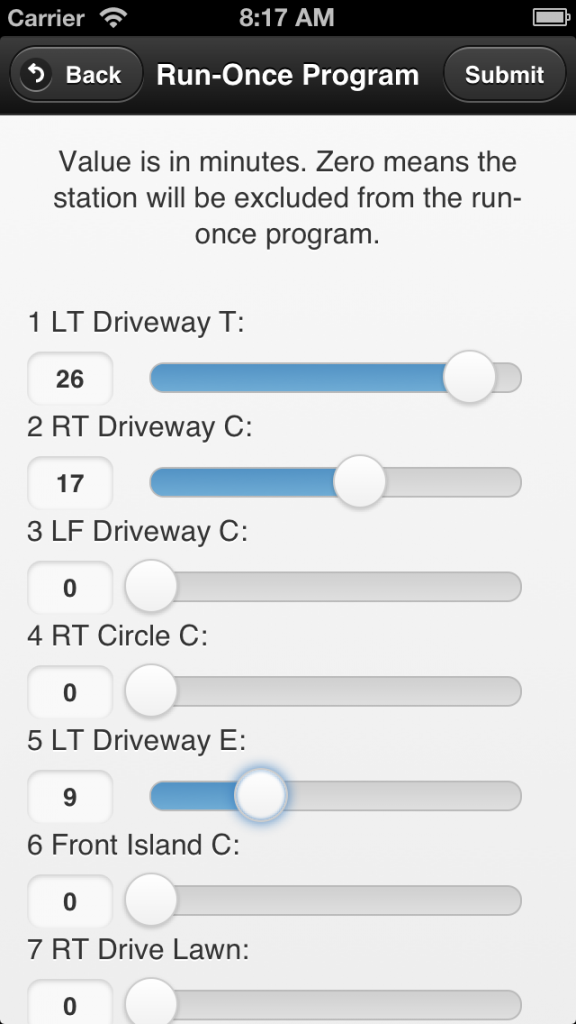
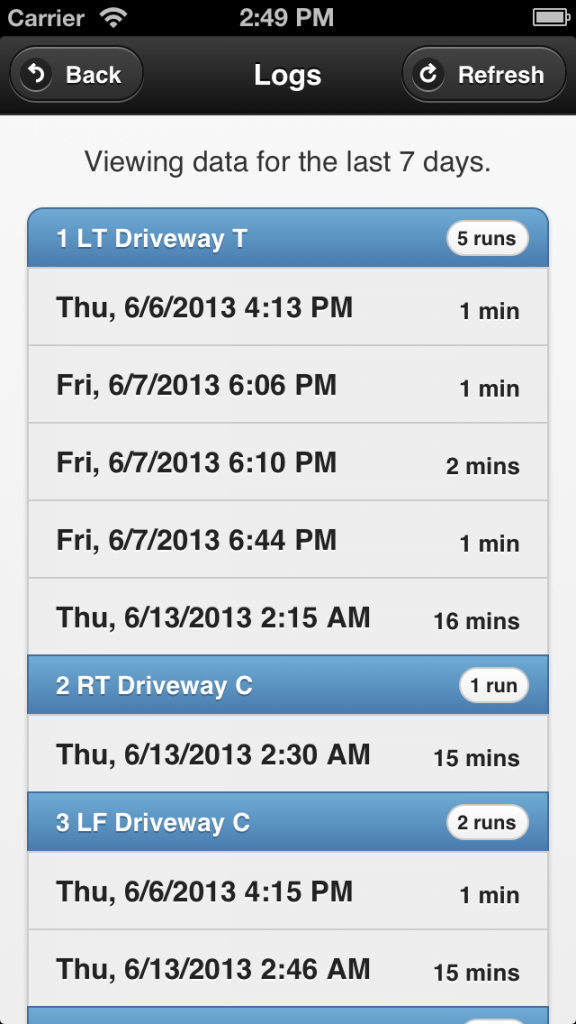
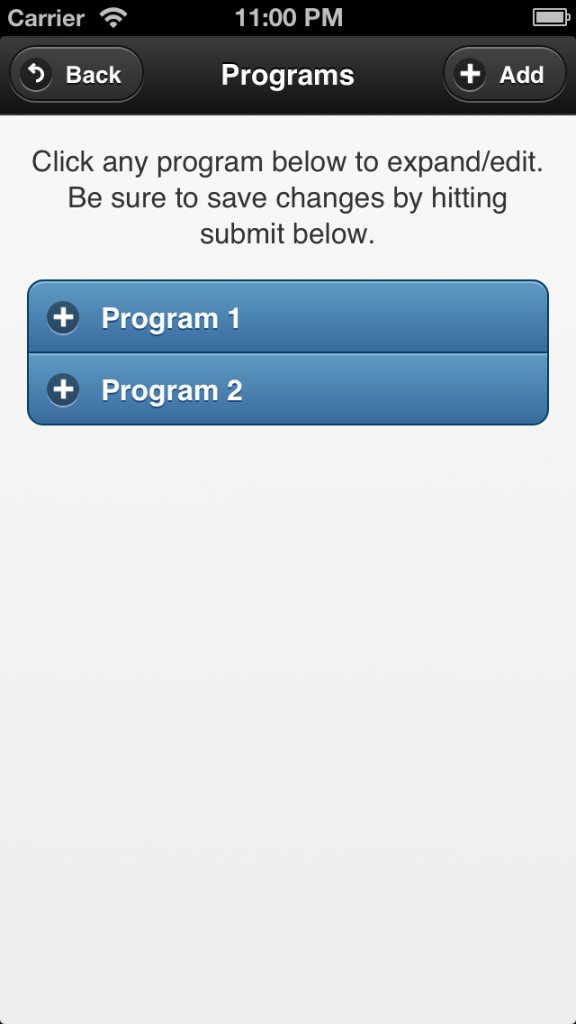
Now let me go back to talk about the OpenSprinkler mobile web app that Samer wrote. Here are a few screenshots from his blog:
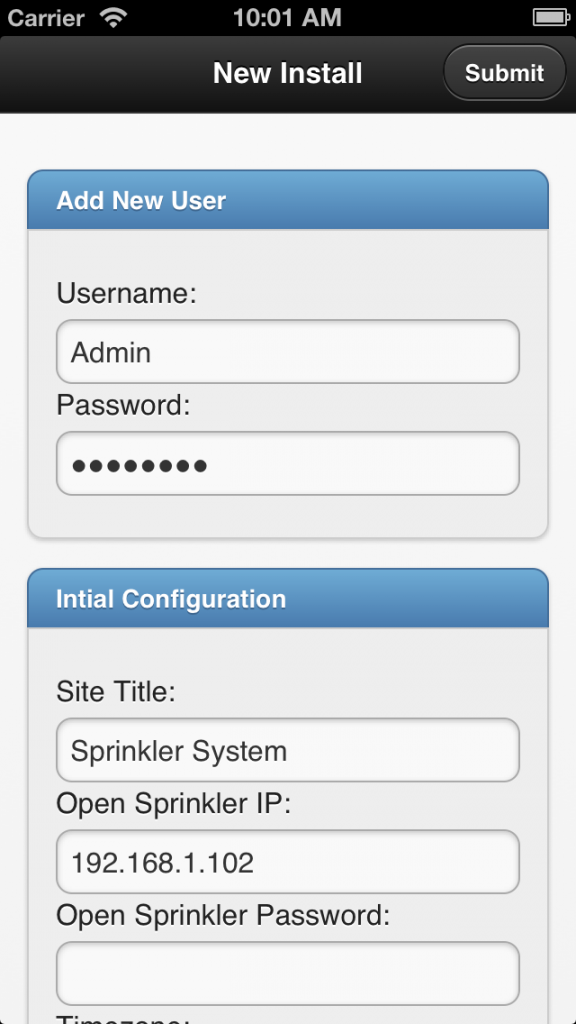
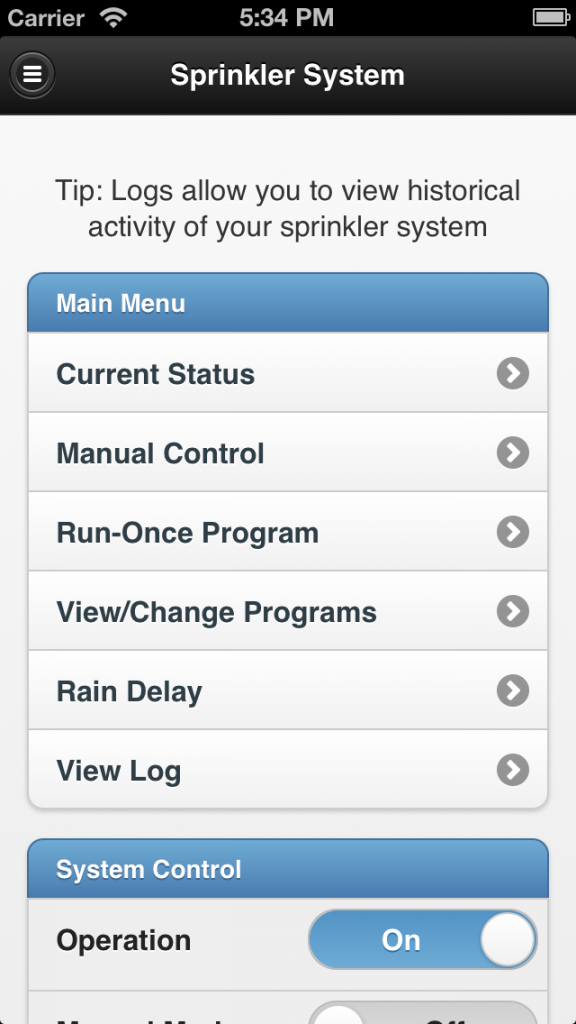
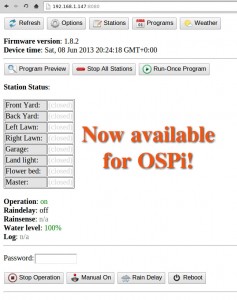
os_webapp1os_webapp3os_webapp2os_webapp4

os_webapp5os_webapp8os_webapp9os_webapp10

Very sleek and clean. Gotta love it! The app currently supports the complete set of features in OpenSprinkler firmware 1.8.3 (and equivalently 2.0.0 for OpenSprinkler v2.0s users). You do probably need to refer to the OpenSprinkler Online User Manual for detailed explanations of specific settings, but the app itself is quite intuitive to use and self-explanatory.

Not only does it support the complete set of firmware features, it offers additional ones, notably:

  • A logging feature (i.e. records of watering events).
  • The ability to select an arbitrary day in program preview.
  • The app is self-contained (implemented using PHP) and does not rely on external Javascripts, so you can use it to access OpenSprinkler locally without Internet connection.

These really help improve the user interface significantly. Also, as mentioned before, the app is cross-platform: the same app runs on iOS, Android, as well as Desktop browsers.
os_webapp12os_webapp13IMG_1239

How to Set it Up (using Raspberry Pi as example)

To set up the web app, you need to have an HTTP server with PHP support. There are many options, for example, a desktop server running Ubuntu Linux, a Raspberry Pi, or an external server. In the following I will use Raspberry Pi (RPi) as an example since it can be used as a low-cost web server. The steps should be the same for desktop servers. For details, please refer to Samer’s GitHub repository (link given above). In addition, you will need an OpenSprinkler running firmware 1.8.3 or above, or OpenSprinkler Pi running the interval_program ported by Dan.

Step 1. Install the necessary packages

  • sudo apt-get update
  • sudo apt-get install apache2 php5 libapache2-mod-php5 git

Step 2. Create direcotry

  • sudo mkdir -m 777 /var/www/sprinklers

Step 3. Clone Samer’s GitHub repository

  • sudo git clone https://github.com/salbahra/OpenSprinkler-Controller.git /var/www/sprinklers/

This will download and copy necessary files to the /var/www/sprinklers/ directory. Once these steps are completed, you can open a web browser (either desktop browser or mobile browser), and type in the IP address of your RPi, followed by /sprinklers. For example, my RPi’s IP address is 192.168.1.147, so I type in:

  • http://192.168.1.147/sprinklers/

You should then see a setup page that requires you to type in some necessary information. In particular,

  • An account including user name and password.
  • Your OpenSprinkler’s IP address (including port number if it’s not the default 80).
  • Your OpenSprinkler’s access password (‘opendoor’ by default).
  • Un-check the ‘Force SSL’ checkbox, unless if you are sure you server has the proper SSL setup.

Once your settings are saved, you will be automatically directed to a login page (or if not, you can directly type in the web url again: http://192.168.1.147/sprinklers/). Type in the account you created above, and then you should be directed to the app’s homepage. I recommend you to bookmark this page to your home screen (most mobile browsers support this), so that next time you can simply click on the home screen icon to access the web app. From this point on, you can feel free to play with the app, and check all the features it supports. I will probably make a video demo at some point to give you a visual walk-through of the app.

In case your settings are changed, you can open /var/www/sprinklers/config.php to change the information there accordingly. Since this is a un-encrypted text file, you probably want to restrict its access right for security reasons (e.g. sudo chmod o-r /var/www/sprinklers/config.php)

For OpenSprinkler Pi Users

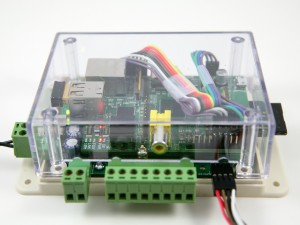
If you are an OpenSprinkler Pi user, you don’t need to install any additional RPi or HTTP server: the same RPi that drives your OSPi can be used to serve the web app! Just follow the instructions above to install apache2, php5 and the other goodies. Your Python-based interval_program can run in conjunction with the HTTP server in the background.

At some point it will make sense to combine the Python-based program and PHP-based web app into a single program that serves both the front-end (UI) and back-end (scheduling algorithms). This would be awesome for the OpenSprinkler Pi in the future.

Acknowledgement

Finally, a big thank-you again to Samer Albahra, who wrote this app and made it available to the public. This is yet another evidence of the spirit of open-source development.

Keep in mind that the web app is continuously being improved and supported, and we can use your feedback and suggestions for making it better and fixing bugs. Please leave your comments and suggestions at the Rayshobby Forum. Thanks!
OpenSprinkler Interval Program is now available for OSPi

Good news to the OpenSprinkler Pi users: the same interval program firmware that runs on the latest OpenSprinkler has now been ported to OpenSprinkler Pi! This is due entirely to the generous contributions by Dan Kimberling, who ported the OpenSprinkler’s Arduino code to Python. The code is available for download at Dan’s GitHub repository. Instructions can be found at the Rayshobby Wiki page:

(Note: the grayed-out instructions below are obsolete and are only kept here for archiving purpose. Please follow the instructions on the Wiki page above for how to install and use the latest software. Thanks.)


For anyone who is unfamiliar with RPi, here are some basic instructions to follow:

  • First, ssh to your RPi (or connect your RPi to a monitor and open a Terminal), and type in run the following command in one single line(i.e. the ‘wget’ command, space, and the very long link): wget https://github.com/rayshobby/opensprinkler/raw/master/OpenSprinkler%20Pi/software/demos/interval_program/ospi.tar.gz
  • Next, run tar zvxf ospi.tar.gz. This will unzip the file to a subfolder named OSPi in your current directory.
  • Now, cd OSPi, and then run sudo python ospi.py (note that you will need to type in your RPi account password). This will start the web server.
  • Open a browser on your computer or any device that’s connected to the same network as your RPi, and type in your RPi’s IP address, followed by colon, and the default port number 8080. For example, for my RPi, the address is http://192.168.1.147:8080. You should now see the homepage of the interval program demo. Note that the port number can be changed to other values, in which case you need to check the source files to figure out how to make the change (or post a message on the forum and I am sure someone will help you).


interval_program_ospiospi_header

This demo program is the same as OpenSprinkler 1.8.2 firmware. So you can follow the OpenSprinkler Online User Manual for usage instructions. I believe all features of the firmware are supported. Keep in mind that this is still work in progress, so there are glitches and bugs that will be ironed out over time. If you are a developer, you are welcome to improve the code or help fixing bugs. The backbone of the software is based on web.py, a popular and easy-to-use web framework for Python.

Also keep in mind that if you have RPi rev. 2 (which is the current model), you need to open ospi.py and edit a port number. Details can be found in the README.txt file. P.S., it’s generally a good idea to read the README.txt first before you start doing anything.

These will be the basics to get you started. If you have any questions, feel free to post a message on the forum.

Finally, a big thank-you again to Dan Kimberling for his time and efforts in making this available to the public. This is an example of the true spirit of open-source development and community support. I am very excited to see additional user contributions to the OpenSprinkler Pi project!

Annoying ribbon cable problem with recent orders of OpenSprinkler Pi

Hi, this is an alert to users who recently ordered OpenSprinkler Pi: we’ve found an annoying problem with the 8-pin ribbon / rainbow cable that comes with the package. Apparently many of the cables have disconnected crimp wires, causing the OSPi to not respond to RPi, or even worse, causing all stations to turn on at the same time. I estimated that there are potentially up to 60 orders that might be affected. We’ve proactively taken actions to send a replacement cable to everyone who ordered OSPi recently (within the last 2 weeks). If you are seeing an issue of your OSPi not responding to RPi, try to use a multimeter to measure the connection on each of the 8 wires of the cable. If any wire is not connected, please email to [email protected] and we will send you a replacement cable right away.

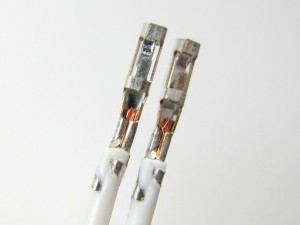
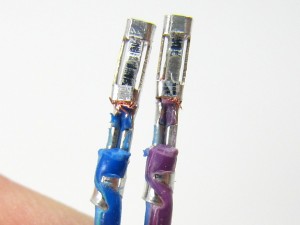
Here is a closer look at the cause of the problem. When I take the wire out of the crimp connector, you can clearly see that the good ones (shown on the left below) have metal wires tightly secured by the crimps, while the bad ones (shown on the right below) have the metal wires cut from the cable, resulting in disconnection. This is probably due to a defective wire stripper or crimp tool, or incorrect operation that causes the metal wires to be completely cut through. In any case, I’ve informed the supplier and complained about the the quality, and will never order from them again.

IMG_2963IMG_2965

So the lesson to learn here is that when testing OSPi, we really should use the individual cable that goes with each board, instead of using a common testing cable. Another lesson to learn is to never overlook any part, even something as simple as a cable!

I became aware of the cable issue when a couple of users reported that their OSPi did not work. This is very puzzling because every single board has been tested and verified, so the chance of DOA is very small. I’ve asked two of them to send their boards back to me, and after testing, I couldn’t find any obvious problem — the board works fine, and all demo programs work fine. However, until yesterday, I have apparently overlooked the problem with the cable: when testing, we have always used a common testing cable, instead of the user’s cable. Partly it’s because I never thought the cable would have any problem at all. Now I’ve learned a lesson, and it’s a good lesson to learn!

2013 Bay Area Maker Faire Summary

First off, my apology for not updating the blog for a while. Right after the Bay Area Maker Faire on May 18 and 19, I went to a trip to the UK for about ten days. Then as I came back, I was faced with a load of orders that need to be processed immediately. My friend Don and I spent three days non-stop shipping out packages. Now that all the back orders have been processed, I finally felt relieved and can come back to take care of the blog.

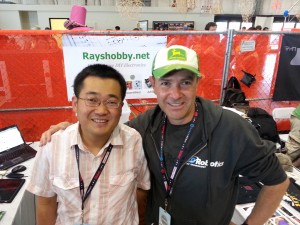
As a quick summary of the 2013 Maker Faire: we had a great show. A big thumb-up to Aaron Newcomb for helping me out. Without him, I would not have made it to the Maker Faire. Lots of people came by, chatted with us, provided valuable comments and suggestions, and expressed appreciation and love 🙂 I took pictures with Chris Anderson, and Eben Upton and Liz Upton. I also met and chatted with Laen from OSH Park, Ian Lesnet from Dangerous Prototypes, Mark Frauenfelder (Editor-in-Chief of the Make Magazine), Jason Babler (Creative Director of Maker Media), Michael Caster from the Maker Shed, and many others. This is such a fantastic event, and a great opportunity to meet and make connections with other makers.

20130518_12070120130519_151115

This year we didn’t bring many physical goods sell at the Maker Faire, but instead directed people to place orders online. This way we can devote more time to talk to people. Two interesting things I learned this year: First, AASaver is surprisingly popular and received much interest, but unfortunately I didn’t foresee this and hence did not prepare any new stock. What a pity! If I end up going to the New York Maker Faire later this year, I will make sure to take a batch of AASavers there. Second, kids really enjoy playing with flashing LEDs. We’ve set out a table with coin batteries and self-flashing LEDs, and provided simple instructions to make an LED throwie so people can make one right at the booth and take it away as a gift. This was hugely popular, and all the LEDs and batteries were consumed in no time. Apparently I should prepare more of these next time!

Of course the primary focus of the audience at our booth is on OpenSprinkler and OpenSprinkler Pi (OSPi). Since the release of OSPi just a couple of months ago, it has started gaining significant interest and has become the fastest growing product on my site. So far there have been more than 350 OpenSprinkler Pis out there in the wild. And as you can see from the forum, lots of people have been keenly working on developing their own software, using different programming languages and implementing advanced features such as weather-based control and sensor-based control. As I will talk about in the next post, the same firmware that’s running on the microcontroller-based OpenSprinkler has now been ported to OSPi, thanks to the generous contribution by Kimberling. So now you can run the same full-featured interval program on OSPi as in the standard OpenSprinkler.

But if you think the microcontroller-based OpenSprinkler is losing its charm, you couldn’t be more wrong 🙂 Although not growing as fast as OSPi, it’s still selling extremely well. Anyone who recently ordered the assembled OpenSprinkler has probably found out that we’ve been `secretly’ upgrading your order to a pre-release version of OpenSprinkler 2.0. As I will talk about in a follow-up post, OpenSprinkler 2.0 has an upgraded mcu (ATmega644), microSD card slot, the ability of adjusting LCD backlight brightness and contrast, more available pins to interface with external sensors and actuators, and pin headers to directly plug in an RF transmitter in order to interface with remote devices. The only difference of the pre-release version with the final version of 2.0 is in the enclosure design: the pre-release uses the current enclosure, and the final version (which is in production at SeeedStudio) will be using the new injection molded enclosure. There are many good reasons to prefer the microcontroller-based OpenSprinkler over OSPi: it is pre-flashed and works out of the box, so no hassle with installing raspbian, doing ssh, or dealing with Linux; it has LCD, buttons, and a number of analog pins to interface with external sensors; also I personally really like microcontrollers because of their simplicity and the fact that the controller is instant on when you need to restart it.

Uhh, I think my thoughts are already drifting away from the Maker Fairem which is supposed to be the focus of this post. So let me conclude this post here, and more exciting posts about recent updates will follow next!