Preparing for Bay Area Maker Faire 2013

Contrary to what I mentioned in a previous post, I have made the very last-minute decision to attend the Bay Area Maker Faire 2013. I will be flying out of Massachusetts early tomorrow morning, and get to the Maker Faire ground in the afternoon to do initial setup. Aaron Newcomb has kindly volunteered to help me at the booth. If you are planning to come to the Maker Faire, be sure to drop by our booth (exhibit 3375, Expo Hall with commercial makers), and watch our demos.

We will be showing most products I’ve developed so far: OpenSprinkler (including DIY 1.42u, the new assembled OpenSprinkler 2.0, and new injection molded enclosure), OpenSprinkler Pi, SquareWear (with lots of pictures of wearable electronics workshops I’ve hosted int he past, and SquareWear demos), AASaver (including the upcoming AASaver 2.0 I just blogged about earlier tonight). So it will be quite a show!

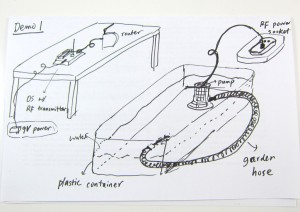
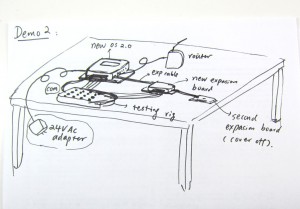
It has been fun to prepare the demos, and a lot of work too. Below are my sketches for two of the OpenSprinkler demos:
IMG_2713IMG_2714

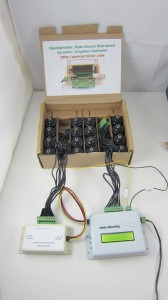
and some real gears to go with the two demos:

IMG_2715IMG_2712

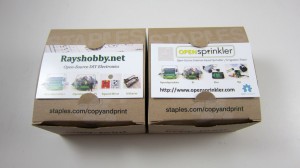
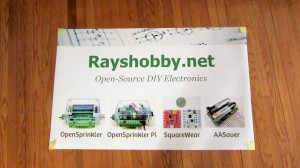
In terms of promotional materials, new this year I have made a banner and some business cards to be distributed at the table:
IMG_2718IMG_2719

These were made in the last minute, so they are not as professionally looking as I wanted, but the essential information is there 🙂 Also, I will have lots of colorful info pages and pictures at the table.

Time to go to sleep and prepare for the trip tomorrow. Hope to see you at the Maker Faire OpenSprinkler booth!

A VirtualBox Image for Compiling OpenSprinkler Source Code

I know, it has been a pain to compile OpenSprinkler 1.x source code, mainly because the firmware has grown to the point that you can only compile it successfully (i.e. within 32KB size) under a particular version of avr-gcc (4.5.3) in a particular version of Linux. This is very annoying for users who want to modify the source code and experiment with new features. That’s why I have decided to create a VirtualBox image with all the necessary software and settings that you need to easily compile it, without having to install a separate Linux system yourself.

Before you continue reading, please note that the VirtualBox Image is only useful if you are trying to modify the compile the source code yourself. To upload a pre-compiled firmware, you do not need any of these.

Wait, What?
VirtualBox is a free software that you can use to install and run a virtual operating system (OS) on your existing OS. Let’s say your computer runs Windows (i.e. the host OS). With VirtualBox, you can run a virtual OS (e.g. Linux) under the host OS, as if it is a Windows application but it’s a fully functional Linux system. This makes it easy to switch between different OS without having to restart your computer. VirtualBox is quite mature now. It makes use of hardware virtualization features available on most modern CPUs to provide fast speed. So even though you are running a virtual OS, it feels just as fast as a native OS.

One of the benefits of virtual OS is that the entire OS and all settings are stored in a single file — the VirtualBox Image — on your host system. So you can easily replicate the same virtual OS on different hosts by a simple copy-paste of the image file.

Download
To make it easy to compile OpenSprinkler code, I created a VirtualBox Image for Linux Mint 13 with all the necessary software installed. You can download the virtual image file from here:

Warning: the file size is 2.1GB, so it will take some time to download. Meanwhile, you can read the instructions below.
User and Password: the virtual OS has a default sudo user opensprinkler and the password is the same as the user name.
VMWare Users: check this forum post for instructions of converting VirtualBox image to VMWare image.
Unzip in Windows: do not use the built-in zip/unzip tool of Windows because it seems unable to recognize the correct file size. Use a third-party software such as 7-Zip or WinRAR.


Instructions
Step 1. Install VirtualBox

Download and install the latest version of VirtualBox from its official website. You should install the version corresponding to your host OS (Windows, Mac etc.). In the following I will use Windows as an example. After installing the software, you also need to install the VirtualBox Extension Pack. This is platform independent.

Step 2. Add a New Virtual OS
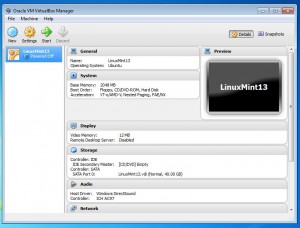
Unzip the file you downloaded to a local folder. I recommend creating a folder named VirtualBox VMs in your home directory, and unzip everything there. Next, run VirtualBox you just installed, and click on menu Machine -> Add. Navigate to the folder VirtualBox VMs \ LinuxMint13 and select the LinuxMint13.vbox file. Then click on Open to add the file. Now you should see an item named LinuxMint13 in the virtual OS list.

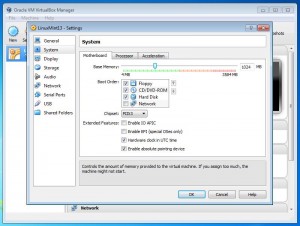
Click on Settings and make sure the default settings are compatible with your system. In particular, you should check if the Base Memory allocated to your virtual OS is not too large (it defaults to 2GB but depending on how much physical memory you have you may need to reduce it to 1GB).
virtualbox_newvirtualbox_settings

Now you can click on Start to start the virtual OS. There will be a bunch of dialog boxes popping up with various information. If this is the first time you are using VirtualBox, you should read them thoroughly. Once the virtual OS boots up, you should see the desktop as shown in the following. If you want, you can press Ctrl-F to quit full screen mode, so the virtual OS will look like a normal Windows application running alongside with other applications.

virtualbox_desktop

Step 3. Compile OpenSprinkler Code
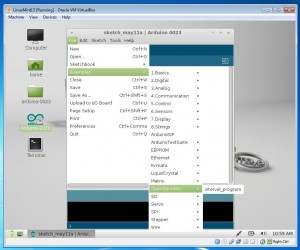
Arduino 0023 is pre-installed in the virtual OS. So you can just double click on the desktop icon to run it. Also, firmware 1.8.3 source code is pre-installed. So all you need to do to get started is to go to menu File -> Examples -> OpenSprinkler -> interval_program and then you can compile the code directly. If you need to change and file, or update to new firmware source code, everything is located in the arduino-0023/libraries/OpenSprinkler folder on the desktop.
virtualbox_arduino

Note: the following two steps are revelent:

  • Specify your hardware version by opening file arduino-0023/libraries/OpenSprinkler/defines.h, and uncomment one of the lines #define SVC_HW_VERSION that corresponds to your hardware version. To identify your hardware version, check the version number printed at the top of your OpenSprinkler circuit board. The current version is 1.4.
  • If you own OpenSprinkler v1.0 or 1.1, you can no longer upload a program through FTDI. Instead, you need an external ISP programmer. An inexpensive USBtiny programmer is available at Rayshobby Shop.

Step 4. Upload Compiled Code
To upload the compiled code to your OpenSprinkler controller, first connect OpenSprinkler to your computer through the USB port. Then go to the VirtualBox software, and click (in the menu) Devices -> USB Devices -> USBtinySPI. This will allow the OpenSprinkler’s built-in USBtiny programmer to pass through directly to the virtual Linux and appear as a native device. Finally, click on the Upload button in Arduino and you are all set.
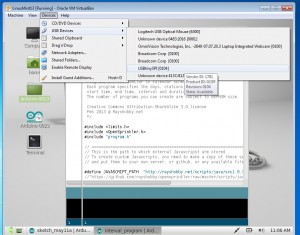
virtualbox_usbtiny

That’s all. Hope my effort is helpful for those who want to compile OpenSprinkler source code. Feel free to leave comments, and enjoy playing with the virtual Linux!
Maker Faire 2013 OpenSprinkler Booth Call for Help

Hi All, OpenSprinkler will have a booth at the Bay Area Maker Faire again this year. Due to a number of reasons, I cannot make it myself, but Aaron Newcomb from California has generously volunteered to host the booth for me. He will be showing demonstrations with the OpenSprinkler controller. There will also be flyers and promotional materials distributed there.

In order to make this a success, we would like to have a few more people to help. If you are going or planning to go to the Maker Faire and can help at the booth even for just a couple of hours, that would be great and much appreciated. I am happy to send free gifts to you. Anyone who can help at the booth for at least 4 hours either Saturday or Sunday will additionally get a free Maker entry pass. This is covered by the exhibit.

If you are interested in helping, please respond to this forum post by Aaron, or email me. Thanks!


Bay Area Maker Faire Web Badge

Noise Coupling Issue with DS1307 RTC

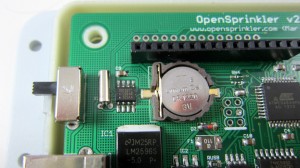
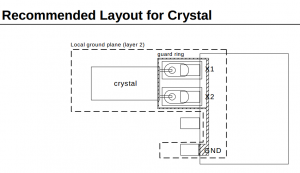
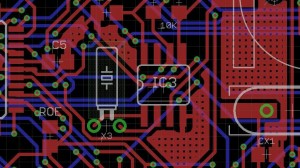
Recently a random crashing issue has surfaced on the forum regarding some of the OpenSprinkler 2.0 development boards that we sent out a few weeks ago. The background is that we have started shipping a development version of 2.0 for any recent order of the assembled OpenSprinkler. The symptom is that some of the units started crashing and losing network connection, and this seems to be always correlated with the timing running crazy off the charts. Initially I thought this issue may have been caused by a bad RTC crystal, which leads to incorrect timing, and which in turn causes the controller to get stuck. Then at some point I realized all the problematic cases happened on a particular PCB version dated Nov 2012. This helped me narrow down the search range. After a thorough comparison to the more recent version, I discovered that the problem is actually caused by a noise coupling issue with DS1307 RTC. Specifically, according to the datasheet (right image below), the region around traces between the 32.768kHz crystal and DS1307 should be shielded by a ground trace. If this is not implemented, the crystal may pick up noise from nearby traces and cause the clock to run significantly off the charts. When I designed OpenSprinkler PCBs, I had not paid attention to this recommended layout at all. Jeese, why did’t I read the datasheet carefully!

IMG_2704ds1307_recommended_layout

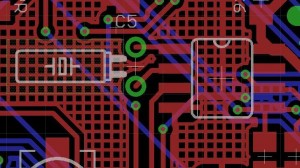
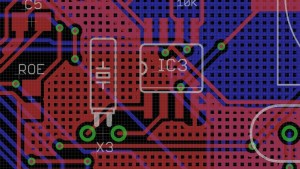
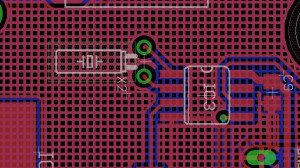
After discovering the issue, I panicked a little bit. Since I didn’t know about the issue previously, and there are hundreds of boards in production at SeeedStudios, am I screwed? It turns out that the situation is not as bad as I thought. First of all, I usually add a ground plane to fill the empty spaces between traces. As a result, on most PCB versions, there is indeed a ground plane around the traces from the crystal to the RTC. Below are examples of the traces on OpenSprinkler 1.4s, the more recent version 2.0, and the version in production at SeeedStudios:

pcbtrace20pcbtrace14

pcbtrace20_new

Although they don’t match the recommended layout exactly, they are pretty good at shielding the crystal pins from picking up noise. You know, I have always questioned about those ground planes and wondered whether it’s worth my effort of adding them. Well, in this case it did save me from potentially deep trouble.

Now, in comparison, on the Nov 2012 version of 2.0, the ground plane is missing around that region (probably because there is not enough space between the traces to allow a ground plane). As a result, here is the PCB image:

pcbtrace20_alpha

Not only it is missing the ground plane in that region, but also there are all kinds of signal traces nearby, which makes is extra easy to pick up noise. This is bad, bad, bad. Now, that being said, even with the careless design, it’s not like you are guaranteed to have the problem. It more of a reliability thing: it increase the chance of noise coupling, but in many cases the issue probably doesn’t show up. In fact I was trying to reproduce the problem today on a particular PCB version that has no ground plane. After testing 8 of these, one showed a problem of extremely fast clock (5x faster than normal). And it turned out that I forgot to cut the crystal leads, which make them act like antenna to happily pick up noise. After cutting the leads, the clock went back to normal speed. This probably explains why the problem didn’t surface earlier even though I have never paid attention to the PCB trace around RTC previously.

The DIY version 1.42u is also missing the ground traces around that region. So I won’t be surprised if users have encountered a clock speed problem (although so far I have not received any report of it). In case this happens, an easy thing to try is to re-solder the 32.768kHz crystal and try to push it down to the PCB holes as much as you can. This will help reduce the length of the crystal pins and in turn reduce the chance of picking up noise. Another possibility is to simply solder the crystal directly onto the IC pins,

So overall this is a very valuable learning experience for me. I am grateful to those who reported the issue on the forum, and helped me figure out the problem as quickly as I can. There are about 10 of those Nov 2012 assembled boards out there, and I am happy to replace them for free. With that, it’s now time for me to revisit the datasheets. Never overlook them again!

The Cost of Development

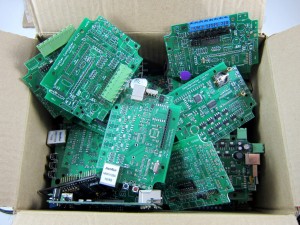
During the process of cleaning up my workshop today, I collected all the OpenSprinkler prototype boards that have had design mistakes or were built and failed in the past, and looks at this whole box of lovely PCBs:

IMG_2671

Probably no less than 30 boards in the box. It’s quite shocking to realize how many there are. By far getting prototype PCBs has been the most time-consuming and costly part of the development process. First of all, each round of prototype PCBs costs about $50 and takes 9 to 12 days of lead time (using the fastest shipping option), from places like SeeedStudio or Smart-Prototyping. The cost is not dramatic, but the lead time is quite significant unless if I am willing to pay hundreds of dollars to order from US-based services. Also, these boards are unfortunately complex enough that home DIY PCBs are no longer a viable solution.

Then, no matter how careful I am in designing the PCB, there are always a couple of unforeseen issues that had to be discovered when I actually start assembling. For example, a component might be too far away from the enclosure cutout, a component footprint might be wrong, two components might be too close to each other, the pin headers were placed in the wrong orientation, and sometimes I forget to add a ground plane. Because these issues are only discovered after one round of PCBs have arrived (then I will fix the issues, refine the design, and order another round), they make the development process sequential and cause the overall time and cost to quickly add up. The good thing is that over time I learn from lessons and accumulate tips to help me maximally avoid potential mistakes. Still, it’s inevitable to produce design issues, which can only be fixed by putting in more money and time.

When I get the finalized PCB, however, I often feel proud, as if it’s a work of art which has been refined and polished and is ready to be seen by the public. Then I get a sense of achievement. That’s the joy of working on electronic circuits 🙂

OpenSprinkler March 2013 Update

Tomorrow we will be flying south to Peru for a one-week spring vacation (yes, that’s right!) I am very excited about the trip, and am looking forward to visiting Machu Picchu 🙂 Before I go off and get lost in exploring the ancient world, some quick updates about what’s happening recently:

  • OpenSprinkler Pi is back in stock as of last week, and about 50 have already been shipped out. One user on the Rayshobby forum, Ric, pointed out that the original Python demo code only worked for RPi rev. 1. It turns out, as Ric discovered, that RPi rev. 2 has changes the pin numbers of a few GPIO. So if you own a rev. 2, you should update your code from GitHub, and follow the instructions in README.txt to modify a pin number in your Python code. Thanks Ric for finding this out!.
  • OpenSprinkler 1.4u will be the last DIY, all through-hole version. As soon as it sells out (there are only a couple of them left in stock), we will discontinue the DIY kits. The main reason is that the support overhead for DIY kits has gradually become too high for me. Although we don’t officially provide any assembly support for DIY kits, when users get into trouble and can’t fix problems themselves, I hate to see them go and have to jump in to help, sometimes even asking them to send the kits back to me so I can fix soldering mistakes for them. This is simply not sustainable any more. One way to solve the issue is to have a community of people to help each other, but i don’t see that happening on OpenSprinkler any time soon. So the only solution is to let go the DIY version. Sorry folks!
  • We will be going to the Bay Area Maker Faire again this year. I’ve just submitted the proposal to Maker Faire and hopefully it will be accepted. If you are planning to be there too, feel free to come by, hang out with us and watch demos 🙂
  • Since we are going off for vacation, we won’t be shipping packages until Monday March 25. Meanwhile I will still be checking emails, although probably no more than once a day.

All right, time to pack and prepare for the trip tomorrow. Thanks for reading this post!

Machu_Picchu

Custom OpenSprinkler Enclosure using Injection Modeling

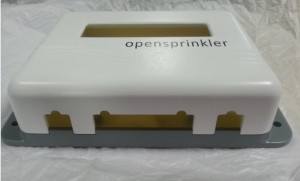
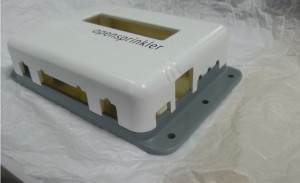
As mentioned in a previous post, I have been working with SeeedStudios to design a custom OpenSprinkler enclosure. Thus far I have been using an off-the-shelf Serpac WM-032C clear plastic enclosure, and I have Electronic Precepts to machine the cutouts. It was a good start and really easy to design, but the cost can quickly add up as I order more from them. Over time, it’s make more and more sense to design a custom enclosure using injection molding, in order to reduce the per unit cost.

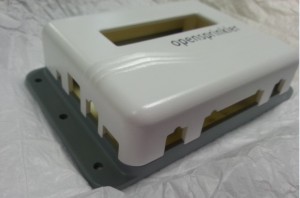
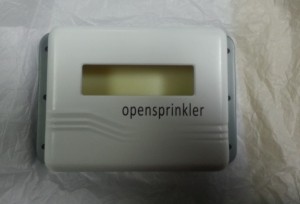
The initial design has been finalized and a 3D printed prototype is on its way to me. I am very excited because this will be the first injection-molded OpenSprinkler enclosure! It’s a pretty heavy one-time cost (the mold costs about $5,000 to make), but it’s fun and I think it’s worth the investment. I am supposed to receive the prototype today, but a snow prevented DHL from delivering today. So I have to look forward to Monday. But below I attached some pictures Seeed sent me. They are enough to enjoy for a while 🙂 More pictures will come after I receive it on Monday.

opensprinkler 1opensprinkler 2

opensprinkler 3opensprinkler 4

OpenSprinkler Pi Back in Stock

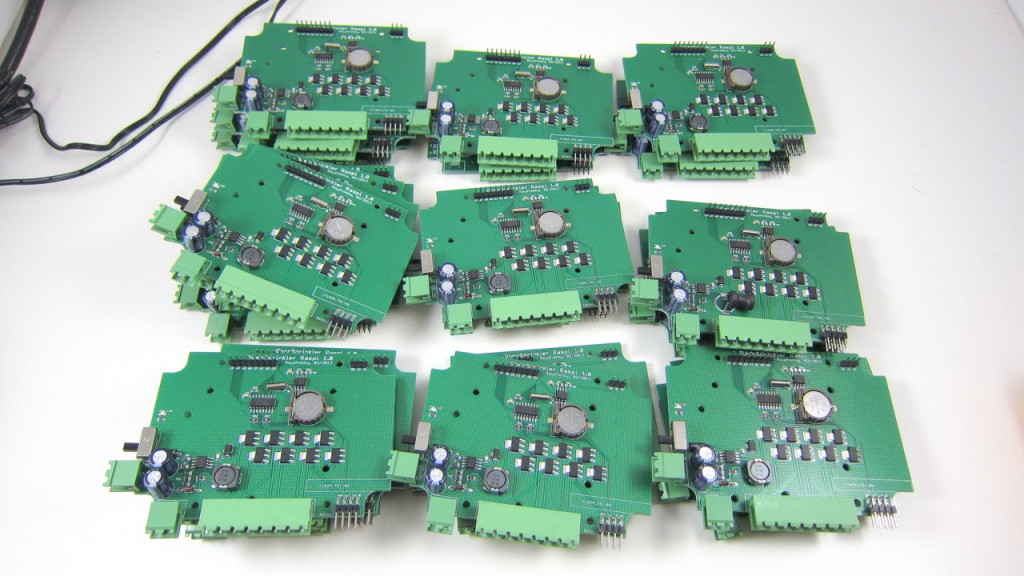
OpenSprinkler Pi (OSPi) v1.0 is back in stock and available for shipping now. The kit includes one assembled and tested OSPi board, separation pillars, terminal blocks, 8-pin and 3-pin connection cables, and optional enclosure. You need to provide your own Raspberry Pi, and 24VAC sprinkler transformer. The board controls 8 zones, and can connect to standard OpenSprinkler zone expansion board to enable additional zones. Grab it now before it goes out of stock again!

IMG_2416

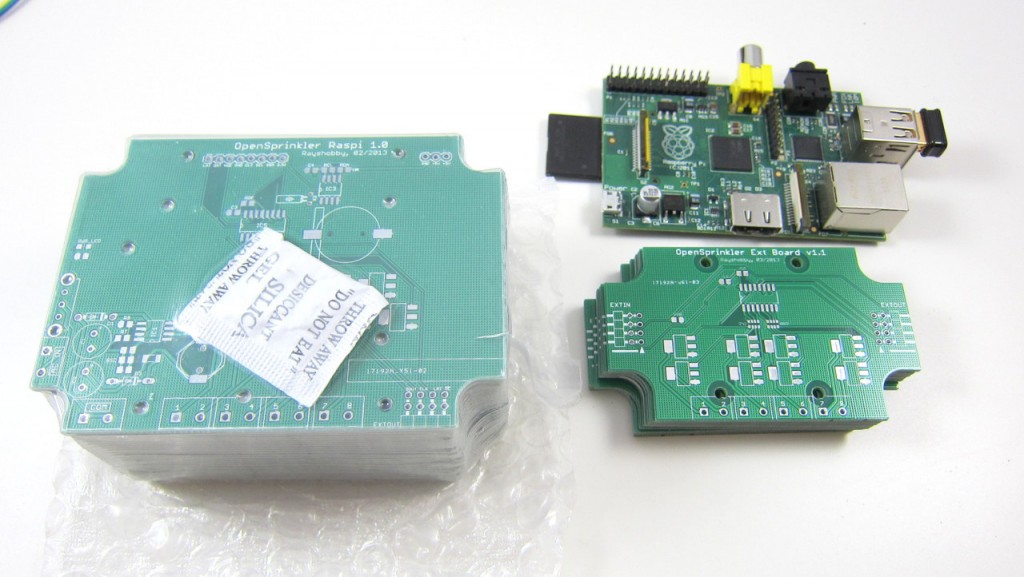
I would really like to give a big thumb-up to smart-prototyping.com. This is the first time I ordered PCBs from them (I got the link from dangerousprototypes.com), and I wasn’t sure what to expect. The order was placed on Feb 26 right after the initial batch of OSPi sold out. I selected DHL shipping (about $30) since I need it to be quick. On Feb 28 I decided to place a smaller order for the new zone expansion board prototype PCB, and I selected economy air shipping (about $4) since I don’t care how fast it comes. Then on March 5, exactly one week after placing first order, I noticed it got shipped out. I happily received the package on March 7. This is a total turn around time (from ordering to delivery) of only 9 days! What’s more surprising is that when I opened the package, I found my second order is also included. They must have figured out that since both orders are going to the same address, and both were ready upon shipping of the first order, why not put them together and use the fastest shipping. Clever! I am really impressed by their processing speed and the super-fast shipping time. Also, the PCB quality is very good, and their price is even cheaper than SeeedStudios. Highly recommended, and will definitely order from them again!

IMG_2415

OpenSprinkler Pi (OSPi) 1.0 — a sprinkler / irrigation extension board for Raspberry Pi


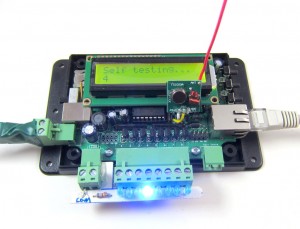
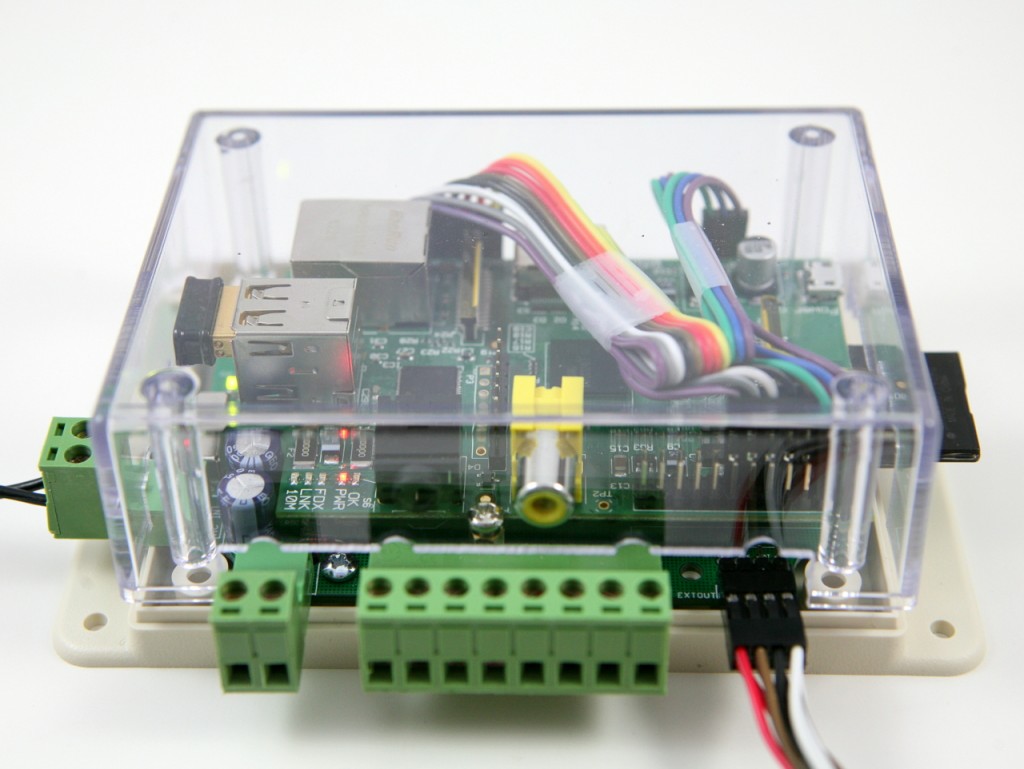
Hi, I am glad to announce the arrival of OpenSprinkler Pi (OSPi) 1.0 — a sprinkler or irrigation extension board for Raspberry Pi that provides direct access and control of sprinkler valves. This post serves as a quick introduction to the hardware and software setups. A more dedicated webpage will be available soon. First off, a picture of the board:

ospi_header

and a video introduction:


Background

Since the beginning of Raspi, there have been many published DIY projects on how to use Raspi for home automation need. I bought a Raspi a few months ago, and have been quite happy with it since then, but I at that point I had not thought about designing an OpenSprinkler extension board for it. The idea of OSPi first came when I noticed that several OpenSprinkler users were setting up Raspi to work with OpenSprinkler. There are many good reasons to do so, for example, to enable logging, to customize the default Javascript files, and to allow more advanced features such as weather-based and learning-based control. At one point I started thinking: wouldn’t it be nice to design an extension board for Raspi, so that it can directly talk to sprinkler valves through the GPIO pins, without an additional layer of microcontorller and Ethernet controller? This has been on my todo list for quite a while, until one day I was playing with Raspi, and I suddenly that the I can actually fit a Raspi inside the existing OpenSprinkler enclosure. As soon as I figured this out, I couldn’t resist ordering a small batch of prototype PCBs right away.


The content below has been updated and moved to a dedicated product page for OSPi at http://pi.opensprinkler.com.


OpenSprinkler Firmware 1.8.3 Released

Amid all the fun and exercise of snow shoveling following the heavy snowstorm Nemo, I was able to finish and check in a new firmware update for OpenSprinkler. This new firmware, numbered 1.8.3, is a relatively minor update. You don’t have to update if you don’t need the new features explained below. There are two main changes:

The first is adding back the Sequential option that was available in firmware 1.7 but disabled in 1.8 due to a bug that was tricky to fix. This option allows you to set the controller to run in either sequential mode (where station runs are serialized) or concurrent mode (where stations are allowed to run simultaneously). The support for this option is now added back (with the bug fixed), and the Program Preview Javascripts have also been updated so you can easily check and verify the controller schedules in concurrent running mode. For most people this is probably not that useful, because sprinklers are typically set to run sequentially to maintain water pressure (similar to how people in the same house usually take showers in turn!) But there are times when you may need to run stations in parallel, say, if you want to speed up the overall watering time, or if you want to run master stations in a non-conventional manner, or if you want to use OpenSprinkler to control not only sprinkler valves but also home lighting and other devices. These are all cases where station runs have to overlap with each other. If this feature is useful to you, go ahead and upgrade to 1.8.3.

The second change is a new Device ID option which assigns the last byte of the controller’s MAC address. This new option allows you to run multiple controllers on the same network by giving each controller a different MAC address. Note that OpenSprinkler uses a software MAC, and is programmed with exactly the same MAC on every unit. I know, this sounds lame, but it’s just because I haven’t spent any time to figure out how to flash a random MAC address. Since most users won’t have more than one controller on the same network, it is not a serious issue. With the Device ID, you can easily customize the MAC address, albeit only the last byte. So again, if you find this feature useful, go ahead and upgrade to 1.8.3.

There are a couple of other minor changes. For example, the network status icon has been removed, instead, the LCD now displays no status icon if the network is on, and a question mark if the network is lost. Also, the Run-Once Program data is not stored in EEPROM any more; instead, you have to type in the water duration each time you start the Run-Once program. I know, this sounds a bit inconvenient, but I had to do it to make space for the new features. If you want to upgrade to 1.8.3, please follow the Firmware Update Instructions.

A slight annoyance I found recently is that I couldn’t compile the OpenSprinkler source code any more on my upgraded OS — Linux Mint 14. It turns out that Mint 14, based on Ubuntu 12.10, installs avr-gcc 4.7.2 by default, which apparently broke some of the Ethernet library code. This is quite annoying. My temporary workaround is to install Linux Mint 13 (based on Ubuntu 12.04 and installs avr-gcc 4.5.3 by default) on a VirtualBox in the host system, and then I can compile the code again in the virtual OS. I haven’t found an easy way to downgrade avr-gcc 4.7.2 to 4.5.3, so I will just stick to this option for now. Apparently next time I should really transition to use Arduino 1.x, which comes with its own avr-gcc compiler so I don’t have to worry about the OS installed avr-gcc breaking old code.

OK, that’s all. Back to snow shoveling tomorrow!